
Container Gardens
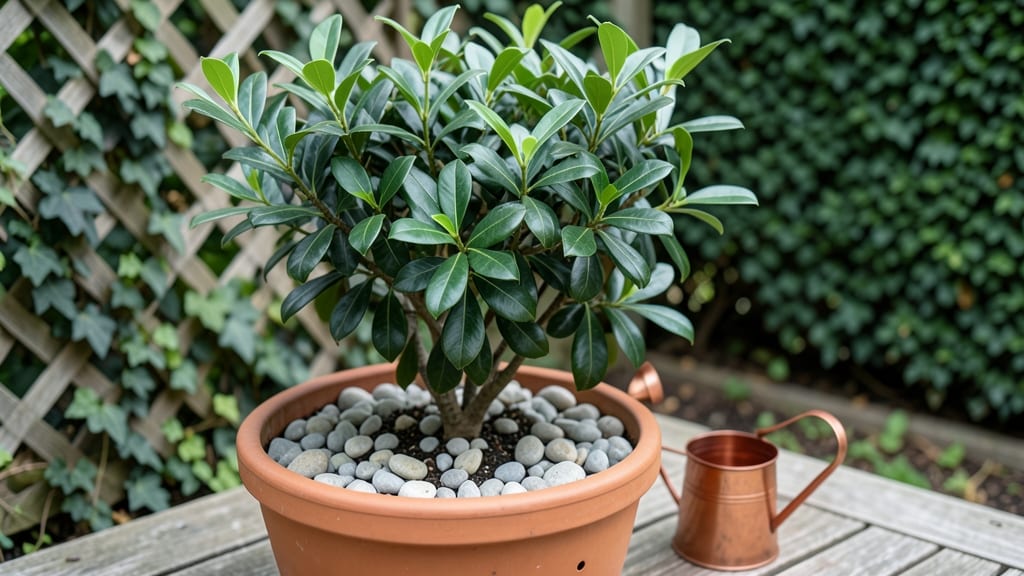
Growing a bay tree in a container lets you enjoy its fragrant leaves year-round without needing a yard. 🌿 I've kept mine thriving on my balcony for three winters by mastering the simple tricks that prevent common problems like root rot or yellowing leaves.
The secret starts with the right pot—at least 12 inches wide and deep—and soil that drains well but holds moisture. Most people overwater, thinking bay trees need constant dampness, but they actually prefer slightly dry soil.
A mix of potting soil and perlite keeps roots happy while preventing soggy messes.
With proper sunlight (6+ hours daily) and occasional pruning, your bay tree will grow 3-4 feet tall in a container, producing lush leaves perfect for cooking or potpourri. The key is patience: it takes about 2 years to establish, but once it does, it's nearly indestructible.
Even in small spaces, you can harvest leaves year-round—just don't take more than 1/3 of the plant at once. The fragrance alone makes it worth the effort, and the glossy foliage adds instant elegance to any patio or windowsill.
📚 In This Guide
- What you need
- Instructions
- Tips and common mistakes
- Wrapping up and next steps
What you need
- ● Container: A drainage hole-equipped pot (minimum 12–18 inches in diameter for mature growth). Terracotta or ceramic works best for airflow.
- ● Grow bag alternative: A breathable fabric bag (10–12 gallons) if you prefer flexibility.
- ● Potting Mix: 2–3 gallons of well-draining mix: Combine 60% potting soil, 30% perlite or coarse sand, and 10% compost.
- ○ Optional boost: Add 1 cup of orchid bark for extra aeration.
- ● Bay Tree: A young bay tree (Laurus nobilis) from a nursery (3–6 feet tall). Choose a container-grown specimen for easier transition.
- ● Tools: Trowel or small shovel
- ● Pruning shears (sterilized)
- ○ Gloves (optional but recommended)
- ● Mulch: 1–2 inches of pine bark or straw to retain moisture.
- ● Slow-release fertilizer: Balanced 10-10-10 (1 tbsp per gallon of soil).
- ● Support: A small stake or trellis if your bay tree grows tall.
- ● Self-watering system: A moisture meter or drip irrigation kit for convenience.
- ● Decorative elements: Gravel, pebbles, or moss for a polished look.
How to grow a thriving bay tree in containers
Here's how I keep bay trees lush and fragrant in pots—no yard required.
🪴 Step 1: Select the Right Container and Soil Mix
Bay trees need room to grow but also excellent drainage. Choose a 12-15 gallon container with drainage holes—terracotta pots work best because they prevent root rot by wicking moisture. The soil mix should be 60% potting soil, 30% perlite, and 10% compost to mimic their Mediterranean roots' airy environment. I always add a handful of sand to improve drainage further.
Fill the pot halfway with your mix, then place the tree at the same depth it was in its nursery container. The top of the root ball should sit 1-2 inches below the rim—this prevents water from spilling over when you water. Tap the sides gently to settle the soil without compacting it too much.
💧 Step 2: Water Deeply and Establish a Routine
Bay trees hate soggy roots but need consistent moisture. Water deeply until it drains from the bottom—this encourages roots to grow throughout the pot. Let the top 2-3 inches of soil dry out between waterings. In summer, I water every 3-4 days, while winter slows growth, so I reduce to once a week. Overwatering is the fastest way to kill a container bay tree.
Use room-temperature water to avoid shocking the roots. I always water in the morning so excess moisture evaporates during the day. If you see yellowing leaves, it’s usually a sign of overwatering—let the soil dry out more before watering again.
☀️ Step 3: Position for Bright, Indirect Light
Bay trees thrive in full sun to partial shade—at least 6 hours of bright, indirect light daily. A south- or west-facing balcony works perfectly, but avoid harsh afternoon sun, which can scorch leaves. If your space is shady, supplement with a grow light for 12-14 hours a day. I notice leaves darkening or stretching toward light when they’re not getting enough.
Rotate the pot a quarter turn weekly so the tree grows evenly. You’ll see new growth on all sides instead of just one direction. If leaves start dropping, it’s often a sign of too much direct sun—move it to a slightly shadier spot immediately.
✂️ Step 4: Prune and Fertilize for Compact Growth
Prune in early spring before new growth starts. Cut back leggy stems by one-third to encourage bushier growth. Use clean, sharp pruners to avoid tearing the bark. I also pinch off any flower buds—bay trees produce fragrant but weak wood when they bloom, so I remove them to keep the tree focused on foliage.
Fertilize every 6-8 weeks in growing season with a balanced, water-soluble fertilizer (10-10-10). Reduce to once every 3 months in winter. I mix fertilizer into the watering can to avoid burning roots. If leaves turn yellow between veins, it’s a sign of over-fertilizing—flush the soil with water to cleanse it.
⏰ Step 5: Protect and Overwinter for Long-Term Health
Bay trees are evergreens but still need winter care. Move pots to a cooler spot (ideally 40-50°F) if temperatures drop below 20°F. I wrap the pot in bubble wrap for extra insulation. Avoid drafts, which dry out the soil too quickly. If leaves brown in winter, it’s normal—just trim them back in spring.
Check soil moisture more carefully in winter—roots grow slower, so water only when the top 3 inches are dry. A humidifier nearby helps prevent crispy leaf edges. With proper winter care, your bay tree will bounce back strong in spring, ready for another year of lush growth.
Tips & tricks for thriving container bay trees
These insider secrets will help your bay tree thrive in containers for years to come.
Container Selection: While terracotta pots are ideal, you can also use fiberglass or plastic containers as long as they have drainage holes. The key is choosing a container that's at least 12 gallons—anything smaller will restrict root growth and stunt your tree's development. I've seen bay trees in 15-gallon pots grow twice as fast as those in 5-gallon pots. The wider the diameter, the better the root spread and stability.
Soil Mix Secrets: The 60-30-10 soil ratio works perfectly, but here's what I've learned about the components: Use cactus/succulent mix instead of regular potting soil for even better drainage, and consider adding orchid bark to the perlite for additional aeration. The sand should be coarse, not fine—think Masonry sand rather than playground sand. This prevents compaction while still improving drainage.
Light Positioning: For that perfect balance of light, position your bay tree where it gets morning sun and afternoon shade. If you notice leaves stretching toward the light (called etiolation), it's getting too little. Rotating the pot weekly ensures even growth, but I've found that every 10 days works just as well without the risk of disturbing the roots too often. In winter, supplement with a grow light if natural light drops below 6 hours daily.
Winter Care: When temperatures drop below 20°F, move your bay tree to a spot between 40-50°F—this mimics its Mediterranean climate. I've had success using an unheated garage with a small space heater set to 45°F. The bubble wrap insulation is genius—it keeps roots warm without overheating. Just remember to check soil moisture more carefully in winter, as roots grow slower and evaporative loss decreases dramatically.
Pro Tips for Bay Tree In Container
- These insider secrets will help your bay tree thrive in containers for years to come.
- Container Selection: While terracotta pots are ideal, you can also use fiberglass or plastic containers as long as they have drainage holes.
- The sand should be coarse, not fine—think Masonry sand rather than playground sand.
Frequently asked questions
Got questions about growing a bay tree in a container? You’re not alone! Here are answers to the most common queries to help you cultivate a thriving, fragrant plant—even in small spaces.
How big should the container be for a bay tree?
A mature bay tree needs at least 18–24 inches in diameter and deep drainage holes to prevent root rot. Start with a 12-inch pot for young plants, then upgrade every 2–3 years. Pro tip: Use a fabric grow bag for better airflow if your space is humid!
When is the best time to plant a bay tree in a container?
Spring (after the last frost) is ideal, but you can plant in early fall too. Avoid winter—bay trees are evergreen but sensitive to cold drafts. If repotting, do it in late winter or early spring before new growth starts.
Can I grow a bay tree indoors year-round?
Yes! Place it near a south- or west-facing window for 6+ hours of sunlight daily. If indoors, rotate the pot monthly to prevent lopsided growth. Watch for brown leaves—a sign of low light or overwatering.
Why are my bay tree leaves turning yellow or dropping?
Yellow leaves often mean overwatering (let soil dry 1–2 inches deep between waterings) or nutrient deficiency. Brown edges? Try fertilizing every 4–6 weeks with a balanced liquid fertilizer. Pests like spider mites can also cause stress—spray with neem oil if needed!
Are there dwarf bay tree varieties for small containers?
Yes! Look for ‘Tiny Tower’ or ‘Sagittifolium’—both stay under 6–8 feet tall and thrive in 12–15-inch pots. These varieties are perfect for balconies or patios. Just prune lightly in spring to encourage bushiness!
Wrapping up and next steps
Growing a bay tree in a container is a fantastic way to bring fragrant elegance to small spaces—whether your balcony, patio, or sunny windowsill. With the right pot, soil, and care, this versatile plant thrives while offering year-round greenery and aromatic leaves.
Plus, its compact size makes it perfect for urban gardeners!
Now that you’re equipped with the know-how, why not take the next step? Pick your favorite container, grab some bay seeds or a young sapling, and start your mini aromatic garden today! 🌿✨