
Blooming
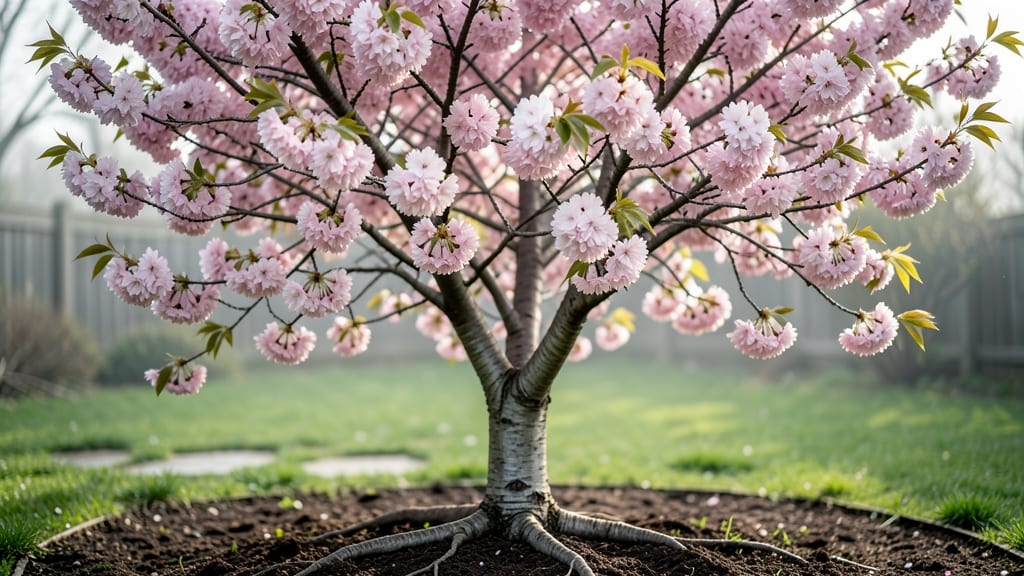
Planting a Yoshino cherry blossom tree means pink clouds of spring arrive weeks before most varieties. 🌸 I've watched mine transform my yard from dull winter to a fragrant, petal-filled paradise by early April, and the secret isn't just timing—it's the right spot, soil, and care routine.
This isn't your grandmother's high-maintenance ornamental. Yoshino cherries thrive in zones 5-8, handling winters down to -15°F with ease, and their non-fruiting habit means no messy cleanup.
The real magic happens when you match their needs: 6+ hours of sun, well-draining soil, and 30-50 gallons of water weekly during their first growing season.
What you'll get is a 20-30 foot tree covered in delicate blossoms that last 1-2 weeks, attracting pollinators and creating that iconic "cherry blossom season" vibe. The scent alone makes it worth the effort—like walking through a Japanese garden without leaving home.
Works beautifully as a lawn centerpiece, street tree, or park planting. Just avoid planting near sidewalks (those petals make spring cleanup a chore). Here's exactly how to make yours thrive!
📚 In This Guide
- What you need
- Instructions
- Tips and common mistakes
- Wrapping up and next steps
What you need
- ● Yoshino cherry blossom tree (Prunus × yedoensis): 1 bare-root sapling (3–6 ft tall, ideal for planting in early spring or fall)
- ● OR 1 container-grown tree (5–10 gallon pot, check root ball for health)
- ● Planting site: Full sun (6+ hours of direct sunlight daily)
- ● Well-draining soil (sandy loam or amended clay with compost)
- ● Space: 20–30 ft wide (account for mature spread) and 20–30 ft tall
- ● Tools: Shovel or digging spade
- ● Garden trowel (for delicate root handling)
- ● Pruning shears (sterilized)
- ● Measuring tape
- ● Garden hose or watering can
- ● Required: 5–10 lbs of compost or well-rotted manure (mixed into native soil)
- ● 2–3 lbs of balanced fertilizer (10-10-10 or similar, applied at planting)
- ○ Optional (for challenging soils): 1–2 lbs of sulfur (to lower pH if soil is alkaline, test first!)
- ● 1 bag of perlite or sand (for heavy clay soils, mix 20% into planting hole)
- ● 🌡️ Timing matters: Plant bare-root trees in dormant season (late fall or early spring) to avoid transplant shock.
- ● ✨ Mulch magic: Apply 2–3 inches of wood chips or shredded bark around the base (keep 6 inches away from trunk) to retain moisture.
- ● 🔥 Cold-hardy prep: In Zone 5 or colder, add a lightweight burlap wrap around the trunk in winter to protect from harsh winds.
Step-by-step guide to planting and caring for Yoshino cherry blossom trees
Here's how to establish your Yoshino cherry blossom for years of spectacular early spring blooms.
🪴 Step 1: Choose the Perfect Planting Location
Yoshino cherries thrive in full sun—pick a spot that gets at least 6 hours of direct sunlight daily. I always look for areas with morning sun and afternoon shade to prevent leaf scorch, especially in hotter climates. The tree needs room to grow: plant at least 20 feet away from buildings or fences since mature Yoshinos reach 30-40 feet tall.
Check the soil drainage before planting. Yoshinos hate soggy roots, so if your yard has heavy clay, amend the area with 2-3 inches of compost mixed into the top 12 inches of soil. You'll know you've got good drainage when water runs through the soil within 30 minutes of watering.
🌱 Step 2: Plant at the Right Time and Depth
Plant your Yoshino cherry in late fall or early spring when the tree is dormant. Dig a hole twice as wide as the root ball but only as deep as the container it came in. This prevents burying the trunk too deeply, which can cause rot. Gently remove the tree from its container and loosen any circling roots with your fingers.
Place the tree in the hole so the top of the root ball sits 2-3 inches above ground level. Fill the hole with native soil, tamping lightly every 2 inches to remove air pockets. Water deeply to settle the soil around the roots. You'll see the soil settle about an inch after watering—add more soil if the root flare isn't visible.
☀️ Step 3: Water and Mulch for First-Year Establishment
Water your new Yoshino cherry 2-3 times per week for the first growing season, providing 1-2 gallons per watering. The tree needs consistent moisture to establish roots, especially during hot, dry spells. You'll know it's getting enough water when the top 6 inches of soil stays moist but not soggy between waterings.
Apply 3-4 inches of organic mulch around the base, keeping it 6 inches away from the trunk. I use shredded bark or wood chips because they break down slowly and improve soil structure over time. Replenish mulch annually to maintain the 3-inch layer—this helps retain moisture and regulate soil temperature.
✂️ Step 4: Prune for Health and Shape in Late Winter
Prune your Yoshino cherry in late winter or early spring, just before buds swell but before new growth begins. Remove any dead, diseased, or crossing branches first using clean, sharp pruners. Cut back to a healthy bud or branch collar to encourage proper healing. I always sterilize my tools with rubbing alcohol between cuts to prevent spreading disease.
Shape the tree by thinning out crowded branches to improve airflow. Open the canopy slightly to let light reach the inner branches—this prevents future issues with fungal diseases. Never remove more than 25% of the tree's foliage in one year, as this stresses the tree. You'll see new growth emerge from the pruned areas within 2-3 weeks of spring pruning.
🌿 Step 5: Fertilize and Monitor for Pests/Diseases
Apply a balanced, slow-release fertilizer (10-10-10 ratio) in early spring when new leaves begin to form. Spread the fertilizer evenly over the root zone, following package instructions for application rates. Yoshinos typically don't need heavy feeding, but young trees benefit from an annual boost. Water the area thoroughly after applying fertilizer to help it reach the roots.
Watch for common pests like aphids or borers, which can stress the tree. Treat infestations immediately with horticultural oil or insecticidal soap, following label instructions. You'll spot aphids as tiny clusters on new growth, while borers create small holes in the bark. Regular monitoring helps catch issues early before they spread.
Tips & tricks for perfect Yoshino cherry blossom planting
These little details make all the difference when establishing your Yoshino cherry blossom for that stunning spring display.
Sunlight Strategy: While Yoshinos need at least 6 hours of sun daily, I've found they actually thrive with morning sun and afternoon shade in hotter climates. This prevents leaf scorch while still getting enough light for those spectacular blooms. If your yard has afternoon shade naturally, that's perfect—just make sure the morning sun hits the leaves directly.
Drainage Test: Before planting, do this simple test: Dig a small hole and fill it with water. If it drains completely within 30 minutes, your soil is perfect. If it pools longer, amend with compost as directed. I've seen Yoshinos fail in soggy soil because their roots can't handle waterlogged conditions—this test prevents that heartbreak.
Pruning Precision: When pruning in late winter, focus on removing branches that cross or rub against each other first. These are the ones that create wounds where diseases can enter. I sterilize my pruners with rubbing alcohol between cuts—it's a small habit that prevents spreading fungal spores between branches. Remember, never remove more than 25% of the foliage in one year.
Watering Wisdom: The key to first-year establishment is consistent moisture in that top 6 inches of soil. I set a timer for every other day during hot spells to remind myself to water. You'll know you're doing it right when the soil feels like a damp sponge—not dripping wet, but not bone dry either. This is especially critical during the first growing season when roots are establishing.
Pro Tips for Cherry Blossom Tree Yoshino
- These little details make all the difference when establishing your Yoshino cherry blossom for that stunning spring d...
- Sunlight Strategy: While Yoshinos need at least 6 hours of sun daily, I've found they actually thrive with morning su...
- Drainage Test: Before planting, do this simple test: Dig a small hole and fill it with water. If it drains completely...
Frequently asked questions
Got questions about planting, caring for, or enjoying your Yoshino cherry blossom tree? Here are some of the most common ones—plus straightforward answers to help you make the most of this stunning early bloomer!
Q: When is the best time to plant a Yoshino cherry blossom tree?
The ideal window is late fall or early winter (November–March in most regions). This gives roots time to establish before spring growth. If planting in spring, do it before buds swell (late winter/early spring) to avoid transplant shock. Pro tip: Dig a hole twice as wide as the root ball but no deeper!
Q: How cold-hardy is the Yoshino cherry blossom tree?
The Yoshino is one of the most cold-tolerant cherry trees, surviving USDA Zones 5–8 (down to -20°F/-29°C). However, late spring frosts can damage blooms. Plant in a sheltered spot, and avoid pruning until after flowering to protect buds. Young trees may need winter mulch for extra protection.
Q: Why aren’t my Yoshino cherry blossoms opening, or they’re sparse?
Several factors could be at play:
- Insufficient chill hours: Yoshinos need 600–1,000 hours below 45°F (7°C) to bloom well. If winters are too mild, blooms may be light.
- Over-fertilizing: Too much nitrogen = lush leaves but fewer flowers. Use a low-nitrogen, high-phosphorus fertilizer in early spring.
- Stress or disease: Check for cankers, leaf spot, or root rot. Prune out dead wood and improve drainage if needed.
Fix: Thin out dense branches to improve airflow and consider a soil test to rule out nutrient deficiencies.
Q: Can I grow a Yoshino cherry blossom tree in a container or small yard?
Yes! Yoshinos adapt well to containers (choose a minimum 24-inch diameter pot) but will need regular watering and winter protection (move to a sheltered spot or wrap the pot). For small yards, opt for dwarf cultivars like ‘Shidare Yoshino’ (weeping form) or prune aggressively to control size. Just ensure it gets 6+ hours of sun daily.
Q: Are Yoshino cherry blossoms edible, or can I grow them for fruit?
Nope! Yoshino cherry blossoms are purely ornamental—they produce tiny, bitter cherries that aren’t worth harvesting. If you want fruit, plant a sweet cherry cultivar like ‘Stella’ or ‘Rainier’ instead. Yoshinos shine for their spectacular spring displays, not their harvest potential.
Q: What are some low-maintenance alternatives to Yoshino cherry trees?
If you love early blooms but want less upkeep, consider:
- Kwanzan cherry (Prunus serrulata ‘Kwanzan’): More disease-resistant and slightly later bloomer (still early!).
- Japanese tree lilac (Syringa reticulata): Fragrant, cold-hardy, and thrives in tough conditions.
- Serviceberry (Amelanchier): Edible fruit, great fall color, and minimal pruning needs.
All three offer stunning spring interest with fewer hassles!
Wrapping up and next steps
The Yoshino cherry blossom tree is a stunning, cold-hardy beauty that brings early spring magic to any garden—its delicate pink blooms and adaptability make it a favorite among gardeners.
Whether you're drawn to its early bloom time or its resilience in cooler climates, this tree is a low-maintenance yet high-impact addition to your outdoor space.
Ready to welcome spring with a burst of color? Start by researching your local climate zone or consult a nursery to find the perfect Yoshino variety for your yard.
With the right care, you’ll soon be enjoying years of breathtaking blooms—just like the cherry blossom enthusiasts in Japan and beyond! 🌸✨