
Trees
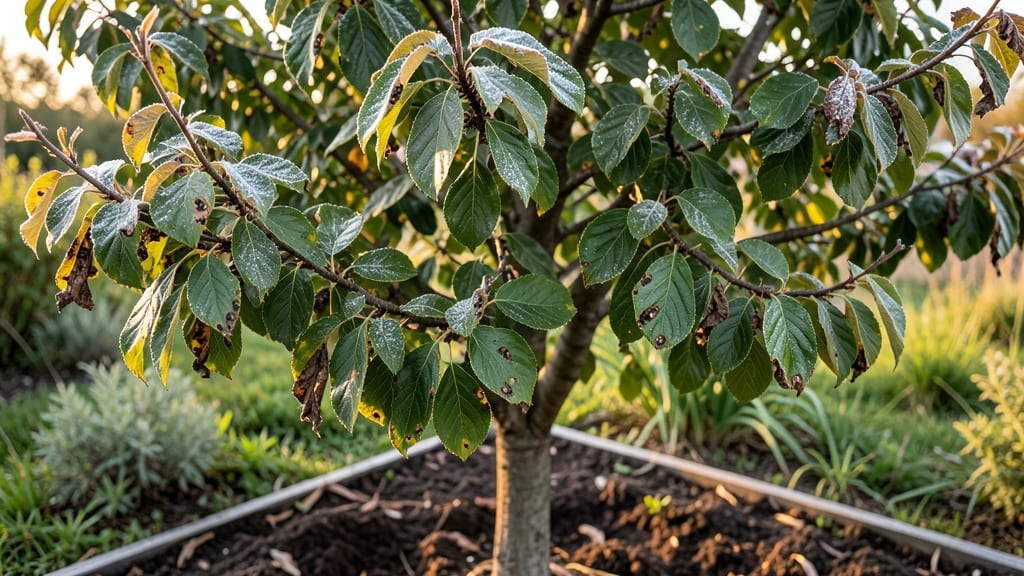
Your cherry tree’s leaves shouldn’t look like a crime scene—yellow splotches, curling edges, or strange spots mean something’s wrong, and fixing it fast stops bigger problems. 🌿 I’ve seen powdery mildew turn a healthy tree into a sad, dusty mess in weeks, but catching it early makes all the difference.
The key is spotting the symptoms before they spread.
Start by checking the undersides of leaves for webbing (spider mites) or fuzzy white patches (powdery mildew)—both are common culprits. Bacterial spots show up as tiny dark dots with yellow halos, while fungal issues often cause leaves to pucker or drop prematurely.
Grab a magnifying glass if you have one; sometimes the fix is as simple as pruning infected branches or spraying neem oil, but other times you’ll need stronger action.
📚 In This Guide
- What you need
- Instructions
- Tips and common mistakes
- Wrapping up and next steps
What you need
- ● Gloves (nitrile or rubber) – Protect your hands from sap, pests, or sharp tools. Quantity: 1 pair
- ● Pruning shears or loppers – For removing damaged leaves, branches, or infected foliage. Specs: Sharp, sterilized blades (7–10" loppers for thicker branches)
- ● Garden trowel or small shovel – For inspecting roots or soil if needed. Specs: Stainless steel or heavy-duty
- ● Spray bottle (16–32 oz) – For applying diluted treatments or water tests (e.g., pH strips)
- ○ Magnifying glass (optional but helpful) – To spot tiny pests, mold, or leaf details up close
- ● Disinfectant (70% isopropyl alcohol or bleach solution) – To clean tools between cuts and prevent disease spread. Mix: 1 part bleach to 9 parts water
- ● Labeling tags & marker – To track symptoms or treatment dates on branches/leaves
- ● pH test kit (soil or leaf) – To check for nutrient deficiencies or imbalances. Specs: Digital or liquid test strips
- ● Fungicide (copper-based or neem oil) – For fungal issues like powdery mildew or leaf spot. Specs: Follow label instructions for dilution
- ● Insecticidal soap or horticultural oil – Targets mites, aphids, or scale insects. Specs: USDA-approved for organic use
- ● Fertilizer (balanced 10-10-10 or iron supplement) – If yellowing suggests nutrient deficiency. Specs: Slow-release granules or liquid
- ● Mulch (shredded bark or straw) – To improve soil health and retain moisture. Quantity: 2–3 inches around the base
- ● Camera or smartphone – Document symptoms for later reference or expert consultation
- ● Notebook & pen – Record observations (e.g., leaf color changes, pest sightings)
- ● Reflective vest or bright clothing – For visibility if working in low light
- ● Watering can with rose attachment – For gentle, targeted irrigation
Step-by-Step guide to diagnosing and fixing cherry tree leaf problems
Here’s how to identify and treat common leaf issues—fast—before they spread.
🌿 Step 1: Examine the Leaves for Key Visual Clues
Start by inspecting the leaves closely. Yellowing between the veins often signals iron deficiency or overwatering, while brown spots with yellow halos usually mean fungal infection from wet conditions. Curling leaves can indicate pests like mites or drought stress. Hold the leaves up to the light—look for tiny webs, eggs, or sap trails that reveal pests.
Check the undersides of leaves too—this is where many pests hide. If you see black sooty mold on the leaves, it’s a sign of aphids or scale insects feeding on sap. Note the pattern: Are the spots random or clustered? Is the discoloration new or spreading? These details pinpoint the exact issue.
💧 Step 2: Check Soil Moisture and Drainage
Dig a small hole near the tree’s base—2-3 inches deep—and check the soil. If it’s soggy or smells musty, overwatering is the culprit. Cherry trees hate wet feet and are prone to root rot in poorly draining soil. If the soil feels dry but the leaves are wilting, the tree may be underwatered or struggling with compacted soil that blocks root growth.
Run your finger through the soil—if it clumps tightly when squeezed, it’s too dense. Cherry trees need well-draining soil with a mix of organic matter. Amend the soil with compost or peat moss if it feels heavy or clay-like. Water deeply once a week unless it rains, then let the top 4 inches of soil dry out before watering again.
☀️ Step 3: Assess Sunlight and Nutrient Balance
Cherry trees need full sun (6-8 hours daily)—if leaves are pale or sparse on one side, the tree might be shaded too much. Move nearby structures or trim overgrown branches blocking light. Conversely, if leaves are scorched or crispy, the tree could be getting too much direct afternoon sun, especially in hot climates.
Yellow leaves with green veins often mean iron deficiency, common in alkaline soils. Test your soil’s pH—cherry trees thrive in slightly acidic soil (pH 6.0-6.5). If the pH is too high, add sulfur or peat moss to lower it gradually. For quick relief, apply chelated iron in early spring, following package instructions.
✂️ Step 4: Treat Pests and Fungal Issues Immediately
For fungal infections (like brown spots or powdery mildew), prune affected branches ¼ inch above the infection and dispose of them in the trash—not the compost. Apply a fungicide (copper-based or neem oil) to the remaining leaves, focusing on the undersides. Water the base of the tree in the morning to let foliage dry quickly—wet leaves at night invite fungus.
If pests like aphids, mites, or borers are the issue, spray the tree with neem oil or insecticidal soap in the early morning or evening when bees are less active. For severe infestations, repeat every 5-7 days until pests disappear. Wrap the trunk with tree banding (sticky tape) in early spring to trap crawling pests before they reach the leaves.
🌱 Step 5: Monitor and Adjust Care for Long-Term Health
After treating the problem, keep a weekly leaf check for new symptoms. Healthy cherry leaves should be deep green, firm, and free of spots or curling. If issues persist, dig deeper: Are roots girdling? Is the tree too crowded by other plants? Prune competing branches to improve airflow and light penetration.
Fertilize in early spring with a balanced, slow-release fertilizer (10-10-10 or similar) to support recovery. Avoid high-nitrogen fertilizers—they promote leafy growth at the expense of fruit production. Mulch around the base with 2-3 inches of organic mulch (like wood chips) to retain moisture and regulate soil temperature.
Tips & tricks for diagnosing cherry tree leaf problems fast
Here’s how to spot the early signs and act before your tree’s health declines further.
Visual Clues Matter: When examining leaves in Step 1, focus on the pattern of discoloration. Iron deficiency often starts with yellowing between veins on younger leaves, while fungal spots appear as random brown patches with yellow edges. For pests like mites, look for fine webbing on leaf undersides—this is where they hide and lay eggs. I always check the newest leaves first, as they show symptoms before older ones.
Soil Testing Shortcut: In Step 2, if you don’t have a pH test kit, use the baking soda test for alkaline soil: Mix 1 tablespoon of baking soda with 1 cup of water, then pour it over soil. If it fizzes, your soil is alkaline (pH 7.0+), which explains why chelated iron isn’t working. For a quick drainage check, dig a 2-3 inch hole and fill it with water—if it drains in less than 15 minutes, your soil is well-draining. If water pools after 30 minutes, you’ve got poor drainage.
Sunlight Strategy: The 6-8 hours of sunlight mentioned in Step 3 is non-negotiable, but timing matters too. If your tree gets afternoon sun (especially in hot climates), consider pruning nearby structures to provide morning sun instead. Early morning light is gentler and helps prevent scorching. I’ve seen trees with crispy edges simply because they were getting too much direct afternoon heat—even with full sun exposure.
Fungal Prevention: When treating fungal infections in Step 4, don’t just focus on the leaves. Remove all fallen leaves from the ground and dispose of them in the trash—they can harbor spores. After applying fungicide, water the base of the tree in the morning to let foliage dry quickly. Wet leaves at night are a fungus’s best friend, so avoid evening watering entirely during treatment.
Pro Tips for Cherry Tree Problems Leaves
- Here’s how to spot the early signs and act before your tree’s health declines further.
- Visual Clues Matter: When examining leaves in Step 1, focus on the pattern of discoloration.
- Soil Testing Shortcut: In Step 2, if you don’t have a pH test kit, use the baking soda test for alkaline soil: Mix 1 tablespoon of baking soda with 1 cup of water, then pour it over soil.
Frequently asked questions
Got questions about your cherry tree’s leaves? You’re not alone! Here are some of the most common concerns—plus quick fixes to get your tree thriving again.
Why are my cherry tree leaves turning yellow?
Yellowing leaves (chlorosis) are often caused by overwatering, nutrient deficiencies (like iron or magnesium), or fungal diseases like leaf spot. Check the soil moisture—it should be damp but not soggy. For deficiencies, use a chelated iron supplement or Epsom salt (1 tbsp per gallon of water). If fungal, prune affected leaves and apply copper fungicide.
What causes black spots or holes on cherry tree leaves?
Black spots, holes, or ragged edges usually mean leaf spot disease (common in sweet and tart cherries) or insect damage (like Japanese beetles or mites). Remove fallen leaves to reduce spores, thin the canopy for airflow, and spray with neem oil or fungicide (like chlorothalonil). For pests, use insecticidal soap or horticultural oil.
When should I prune cherry tree leaves with problems?
Prune only after the tree has bloomed (late spring/early summer for sweet cherries; winter for tart cherries). Remove 100% of infected leaves (don’t compost them!) and sterilize pruners with rubbing alcohol to prevent spreading disease. Avoid heavy pruning—focus on dead, diseased, or crossing branches to improve airflow.
Can I save my cherry tree if the leaves are curling?
Curling leaves often signal stress from drought, heat, pests (like aphids), or viral infections. Water deeply 1–2 inches per week (check soil moisture). For pests, blast leaves with water to dislodge insects. If viral (e.g., cherry leaf roll), there’s no cure—remove the tree to protect others. Test leaves at a local extension office for confirmation.
What’s a natural alternative to chemical treatments for cherry tree leaf problems?
Try these DIY fixes:
- Baking soda spray (1 tsp baking soda + 1 quart water + a drop of dish soap) for fungal issues.
- Compost tea (brewed from aged compost) to boost soil microbes and deter diseases.
- Garlic or chili pepper spray (blend 2 garlic cloves + 1 tbsp cayenne + 1 quart water) as a natural pesticide.
- Mulch with wood chips to retain moisture and improve soil health.
Monitor progress weekly—if symptoms worsen, escalate to targeted treatments.
Wrapping up and next steps
Diagnosing and treating cherry tree leaf problems doesn’t have to feel overwhelming—with the right tools and knowledge, you can restore your tree’s health and beauty in no time! 🌿 Whether it’s yellowing leaves, spotting, or curling, early action makes all the difference.
Remember, patience and consistency are key as you monitor progress and adjust care as needed.
Ready to give your cherry tree the TLC it deserves? Start by inspecting one more time—then grab your tools and begin treating those issues today! Your tree (and future harvests) will thank you. 🌟