
Pruning
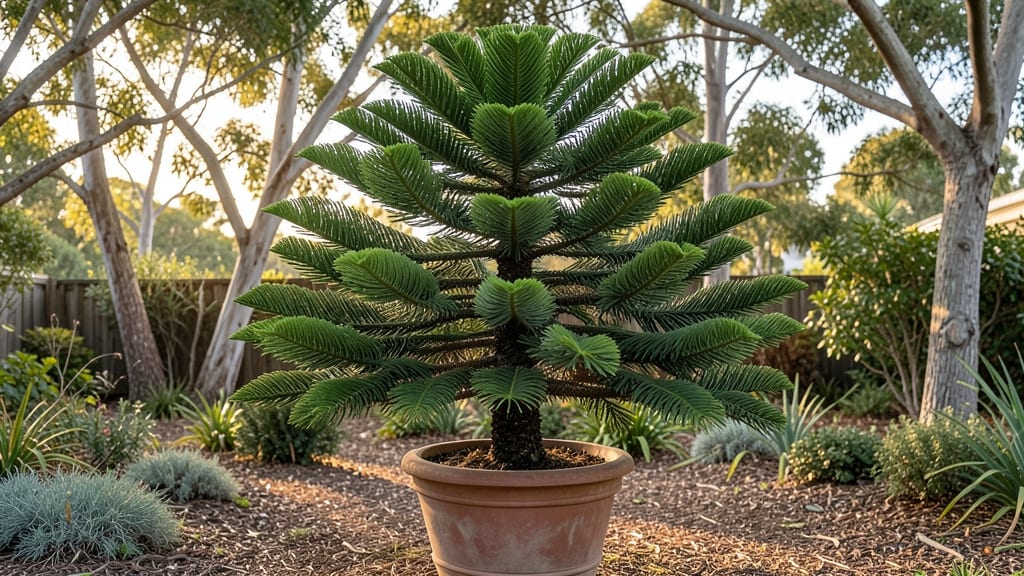
A Christmas tree in a flower pot brings holiday magic to your porch all year long. 🌲 I’ve grown dwarf conifers in containers for decades, and the right variety turns a simple pot into a festive centerpiece that never loses its charm—even when the snow melts.
The secret lies in choosing compact evergreens like ‘Little Gem’ or ‘Globe’ firs, which stay manageable in 15-gallon pots. Add a layer of gravel at the bottom for drainage, then mix potting soil with a slow-release fertilizer to keep roots happy through winter’s dry spells. Pruning?
Just a light trim in early spring to shape it—no heavy-handed work needed. By summer, your tree will be lush and fragrant, its needles a deep, rich green that contrasts beautifully with summer blooms.
Wrap it in twinkling lights for winter, or let it stand bare as a textured evergreen accent in spring gardens. The best part? It grows with you, adapting to patios, balconies, or even indoor spaces with bright light. This isn’t just a holiday decoration—it’s a living heirloom.
With the right care, your potted Christmas tree will outlive store-bought alternatives by years, becoming the heart of your garden’s seasonal rotation.
📚 In This Guide
- What you need
- Instructions
- Tips and common mistakes
- Wrapping up and next steps
What you need
- ● Flower pot: 12–18 inches in diameter (ensure drainage holes at the bottom!)
- ● Potting soil: 3–5 gallons (well-draining, peat-based mix recommended)
- ● Miniature Christmas tree: 1–3 feet tall (pre-pruned or slow-growing varieties like Picea pungens 'Glauca Globosa' or Thuja occidentalis 'Smaragd')
- ● Slow-release fertilizer: 1–2 tablets or granules (for nutrient boost)
- ○ Decorative stones or mulch: 1–2 cups (optional, for aesthetic flair)
- ● Garden trowel or small shovel: For planting and soil adjustments
- ● Watering can or spray bottle: To keep soil moist (avoid overwatering!)
- ○ Pruning shears (small): Optional, for minor trimming if needed
- ● Holiday ornaments: Miniature, lightweight decorations (if adding seasonal flair)
- ○ LED string lights (battery-operated): Optional, for a magical glow
- ● 🌡️ Choose a pot with a saucer to catch excess water and protect surfaces.
- ● ✨ Pre-moisten soil before planting to help roots settle faster.
- ● 🎯 Place in indirect sunlight (4–6 hours/day) to keep your tree lush and healthy.
How to grow a Christmas tree in a flower pot for year-round holiday charm
Here's how to transform a small evergreen into a festive centerpiece that brings holiday cheer indoors—no green thumb required.
🌱 Step 1: Select the Right Tree and Pot for Long-Term Growth
Choose a slow-growing evergreen like a dwarf Alberta spruce or miniature Norway spruce—both thrive in containers and stay manageable. Avoid fast-growing trees; they'll outgrow their pots quickly. Pick a pot with drainage holes that's 2-3 inches wider than the root ball and at least 12 inches deep to accommodate years of growth.
Fill the bottom 2 inches with gravel or broken pottery to improve drainage. This prevents root rot, which is the #1 killer of potted Christmas trees. I always use lightweight potting mix (not garden soil) to keep the pot from becoming too heavy. The mix should feel like a damp sponge—neither soggy nor bone-dry.
🪴 Step 2: Plant and Stabilize the Tree for Immediate Holiday Appeal
Remove the tree from its nursery pot and loosen the roots gently with your fingers. Place it in the center of your prepared pot and fill around the roots with potting mix, pressing lightly to eliminate air pockets. The top of the root ball should sit 1 inch below the pot's rim—this prevents soil from spilling when you water.
Water thoroughly until it drains from the bottom holes, then let it sit for 10 minutes to absorb excess moisture. For the first two weeks, keep the pot in a shaded, sheltered spot to reduce transplant shock. You'll know it's settled when new growth appears along the branches—usually within 3-4 weeks.
☀️ Step 3: Position for Light and Seasonal Care
Place your potted tree in bright, indirect light—like a south- or east-facing window—for 4-6 hours daily. Direct sun can scorch needles, while too little light causes sparse growth. If indoors, rotate the pot a quarter turn weekly so the tree grows evenly. Outdoors, move it to a protected spot (like a covered porch) during warm months to prevent heat stress.
Water when the top inch of soil feels dry—stick your finger in to check. Overwatering is the silent killer here; yellowing needles often mean roots are drowning. In winter, reduce watering to every 2-3 weeks, as indoor heating dries the air and soil faster than you'd expect.
✂️ Step 4: Prune Strategically to Maintain Shape and Health
Prune only in late winter or early spring (just before new growth starts) to avoid stressing the tree. Use clean, sharp pruning shears to trim 1/4 inch above a leaf joint—never cut into old wood. Remove no more than 1/3 of the foliage in any one season; this keeps the tree lush without shocking it. I snip just the tips of the longest branches first to encourage bushier growth.
Fertilize once in early spring with a slow-release evergreen fertilizer (follow package rates). This gives the tree a steady nutrient boost without the risk of burning roots. Skip fertilizer in fall and winter—it encourages tender new growth that won't survive cold snaps. A lightly fed tree stays hardy and festive year-round.
🎄 Step 5: Decorate and Rotate for Year-Round Holiday Magic
Transform your tree into a mini holiday display by adding miniature ornaments, fairy lights, or a tiny star topper. For a low-maintenance look, I swap out decorations seasonally—gold and red for winter, silver and white for Christmas, and pastels for spring. Avoid heavy ornaments that can bend branches; opt for lightweight, weather-resistant pieces.
Every 3-4 years, check if the tree has outgrown its pot. If roots circle the bottom or soil dries out too fast, it's time to repot into a container just 2 inches larger. This refreshes the soil and gives roots room to spread. With this care, your potted Christmas tree becomes a living heirloom—passed down as decor and tradition.
Tips & tricks for perfect potted Christmas trees
These little details make all the difference between a struggling sapling and a thriving holiday centerpiece.
Root Ball Prep: When you remove your tree from its nursery pot, don't just yank it out—gently squeeze the sides to loosen the root ball first. This prevents root damage and helps the tree establish itself faster in its new home. I also recommend trimming any circling roots with clean shears before planting—they'll strangle the tree if left unchecked. This step happens right at the start in Step 2, so don't skip it!
Lighting Strategy: The 4-6 hours of bright, indirect light in Step 3 is non-negotiable, but here's the secret: supplement with a grow light if your windows aren't sufficient. Place it 6-12 inches above the tree for 2-3 hours daily during winter months when natural light is scarce. I use a simple LED grow bulb on a timer—it's made the difference between sparse growth and lush foliage during dark seasons.
Watering Wisdom: The 10-minute drainage wait after watering in Step 2 is crucial, but here's what nobody tells you: check drainage by lifting the pot—if it feels heavy, you've overwatered. For winter care, I place my pot on a saucer filled with pebbles and a little water instead of pouring directly into the soil. This creates humidity around the roots while preventing soggy soil, which matches the winter watering recommendation of every 2-3 weeks.
Decorating Hack: For that "just out of the catalog" look, I always add a thin layer of decorative moss around the base of the pot before placing ornaments. It hides soil edges and adds a natural, woodland feel. Plus, it's lightweight enough that it won't weigh down your tree's branches. This ties perfectly with the seasonal decoration suggestions in Step 5 while adding that extra touch of holiday magic.
Pro Tips for Christmas Tree In Flower Pot
- These little details make all the difference between a struggling sapling and a thriving holiday centerpiece.
- Root Ball Prep: When you remove your tree from its nursery pot, don't just yank it out—gently squeeze the sides to loosen the root ball first.
- Lighting Strategy: The 4-6 hours of bright, indirect light in Step 3 is non-negotiable, but here's the secret: supplement with a grow light if your windows aren't sufficient.
Frequently asked questions
Got questions about keeping your Christmas tree in a flower pot? We’ve got answers!
Whether you’re a first-timer or a seasoned plant parent, these FAQs will help you navigate the quirks of potted holiday greens—from timing to troubleshooting. Let’s dive in!
Can I keep a Christmas tree in a flower pot year-round?
Many varieties like Norfolk Island pine or Dwarf Alberta spruce thrive in pots long-term. Just ensure the pot has drainage holes, use well-draining soil, and place it near a window or under grow lights. With proper care, your tree can become a permanent holiday centerpiece!
When is the best time to prune a potted Christmas tree?
Prune your tree after the holidays (January–February) to remove dead or overgrown branches. Light trimming can also happen in spring or early summer to shape it. Avoid heavy pruning in fall—it stresses the tree before the holiday season. Pro tip: Use clean, sharp shears to prevent disease.
What’s the easiest Christmas tree variety for pots?
Opt for slow-growing, compact varieties like:
- Norfolk Island pine (hardy, drought-tolerant)
- Dwarf Alberta spruce (classic shape, low-maintenance)
- Blue Atlas cedar (fragrant, pest-resistant)
Why are the needles turning brown on my potted Christmas tree?
Brown needles usually signal overwatering, underwatering, or stress. Check the soil moisture—it should stay evenly damp but not soggy. Brown tips? It’s likely dry air. Move the pot away from heat vents, mist the needles, or use a humidifier. Pro tip: Tap the pot—if it’s light, it’s time to water!
Can I decorate a potted Christmas tree the same way as a cut tree?
Yes! Just go light on the ornaments—potted trees are more delicate. Skip heavy garlands or lights that overheat (like incandescent bulbs). Opt for LED lights and lightweight decorations. Avoid water-based sprays (like fake snow) that can rot the soil. Bonus: Fluff the branches gently to create space for decorations!
How do I overwinter a potted Christmas tree?
Move your tree to a cool (50–60°F), bright spot indoors (like a garage or sunroom) if temps drop below 20°F. Reduce watering—overwatering in winter can cause root rot. Resume regular care in spring. Pro tip: Wrap the pot in burlap for extra insulation if outdoors!
Wrapping up and next steps
Transforming your Christmas tree into a year-round flower pot centerpiece is easier—and more rewarding—than you think! With just a few simple steps, you can enjoy that festive charm without the seasonal stress.
Whether you’re a pruning pro or a beginner, this low-maintenance hack keeps your tree lush, stylish, and ready for any occasion.
Ready to elevate your holiday decor? Grab your tools, follow the tips, and let your creativity shine—your future self (and guests) will thank you! 🎄✨ Start planning your tree’s next look today!