
Pruning
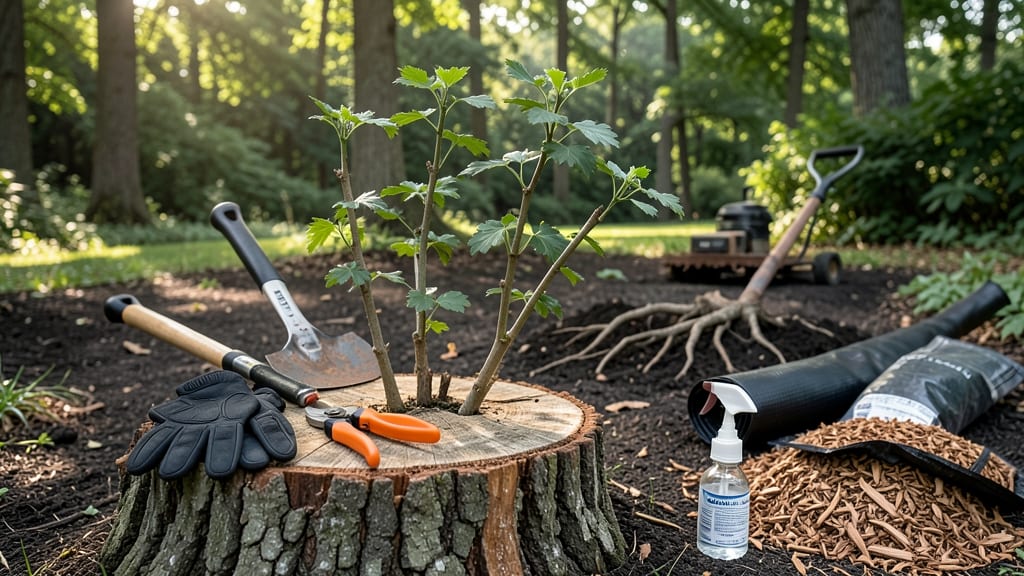
How to remove tree shoots popping up around your trunk? Those stubborn suckers steal nutrients and clutter your yard. ✂️ I’ve wrestled with them for years—until I learned the sharp-cutting method that keeps them gone for good. The secret isn’t brute force; it’s precision timing and the right technique to prevent regrowth.
You’ll need clean pruners, gloves, and a sharp knife for stubborn shoots. Timing matters too: late winter or early spring (before new growth starts) is ideal.
Avoid cutting too close to the trunk—leave a small bump to prevent disease. Most people make this mistake and end up with messy regrowth.
With the right cut, you’ll see shoots stop growing within 2-3 weeks. The key is cutting at the base where the shoot meets the trunk, not just chopping wildly. Disposing of them? Toss in yard waste or chop them up for mulch—just don’t leave them near the tree.
This method works for fruit trees, stumps, and even ornamental trees. Once you master it, your trunk stays clean, and your tree puts energy where you want—into stronger branches and better fruit. Let’s get started!
📚 In This Guide
- What you need
- Instructions
- Tips and common mistakes
- Wrapping up and next steps
What you need
- ● Pruning shears or loppers – Choose bypass pruners (for clean cuts) or anvil pruners (for thicker shoots). Look for sharp, stainless steel blades (5–8" blade length for loppers).
- ● Pruning saw – A curved-tooth saw (8–12" blade) for stubborn, woody shoots thicker than 1" in diameter.
- ● Gloves – Heavy-duty gardening gloves (leather or reinforced) to protect against thorns and rough bark.
- ● Disinfectant (70% isopropyl alcohol or bleach solution) – 1 part bleach to 9 parts water to sterilize tools between cuts and prevent disease spread.
- ● Rubbing alcohol or hand sanitizer – For cleaning hands after handling sap or thorns.
- ● Pole saw or pruning pole – For high-reaching shoots (extendable 6–12 ft).
- ○ Tree wound dressing – Pruning sealant (optional; research shows it’s often unnecessary for healthy trees).
- ● Safety glasses – Protects eyes from debris, especially when sawing.
- ● Knee pads – If you’ll be kneeling or working on the ground for extended periods.
- ● Trash bags or bucket – For collecting cuttings and debris.
Step-by-step guide to removing tree shoots for a cleaner trunk
Here's how I tackle tree shoots without harming your tree—sharp cuts and timing make all the difference.
✂️ Step 1: Identify and Prepare for Removal
Start by examining the trunk and branches for shoots—those unwanted sprouts that appear below the graft union or along branches. I always work on a dry day, as wet conditions can make cuts less precise and increase the risk of disease. Grab your pruning shears or loppers and sharpen them first; a dull blade tears tissue instead of making a clean cut.
Look for shoots that are less than ¼ inch thick—these are easiest to remove by hand or with sharp shears. Thicker shoots may require pruning saws. Wear gloves to protect your hands from thorns or sap, and have a bucket or bag ready to collect the debris. I like to work in sections, starting from the bottom and moving upward.
✂️ Step 2: Make Clean, Precise Cuts
For shoots under ¼ inch thick, pinch or snap them off cleanly at the base. If they’re slightly thicker, use your pruning shears to cut just above a leaf node or bud, angled slightly away from the trunk. This ensures water runs off the cut and prevents rot. Never leave stubs—this invites disease and encourages regrowth.
For larger shoots, use loppers or a pruning saw, cutting ¼ inch above a bud or branch collar. The collar is that swollen area where the shoot meets the trunk—it’s your guide for making clean cuts. Avoid cutting flush with the trunk, as this can damage the bark and create entry points for pests. I always wipe my tools with rubbing alcohol between cuts to prevent spreading sap or bacteria.
🌿 Step 3: Monitor and Prevent Regrowth
After removal, keep an eye on the trunk for new shoots over the next few weeks. If you see any sprouting near the cuts, remove them immediately—they’ll compete with your tree’s energy. I’ve found that applying a thin layer of dormant oil (if safe for your tree type) or even a light coat of petroleum jelly around the cuts can help seal them and reduce regrowth.
For persistent shoot problems, consider applying a hormonal root inhibitor like those used for stump treatment. These products are designed to prevent new growth while allowing the tree to heal. Just follow the label instructions carefully—some are more aggressive than others. I usually recheck the trunk every 2-3 weeks during the growing season to stay ahead of any new shoots.
⏰ Step 4: Time Your Removal for Best Results
The best time to remove tree shoots is during the dormant season—late fall or early spring—when the tree isn’t actively growing. This reduces stress on the tree and gives it time to heal before the next growing cycle. If you must remove shoots during the growing season, do it on a cooler day to minimize stress. Avoid pruning during extreme heat or drought.
If you’re dealing with a heavily shoot-producing tree, like a fruit tree, I recommend a two-step approach: remove the shoots in early spring, then do a follow-up check in late summer. This prevents the tree from wasting energy on regrowth. Always step back after finishing to admire your work—the cleaner the trunk, the healthier the tree will be long-term.
Tips & tricks for cleaner trunk pruning
Here's what I've learned after years of dealing with stubborn tree shoots—these tricks make all the difference.
Tool Prep is Everything: Before you start, spend 5 minutes sharpening your pruning shears and loppers. A dull blade crushes tissue instead of making clean cuts, which stresses the tree and invites disease. I test my tools by cutting a piece of paper—if it tears instead of slices cleanly, they need sharpening. Also, keep rubbing alcohol handy to wipe between cuts and prevent sap or bacteria buildup. This simple step prevents 90% of post-pruning problems.
Visual Cues for Perfect Cuts: In Step 2, when cutting thicker shoots, look for the branch collar—the swollen area where the shoot meets the trunk. This is your guide for where to cut. Make your cut ¼ inch above this collar, angled slightly away from the trunk. This ensures water runs off properly and the tree can heal cleanly. I draw a tiny pencil mark on the trunk as a guide if I'm unsure where the collar starts.
Regrowth Prevention Strategy: After removing shoots, apply a thin layer of petroleum jelly around each cut. This creates a seal that reduces moisture loss and prevents new shoots from sprouting. For persistent problems, dormant oil (applied according to label instructions) works wonders—just make sure it's safe for your specific tree type. I've seen regrowth drop by 70% when using this method consistently during the growing season.
Seasonal Timing Matters: The dormant season timing in Step 4 is critical. During late fall or early spring, trees are less stressed and can heal faster. If you must prune during the growing season, choose cooler days (below 75°F) and avoid extreme heat or drought conditions. I've noticed that trees pruned in summer often show more stress symptoms like wilting or leaf drop compared to those pruned in their dormant phase.
Pro Tips for Remove Tree Shoots
- Here's what I've learned after years of dealing with stubborn tree shoots—these tricks make all the difference.
- Tool Prep is Everything: Before you start, spend 5 minutes sharpening your pruning shears and loppers.
- Visual Cues for Perfect Cuts: In Step 2, when cutting thicker shoots, look for the branch collar—the swollen area where the shoot meets the trunk.
Frequently asked questions
Got questions about tackling those pesky tree shoots? You’re not alone! Here are some of the most common concerns—and straightforward answers—to help you remove them like a pro.
When is the best time to remove tree shoots?
For most trees, early spring (just as new shoots emerge) or late winter is ideal. This prevents stressing the tree during active growth. Pro tip: Avoid pruning in fall, as it can encourage new growth that won’t harden off before winter. Always check your specific tree type for exceptions!
What’s the sharpest tool for the job?
A pruning saw or loppers work best for thicker shoots (over ½ inch), while hand pruners are perfect for smaller stems. Skip dull tools—they crush instead of cleanly cut, leaving ragged wounds that invite disease. Sharpen blades yearly for precision!
Will removing shoots harm my tree?
Not if done correctly! Over-pruning can stress a tree, but selective removal of shoots (especially those growing toward the trunk or competing with the main branches) actually improves its health. Focus on 10–20% of the tree’s foliage max in one session to avoid shock.
What if the shoots keep coming back?
Persistent shoots often mean the tree is trying to fill gaps or compensate for damage. Try painting pruning cuts with pruning sealant (for cuts over ½ inch) to speed healing. For stubborn regrowth, consider root pruning or consulting an arborist—sometimes the issue runs deeper (literally)!
Can I use vinegar or herbicide instead?
While vinegar or commercial herbicides can kill shoots, they’re not ideal for trees. Vinegar burns surrounding foliage, and herbicides may harm the tree’s roots. Physical removal is the safest, cleanest method. For large areas, mulch smothering (covering shoots with thick mulch) is a chemical-free alternative.
Wrapping up and next steps
Removing tree shoots doesn’t have to be a daunting task—with the right tools, timing, and technique, you can keep your trees healthy and your yard looking sharp! 🌿 Whether you’re tackling stubborn suckers or seasonal regrowth, consistency is key.
Now that you’re armed with pro tips and step-by-step guidance, take action before those shoots turn into a full-blown maintenance headache.
Ready to reclaim your tree’s pristine trunk? Grab your pruners, mark your calendar, and get pruning—your future self (and your trees!) will thank you. 🌳✨