
Pruning
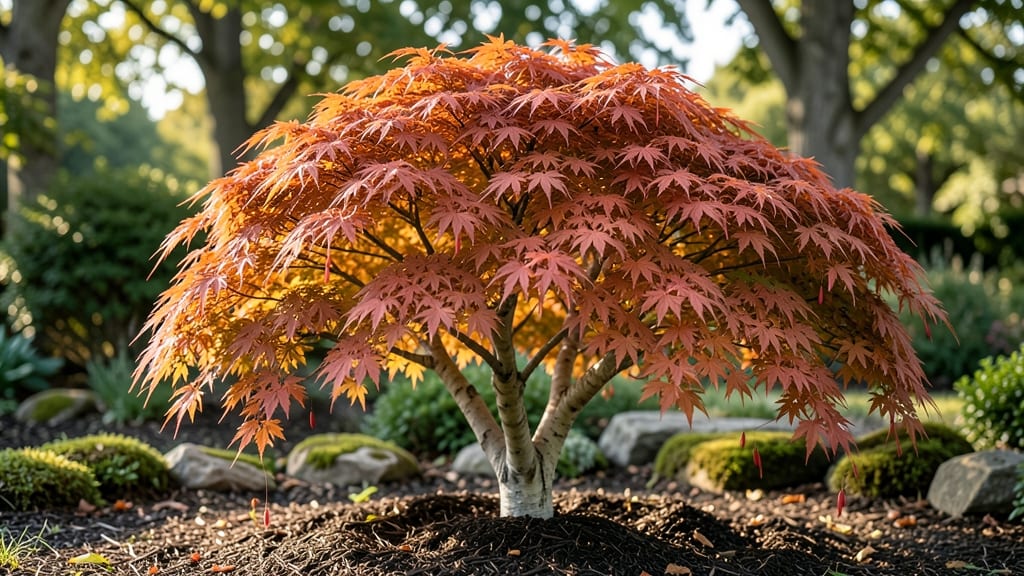
Growing a Japanese Maple Tree Orangeola means adding a year-round burst of fiery color to your garden with minimal space. 🌿 Its compact size and brilliant orange foliage make it perfect for small yards, containers, or even as a stunning focal point in landscaped beds.
Unlike larger maples, this cultivar stays under 6 feet tall, delivering maximum impact with minimal footprint.
The secret to its vibrant hues lies in partial shade and well-draining soil—think dappled sunlight and moist but never soggy roots.
Plant it in early spring or fall, and within a few years, you'll have a tree that turns heads in every season, from spring's fresh green to autumn's fiery orange glow. Just avoid heavy clay soil, which can stunt its growth.
Pruning is simple: shape it in late winter to remove dead branches and encourage fuller growth. A light trim keeps it tidy and promotes those signature orange leaves. With proper care, your Orangeola will reward you with decades of drama—and become the envy of every neighbor.
Bonus tip: Pair it with evergreen shrubs to highlight its seasonal color shifts. Mulch annually to protect roots and maintain moisture. This isn’t just a tree—it’s a living work of art that gets better with age.
📚 In This Guide
- What you need
- Instructions
- Tips and common mistakes
- Wrapping up and next steps
What you need
- ● Pruning shears: Bypass pruners (sharp, clean, and sterilized with rubbing alcohol to prevent disease). Size: 6-8 inches for small branches.
- ● Loppers: For thicker branches (½–1½ inches in diameter). Look for: Long handles (20+ inches) for leverage.
- ● Hand pruners: Anvil-style (for emergency cuts only—avoid for Japanese maples to prevent crushing).
- ● Pruning saw: Curved-tooth saw for branches 1½+ inches thick.
- ● Disposable gloves: Nitrile or latex-free (to avoid sap irritation). Quantity: 1–2 pairs.
- ○ Sealing wax or pruning paint: (Optional but highly recommended for cuts >½ inch thick to prevent disease). Brand tip: Dormant Tree Sealer.
- ● Ladder or step stool: Sturdy, non-slip (extendable ladder for mature trees). Height: Reach 8–10 feet safely.
- ● Bucket or tarp: For collecting debris (1–2 large bags or a 5-gallon bucket).
- ● Rubbing alcohol (70%+) or bleach solution: (1 part bleach to 10 parts water) for sterilizing tools between cuts.
- ● Notebook & pencil: To track pruning notes (dates, branch sizes, growth patterns).
- ● Extension pole pruners: For high branches (saves ladder use!).
- ● Tree bandage: For large wounds (e.g., Tree Tender).
- ● Magnifying glass: To inspect buds and small growth areas closely.
- ● Spray bottle with water: To dampen saw blades and reduce dust.
- ● Camera: Document your tree’s progress before/after pruning!
Step-by-Step instructions for planting and caring for Japanese maple 'Orangeola'
Here's how to give this stunning compact maple the perfect start for vibrant foliage year after year.
🪴 Step 1: Choose the Perfect Planting Site
Japanese maples like 'Orangeola' thrive in partial shade—think 4-6 hours of morning sun with afternoon shade protection. I always look for spots with dappled light where leaves get gentle sunlight but avoid harsh afternoon rays that can scorch the delicate foliage. The soil should drain well but retain moisture—amend heavy clay with 2-3 inches of compost before planting.
Dig a hole twice as wide as the root ball but only as deep. You'll notice the top of the root flare should sit 1 inch above ground level—this prevents water from pooling around the trunk. Gently loosen the roots if they're circling tightly in the pot, which helps them establish faster in the new soil.
🌱 Step 2: Plant with Care and Mulch Properly
Place the tree in the hole and backfill with native soil mixed with 1 part compost to improve fertility. Water deeply as you fill to eliminate air pockets, then firm the soil gently around the base. I always step on the soil lightly to settle it—this prevents future sinking that can expose roots.
Spread 2-3 inches of mulch (like wood chips or shredded bark) over the root zone, keeping it 3 inches away from the trunk. This mulch layer protects roots from temperature swings and retains moisture. Water thoroughly after planting to help the roots settle into their new home.
☀️ Step 3: Provide Consistent Watering and Light
Keep the soil evenly moist for the first 6-8 weeks—that's about 1 inch of water per week. You'll know you're doing it right when the top inch of soil feels damp but not soggy. After that initial period, reduce to 1 inch every 10-14 days, adjusting for rain. Drought stress shows up as wilting leaves or crispy edges.
Monitor sunlight exposure—if you notice new growth leaning toward light, it's getting too much direct sun. A simple solution is to move nearby plants or add a light shade cloth during peak afternoon hours. The goal is to maintain that bright but filtered light that keeps the foliage vibrant.
✂️ Step 4: Prune for Shape and Health
Prune in late winter or early spring before new growth begins. Remove any dead, crossing, or weak branches first—they're easy to spot as they stand out against the healthy orange foliage. I always make cuts just above a bud or branch collar to encourage proper healing.
For shaping, prune back no more than 25% of the plant in any one season. You'll see where the natural shape wants to go—just follow those growth patterns. Avoid heavy pruning in fall, as it stimulates tender new growth that won't survive winter.
⏰ Step 5: Protect in Winter and Fertilize Seasonally
In cold climates, wrap the tree trunk with burlap or use a tree guard to protect it from winter winds. I've found that evergreen burlap works best because it provides some insulation while still allowing airflow. Remove it in early spring once new growth appears.
Fertilize lightly in early spring with a balanced 10-10-10 formula. Use about ½ pound per inch of trunk diameter—for a 2-inch trunk, that's just 1 pound total. Water thoroughly after applying to help distribute nutrients. Avoid fertilizing in fall, as it encourages late-season growth that won't harden off properly before winter.
Tips & tricks for perfect Japanese maple 'Orangeola' planting
Here's what nobody tells you about giving this stunning tree the best possible start.
Site Selection Secret: Look for spots where morning sun hits the leaves but afternoon shade kicks in naturally—like under taller trees or near north-facing walls. I've seen 'Orangeola' trees with scorched leaves because they got too much direct afternoon sun. If you can't find natural shade, a lightweight shade cloth (50% block) during peak sun hours (11am-3pm) works wonders. The goal is that dappled light effect where leaves get just enough brightness without cooking in the heat.
Root Care That Makes All the Difference: When you're loosening those circling roots in Step 1, don't just pull them apart—make small vertical cuts with a knife to break up the root ball. This mimics natural root growth and helps the tree establish faster. I've planted several 'Orangeola' trees and the ones with this root treatment showed new growth within weeks, while others took months. Also, that 1-inch root flare position above ground isn't just about drainage—it prevents water from sitting against the trunk, which can cause rot over time.
Mulch Mastery: The 2-3 inches of mulch you add in Step 2 should be spread evenly but never touch the trunk. I've seen people pile mulch right against the base, which creates a moisture trap that can suffocate roots. Think of it like a donut—mulch forms the ring, trunk stays clean. For extra protection in winter, add an extra inch of mulch around the root zone before freezing temperatures arrive. This acts like a natural blanket for the roots.
Watering Wisdom: That 1-inch weekly measurement in Step 3 is your guide, but timing matters just as much. Water deeply in the morning so leaves have all day to dry—wet foliage at night invites fungal problems. I've noticed that 'Orangeola' trees watered in the afternoon often develop yellow leaves by the next morning. Also, stick your finger in the soil—if it's dry just 1 inch down, it's time to water. The top layer can look moist while roots are thirsty.
Pro Tips for Japanese Maple Tree Orangeola
- Here's what nobody tells you about giving this stunning tree the best possible start.
- Site Selection Secret: Look for spots where morning sun hits the leaves but afternoon shade kicks in naturally—like under taller trees or near north-facing walls.
- Root Care That Makes All the Difference: When you're loosening those circling roots in Step 1, don't just pull them apart—make small vertical cuts with a knife to break up the root ball.
Frequently asked questions
Got questions about growing and maintaining your Japanese Maple Tree Orangeola? You’re not alone! Here are some of the most common queries—plus quick, practical answers to keep your tree thriving year-round.
How often should I prune my Orangeola Japanese Maple?
Prune your Orangeola in late winter or early spring (before new growth starts) to shape it and remove dead wood. Light trimming can also happen in summer to encourage bushier growth. Avoid heavy pruning in fall—it can stress the tree before winter. Pro tip: Use clean, sharp tools to prevent disease!
Does the Orangeola Japanese Maple change color in winter?
Yes! While its vibrant orange foliage fades to a muted bronze or russet in winter, the tree retains its stunning structure. Some varieties even hold onto faint hints of color under snow. For extra drama, plant it where winter sunlight can highlight its arching branches.
Can I grow an Orangeola Japanese Maple in a pot?
This compact variety thrives in 15-20 gallon containers with well-draining soil. Use a mix of organic matter (like compost) and grit to prevent root rot. Repot every 2-3 years and overwinter indoors if your climate drops below 10°F (-12°C). Just ensure it gets 6+ hours of sunlight daily!
What pests should I watch for on my Orangeola Japanese Maple?
Common pests include aphids, spider mites, and scale insects. Treat mild infestations with a hose spray (for aphids) or insecticidal soap. For severe cases, use neem oil or consult a local arborist. Prevention tip: Keep the tree healthy with proper watering and mulching—stressed trees attract pests!
How fast does the Orangeola Japanese Maple grow?
This dwarf variety grows slowly (6-12 inches per year), making it perfect for small gardens or containers. With patience, it’ll reach 10-15 feet tall and wide over 10-15 years. Fun fact: Its slow growth means less pruning needed—just enjoy the year-round color show!
Wrapping up and next steps
The Japanese Maple Tree Orangeola is a stunning, low-maintenance addition that brings year-round beauty to any garden—whether you’re a seasoned gardener or just starting out. 🌿 With its vibrant foliage, compact size, and adaptability, it’s perfect for adding color drama without the fuss.
Now that you’re equipped with the right tools, knowledge, and troubleshooting tips, it’s time to get growing!
Ready to transform your outdoor space? Start by selecting the perfect spot, gather your supplies, and dive in—your Orangeola’s dazzling display is just a few pruning sessions away. Happy gardening! 🌸✨