
Propagation
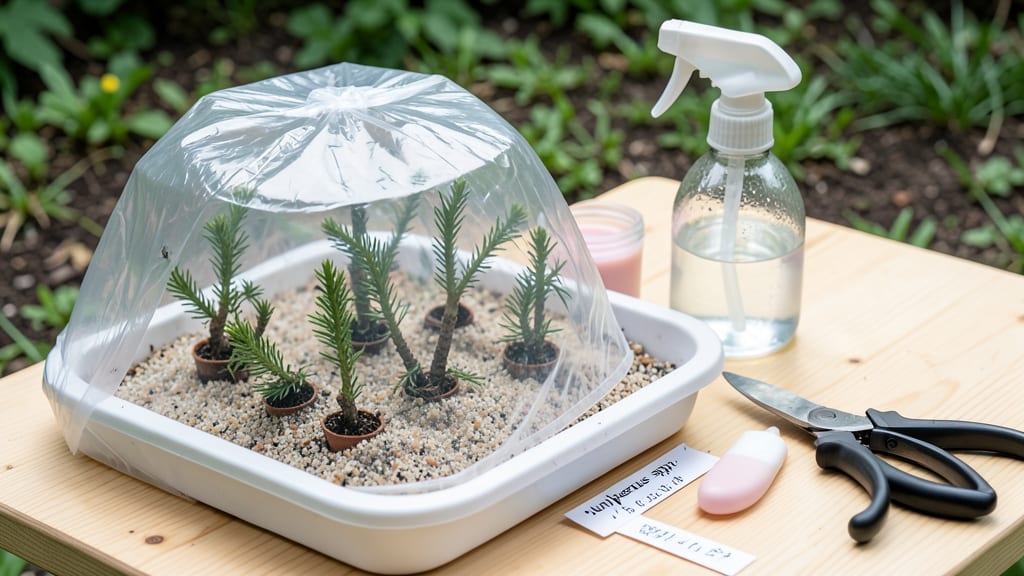
Juniper tree propagation becomes foolproof with cold stratification—turning stubborn seeds into reliable sprouts. 🌱 The key to breaking juniper's stubborn dormancy lies in mimicking winter's freeze-thaw cycle—something I perfected after three failed attempts with store-bought seeds.
What seemed like a mystery became a science once I understood the exact moisture, temperature, and timing requirements.
You'll need three simple supplies: a sealed plastic bag, a damp paper towel, and your freezer. The process takes about 90 days of patience, but the results—strong, healthy seedlings—are worth every week. Junipers grow slowly, so giving them the right start means fewer disappointments down the road.
By spring, you'll see tiny green shoots pushing through the soil, signaling success. These seedlings will grow into hardy trees that thrive in poor soil and drought—exactly why junipers are such a favorite for landscapes. The real magic happens when you transplant them to their permanent home.
This method works for all juniper species, from the blue-green 'Blue Rug' to towering 'Pfitzeriana'. Whether you're restoring a native landscape or adding texture to a rock garden, cold-stratified seeds give you a head start on healthy growth. Let's get those seeds sprouting!
📚 In This Guide
- What you need
- Instructions
- Tips and common mistakes
- Wrapping up and next steps
What you need
- ● Juniper cuttings: 4–6-inch semi-hardwood or softwood cuttings (harvested in late summer or early fall). Choose healthy, disease-free stems with at least 2–3 leaf nodes.
- ● Rooting hormone: A powder or gel (e.g., Clonex or Dip ‘N Grow) to boost root development.
- ● Well-draining potting mix: A blend of 50% perlite, 30% peat moss, and 20% sand (or a commercial cactus/succulent mix).
- ● Small pots or trays: 3–4 inch diameter containers with drainage holes (or a seedling tray).
- ● Clear plastic bags or domes: To create a humidity tent (e.g., plastic wrap or a propagator lid).
- ● Spray bottle: For gentle misting to keep cuttings hydrated.
- ● Refrigerator or cold frame: For cold stratification (40–50°F / 4–10°C) for 6–8 weeks.
- ● Pruning shears: Clean, sharp tools to take cuttings without crushing stems.
- ● Bottom heat mat: Maintains warmth (70–75°F / 21–24°C) for faster rooting.
- ● Grow lights: If propagating indoors with low natural light.
- ● Fungicide: (e.g., hydrogen peroxide 3%) to prevent rot in damp conditions.
- ● Label markers: To track cutting types and dates.
Step-by-Step juniper tree propagation using cold stratification
Here’s my foolproof method for breaking juniper dormancy and growing strong, healthy cuttings.
🌱 Step 1: Select and Prepare Healthy Juniper Cuttings
Choose semi-hardwood cuttings in late winter or early spring, just as new growth begins. Look for 4-6 inch sections with 3-4 nodes—these are the tiny bumps where leaves attach. Use sharp, clean pruners to avoid crushing stems, and select healthy, disease-free branches from the current year’s growth.
Remove all but the top 2-3 sets of needles to reduce moisture loss. Strip the lower foliage with your fingers or pruners, leaving just a small cluster at the tip. This ensures energy focuses on root development rather than maintaining unnecessary leaves. Store cuttings in a plastic bag with a damp paper towel to keep them hydrated until stratification.
❄️ Step 2: Apply Cold Stratification for Dormancy Break
Juniper seeds and cuttings need 60-90 days of cold stratification to mimic winter conditions and trigger root growth. Fill a quart-sized container with a mix of equal parts perlite and moistened peat moss (or coconut coir). Insert the prepared cuttings 2-3 inches deep, spacing them 2 inches apart to prevent overcrowding.
Place the container in a refrigerator (not freezer) where temperatures stay between 35-45°F. Check moisture weekly—stratification works best when the mix stays evenly damp but not soggy. You’ll know it’s right when condensation forms on the container walls but no mold appears. Patience here is key; juniper cuttings won’t root until they’ve experienced this cold period.
☀️ Step 3: Transition to Warmth and Root Development
After 8-12 weeks, remove the container from cold storage and place it in a bright, indirect light location (like a north-facing window). Increase humidity by covering the container with a clear plastic dome or plastic wrap. This creates a mini greenhouse effect that encourages root growth without overheating.
Wait 4-6 weeks before checking for roots. Gently tug on a cutting—if slight resistance meets your fingers, roots have formed. If not, return the container to warmth (65-75°F) and extend the rooting period by another 2-4 weeks. Overwatering now will drown the cuttings; water only when the top ½ inch of mix feels dry to the touch.
🪴 Step 4: Pot Up and Establish New Plants
Once roots reach 1-2 inches long, transplant each cutting into its own 4-inch pot filled with a well-draining mix (equal parts potting soil, perlite, and sand). Water lightly to settle the soil, then place the pots in bright, indirect light for 2-3 weeks to acclimate. Avoid direct sun, which can scorch tender new growth.
After 4-6 weeks, gradually introduce morning sun for 1-2 hours daily, increasing exposure over 2 weeks. Juniper cuttings are slow to mature—expect 1-2 years before they resemble mature trees. During this time, water when the top 1 inch of soil feels dry, and fertilize lightly with a balanced 10-10-10 formula every 6-8 weeks in growing season.
Tips & tricks for perfect juniper tree propagation
These little-known tricks will help you turn those stubborn juniper cuttings into thriving plants with minimal fuss.
Selection Tip: When choosing your 4-6 inch cuttings in Step 1, prioritize branches from the current year's growth—they're more responsive to rooting. Look for vibrant green needles and avoid any with brown tips or signs of insect damage. I've found that cuttings taken just before bud break (late winter) have the highest success rate, as they're primed for new growth. The 3-4 nodes you're targeting should be plump and evenly spaced—these are your future root zones.
Stratification Secret: The 60-90 day cold stratification in Step 2 is non-negotiable for junipers, but here's the pro move: use a clear container for your perlite/peat mix so you can monitor moisture levels without disturbing the cuttings. I place mine on a wire rack inside my fridge to allow airflow underneath—this prevents mold while maintaining that crucial 35-45°F range. The condensation test is your friend: light misting once a week usually keeps things perfectly damp without over-saturating.
Root Development Watch: During the 4-6 week root-checking phase in Step 3, I've learned to time my checks with the plant's natural rhythms. Test roots on a cloudy morning when the cuttings are fully hydrated—this gives you the most accurate resistance reading. If you're impatient (we've all been there), you can gently brush away a little soil with your fingers to peek at root formation without damaging them. Just remember, junipers are slow growers—don't be discouraged if you don't see instant results.
Transplanting Transition: When it's time to pot up those 1-2 inch roots in Step 4, I always do a soil pre-wetting trick: mix your potting soil with water until it's just damp (like a wrung-out sponge), then let it sit for 10 minutes before use. This prevents the shock of sudden moisture when you transplant. After potting, I give the soil a light squeeze—if it springs back, it's perfect; if it stays compressed, you need to add more perlite for that crucial drainage.
Pro Tips for Juniper Tree Propagation
- These little-known tricks will help you turn those stubborn juniper cuttings into thriving plants with minimal fuss.
- Selection Tip: When choosing your 4-6 inch cuttings in Step 1, prioritize branches from the current year's growth—they're more responsive to rooting.
- I place mine on a wire rack inside my fridge to allow airflow underneath—this prevents mold while maintaining that crucial 35-45°F range.
Frequently asked questions
Got questions about growing your own juniper trees?
You’re not alone! Here are answers to the most common questions about juniper tree propagation—from timing tips to troubleshooting tricks.
When is the best time to propagate juniper trees?
The ideal window is late fall to early winter (October–December) for cold stratification, or early spring (March–April) for direct sowing. If you’re using cuttings, summer (June–August) works too—just ensure they’re semi-hardened before planting.
How long does cold stratification take for juniper seeds?
Juniper seeds need 60–90 days of cold, moist stratification (mimicking winter). Store them in a sealed bag with damp peat moss in your fridge (34–40°F). Patience pays off—germination can take another 6–12 months after stratification!
Can I propagate juniper from cuttings instead of seeds?
Use semi-hardwood cuttings (6–8 inches long) from healthy, non-flowering stems. Dip in rooting hormone, plant in perlite/sand mix, and keep humid. Success rates improve with bottom heat (70–75°F).
Why aren’t my juniper cuttings rooting?
Check these fixes:
- Low humidity? Cover cuttings with a plastic bag or use a humidity dome.
- Wrong season? Try summer cuttings—they root better than winter ones.
- Overwatering? Let the soil dry slightly between waterings to avoid rot.
Do all juniper species need cold stratification?
Most eastern red cedar (Juniperus virginiana) and common juniper (J. communis) varieties do, but some western junipers (J. occidentalis) may germinate faster without it. Test a few seeds first—if they sprout quickly, skip stratification!
Wrapping up and next steps
Propagating a juniper tree from seed may take patience, but with the right cold stratification tricks and care, you’ll soon be nurturing sturdy saplings. Remember, consistency in moisture, light, and temperature is key—your future juniper’s resilience starts with these early steps! 🌱
Ready to take the next step? Once your sprouts emerge, transplant them carefully into individual pots or your garden bed. Keep monitoring their growth, and soon you’ll be enjoying the aromatic beauty of your very own juniper trees! 🌿✨