
Blooming
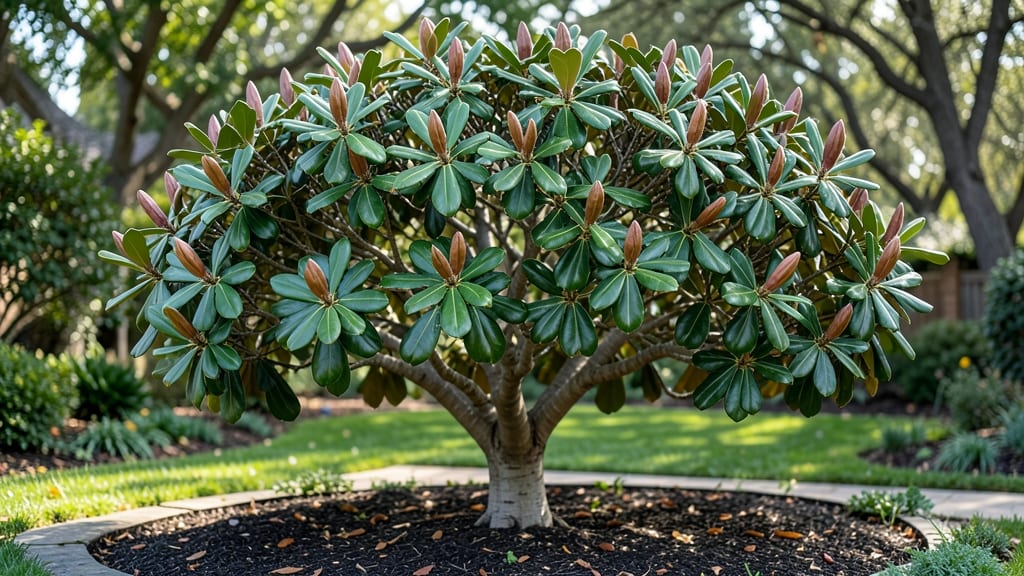
Magnolia trees before bloom are like nature’s hidden treasures—waiting to reveal their stunning flowers. 🌿 The key to spotting one early lies in its leathery, glossy leaves and distinctive bark, which can look like elephant skin or smooth gray ridges.
If you’ve ever wondered, "How do I know if a tree is a magnolia before it flowers?"—look for these telltale signs in late winter or early spring. The buds themselves are another dead giveaway: plump, cone-shaped, and often covered in a sticky resin when young.
These buds form in late summer but stay dormant until spring. Unlike oaks or maples, magnolias have alternate branching—leaves grow in a staggered pattern along the branches. This, paired with their thick, evergreen-like foliage, makes them stand out even when bare.
Once you’ve identified your tree, cold stratification (a natural winter chilling process) is what ensures those iconic blooms. Prune lightly in late winter to shape the tree, but avoid heavy cuts—this encourages stronger blooms.
The soil should be moist but well-draining, and a light mulch helps protect roots from freezing temperatures. This is your chance to get ahead of the game. By recognizing these pre-bloom clues, you’ll know exactly when to expect those breathtaking flowers—and how to care for your tree all season long.
📚 In This Guide
- What you need
- Instructions
- Tips and common mistakes
- Wrapping up and next steps
What you need
- ● Magnolia seeds or dormant buds: Fresh, viable seeds (harvested in fall) or dormant buds from a healthy magnolia tree.
- ● Quantity: At least 10–20 seeds (for better success rates) or 3–5 dormant buds (if propagating via cuttings).
- ● Cold stratification medium: Potting soil (well-draining, sterilized) or a mix of peat moss + perlite (ratio: 2:1).
- ● Quantity: Enough to fill a container (e.g., 6–12 inches deep).
- ● Containers: Plastic storage bags (with air holes) or shallow trays with lids (for seeds).
- ● Small pots (4–6 inches wide) or a seedling tray (for dormant buds).
- ● Refrigerator or cold frame: Space in a refrigerator (34–40°F / 1–4°C) with humidity control or a cold frame outdoors (if temperatures stay below 40°F / 4°C).
- ● Misting bottle or spray nozzle: For keeping the medium moist (not soggy) during stratification.
- ● Labels & markers: Waterproof labels + permanent marker to track seed/bud types and stratification dates.
- ● Humidity dome: Speeds up germination by trapping moisture.
- ● Grow lights: For indoor stratification if natural light is limited.
- ● Thermometer/hygrometer: Monitors temperature and humidity for precision.
- ● Fungicide (e.g., hydrogen peroxide 3%): Prevents mold in damp conditions.
- ● Gloves: Protects hands when handling seeds or soil.
Step-by-step guide for cold stratifying magnolia seeds
Here’s how to break dormancy and ensure your magnolia seeds germinate reliably next spring.
🌱 Step 1: Harvest and Clean the Seeds
Collect fully ripe magnolia seeds in late fall after the cones open naturally. The seeds should be dark brown and hard when mature. Remove any remaining cone fragments and rinse them under cool water to remove debris—this prevents mold during stratification.
Spread the seeds on a paper towel to dry for 24-48 hours in a shaded, well-ventilated area. You’ll know they’re ready when they feel dry to the touch but don’t crumble. Store them in a labeled paper envelope until stratification begins.
💧 Step 2: Moisten and Stratify in a Cold, Wet Environment
Fill a ziplock bag with 1 cup of damp (not soggy) peat moss or perlite. Place the seeds inside, ensuring they’re surrounded but not buried. Seal the bag loosely—small holes prevent mold while allowing airflow. This mimics the moist, cold conditions magnolias experience in nature.
Place the bag in a refrigerator (not the freezer) for 90-120 days. Check monthly to ensure the mix stays moist—spritz with water if it dries out. You’ll see tiny root hairs emerge after 4-6 weeks, signaling successful stratification.
☀️ Step 3: Plant Stratified Seeds in Warmth for Germination
After cold treatment, sow seeds ¼ inch deep in a sterile seed-starting mix in small pots. Use a heat mat set to 70-75°F to simulate spring soil warmth. Keep the mix consistently moist but never waterlogged—magnolia seedlings hate soggy roots.
Place pots in bright, indirect light (no direct sun yet). Germination can take 4-12 weeks, so patience is key. You’ll spot the first true leaves—deep green and glossy—as a sign to gradually introduce morning sunlight for hardening.
⏰ Step 4: Transplant Seedlings After True Leaves Form
Once seedlings have 3-4 true leaves (not the initial cotyledons), transplant them into 4-inch pots with well-draining soil. Magnolias despise root disturbance, so use a smaller pot to minimize stress. Keep them in partial shade for the first month post-transplant.
Overwinter young magnolias indoors near a south-facing window or under grow lights for 14-16 hours/day. They’ll grow slowly but steadily—this is normal. By spring, they’ll be ready for outdoor planting in USDA Zones 4-9 after the last frost.
Tips & tricks for perfect magnolia seed stratification
Here's what nobody tells you about getting magnolia seeds to sprout—these tricks make all the difference between success and frustration.
Seed Selection: Look for seeds that are dark brown and hard—these are fully mature and ready for stratification. Soft or light-colored seeds won't break dormancy properly. I've learned this the hard way after wasting months on immature seeds that never sprouted.
Moisture Balance: The 1 cup of damp peat moss should feel like a wrung-out sponge—never soggy, never bone-dry. Overly wet mixes breed mold, while dry mixes fail to simulate natural winter moisture. I check moisture by squeezing a small handful; if water drips out, it's too wet.
Refrigerator Placement: Store the sealed bag in the vegetable crisper drawer of your fridge for more consistent humidity. The 90-120 day cold treatment is critical—don't rush it! I've seen seeds fail when moved to warmth too soon, even with visible root hairs.
Light Transition: When moving seedlings to bright indirect light, start with morning sun only for the first week. Gradual exposure prevents shock. I've lost seedlings that got too much sun too soon—now I watch for pale leaves as a warning sign.
Pro Tips for Magnolia Tree Before Bloom
- Here's what nobody tells you about getting magnolia seeds to sprout—these tricks make all the difference between success and frustration.
- Seed Selection: Look for seeds that are dark brown and hard—these are fully mature and ready for stratification.
- Moisture Balance: The 1 cup of damp peat moss should feel like a wrung-out sponge—never soggy, never bone-dry.
Frequently asked questions
When should I start cold stratification for my magnolia tree?
Cold stratification should begin 8–12 weeks before your last expected frost date. For most regions, this means starting in late fall (October–November). If you’re unsure, check your local frost dates and count backward—this timing mimics natural winter conditions and ensures strong root development before spring.
Can I skip cold stratification if my magnolia seeds are fresh?
Fresh magnolia seeds can sprout without stratification, but success rates drop dramatically. Cold stratification breaks dormancy and boosts germination from ~10% to 70–90%. If you’re impatient, try a warm-stratification method (soaking seeds in warm water for 24 hours), but cold is still the gold standard for reliability.
What if my magnolia tree isn’t blooming after stratification?
Patience is key! Young trees (under 5 years) may take 3–5 years to bloom. Check for:
- Sunlight: Magnolias need 6+ hours of direct sun daily.
- Soil pH: Aim for 5.5–6.5 (test with a kit).
- Watering: Keep soil moist but not soggy.
Are there alternatives to growing magnolias from seed?
Yes! For faster results, consider:
- Grafted saplings: Guaranteed blooms in 2–3 years (pricier but foolproof).
- Container-grown trees: Buy a 1–3 gallon magnolia from a nursery and transplant in spring.
- Layering/branching: Propagate from existing branches (advanced but rewarding).
What’s the biggest mistake people make with magnolia seeds?
The top mistake? Overwatering or poor drainage. Magnolia seeds rot quickly in soggy soil. Use a mix of:
- 50% peat moss
- 30% perlite
- 20% sand
Wrapping up and next steps
Watching your magnolia tree before bloom transform into a stunning spring spectacle is pure magic—thanks to cold stratification!
By mimicking nature’s chilling process, you’ve given your tree the best shot at vibrant, reliable blooms. 🌸 Remember, patience and consistency are key, whether you’re using the refrigerator, outdoor exposure, or a cold frame.
Now that you’re armed with the know-how, take the next step: mark your calendar for spring! Monitor your tree’s progress, and don’t hesitate to adjust care as needed.
With a little love and science, you’ll soon be rewarded with those breathtaking blooms—and maybe even share the joy with neighbors or snap some Instagram-worthy photos. Happy gardening! 🌱