
Flowers
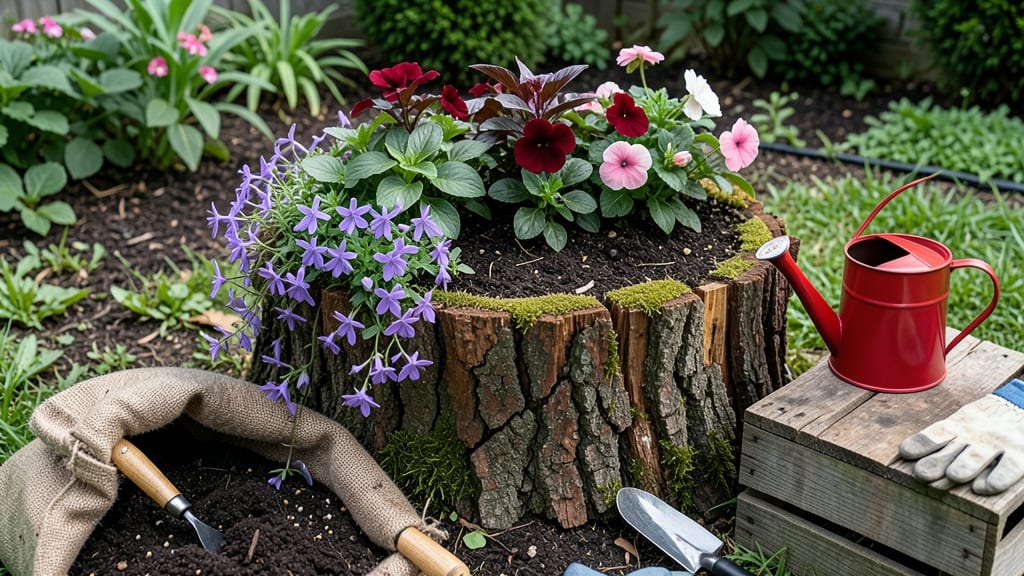
Transforming old tree stumps into bursting floral displays by planting flowers in tree stumps is the kind of gardening hack that makes neighbors stop and stare. 🌸 I’ve turned what was once dead wood into thriving vertical gardens that add height, texture, and unexpected charm to my yard—without taking up a single square foot of ground space.
The secret lies in prep work that’s simpler than it sounds: drill drainage holes, seal the wood, and you’ve got a ready-made planter that looks like it belongs in a fairy tale.
Most people assume stumps need fancy treatments, but the truth is far more straightforward. You’ll need basic tools—a drill, some sandpaper, and a sealant—and plants that love shallow roots, like succulents, ferns, or trailing lobelia.
The key is matching the right flowers to the stump’s unique shape, turning its natural curves into a design feature. A single stump can become a cascading waterfall of color or a bold statement piece in your garden’s center.
By the time you’re done, you’ll have a low-maintenance vertical garden that blooms all season long. The flowers spill over the edges like a living sculpture, and the stump’s rustic texture contrasts beautifully with bright blooms.
Plus, it’s a sustainable way to upcycle something that might otherwise end up in the woodpile.
This works for any yard size, from urban patios to sprawling backyards. Whether you’re reviving an old stump or buying one at a garden center, here’s how to make it happen—without the fuss.
📚 In This Guide
- What you need
- Instructions
- Tips and common mistakes
- Wrapping up and next steps
What you need
- ● Tree stump: A freshly cut, clean stump (preferably recently cut to avoid rot). Size varies, but 12–24 inches in diameter works best for most flowers.
- ● Sphagnum moss: 2–3 pounds (holds moisture well and prevents weeds). Look for pearl moss at garden centers.
- ● Potting soil: 5–10 gallons (well-draining mix, like a 50/50 blend of peat moss and perlite or cactus/succulent soil for drought-tolerant flowers).
- ● Slow-release fertilizer: 1–2 cups (10-10-10 or organic compost for a natural boost).
- ● Small flowering plants: Choose shade-tolerant, moisture-loving varieties like: Ferns (e.g., Boston fern, Maidenhair fern)
- ● Impatiens or New Guinea impatiens (for color!)
- ● Caladiums (for tropical flair)
- ● Small succulents (e.g., Haworthia or Sedum) if your stump gets partial sun.
- ● Drill or auger: ½-inch to ¾-inch bit (to create planting holes). A cordless drill makes this job a breeze!
- ● Spray bottle or watering can: With a fine mist nozzle (for gentle hydration).
- ○ Waterproof sealant (optional): 1–2 gallons (e.g., silicone-based sealant) to protect the stump from moisture damage if needed.
- ● 🌡️ Stump prep: If your stump is old or rotting, seal it first with waterproof sealant to prevent mold. Let it dry 24 hours before planting.
- ● 🎯 Plant spacing: Space holes 3–6 inches apart (closer for small plants, wider for larger varieties).
- ● ✨ Drainage hack: Poke a few ¼-inch drainage holes at the base of the stump to avoid waterlogging.
How to plant flowers in tree stumps for stunning vertical gardens
Turn old stumps into eye-catching vertical gardens that add drama to any yard—no green thumb required.
🪴 Step 1: Prepare the Tree Stump for Planting
Start by cleaning the stump thoroughly with a stiff brush and soapy water to remove dirt, moss, or debris. I like to use a pressure washer on the lowest setting for stubborn grime—just don’t blast the wood too hard or you’ll damage the surface. Once clean, let the stump dry completely in the sun for 24-48 hours. This prevents mold and ensures your plants have a stable base.
Next, drill ¼-inch drainage holes along the sides of the stump, about 6 inches apart. These holes let excess water escape, preventing root rot. I space them in a spiral pattern for even drainage. If your stump is large, you might need a ½-inch drill bit for better water flow. Cover the holes with landscape fabric to keep soil from washing out while still allowing water to drain.
🌱 Step 2: Fill the Stump With Moisture-Retaining Soil
Fill the stump with a lightweight, well-draining potting mix—never garden soil, which compacts and suffocates roots. I blend equal parts potting mix and perlite for extra aeration. Moisten the mix until it’s damp but not soggy, like a wrung-out sponge. Pack it gently into the stump, leaving about 1 inch of space at the top to prevent spills when watering.
For a 4-stump garden, you’ll need roughly 2 gallons of soil per stump. Tap the sides lightly to settle the mix, but don’t compact it too much—roots need room to grow. If your stump has deep crevices, add extra soil there to create pockets for larger plants like ferns or small shrubs.
☀️ Step 3: Choose and Plant Stump-Friendly Flowers
Select compact, drought-tolerant plants that thrive in shallow soil. I love sedum, ferns, ivy, and small succulents—they cascade beautifully and handle the unique conditions. For color, add petunias, lobelia, or impatiens in 4-inch pots (one per hole). Dig a hole twice as wide as the root ball but only as deep as the pot, since stumps have limited depth.
Gently remove the plant from its pot, loosen the roots if they’re circling, and place it in the hole. Fill around the roots with soil, pressing lightly to eliminate air pockets. Water immediately to settle everything in place. Space plants 3-4 inches apart for smaller flowers and 6 inches apart for trailing varieties like ivy.
💧 Step 4: Water and Mulch for Long-Term Success
Water the stump deeply right after planting, then check the soil daily for the first week. You’ll know it’s time to water when the top inch feels dry to the touch. After that, water every 2-3 days during hot weather, but reduce to once a week in cooler months. Stumps dry out faster than ground soil because they’re exposed on all sides.
Spread a 1-inch layer of mulch (like shredded bark) around the base of the stump to retain moisture and suppress weeds. Avoid piling mulch against the plant stems—keep it 2 inches away to prevent rot. This layer also protects the wood from cracking as seasons change. With proper care, your stump garden will thrive for years!
✂️ Step 5: Maintain and Prune for Year-Round Beauty
Trim back leggy or overgrown plants every 4-6 weeks to encourage bushier growth. I use clean, sharp scissors to snip just above a leaf node—this prompts new branches to form. Deadhead spent blooms regularly to keep flowers coming and prevent seed pods from weighing down trailing varieties.
Fertilize lightly once a month with a balanced, water-soluble fertilizer (like 10-10-10) during the growing season. Too much fertilizer burns roots in shallow stump soil, so dilute it to half-strength. In winter, reduce watering to once every 10 days unless you’re in a mild climate. With minimal upkeep, your stump garden will stay vibrant and full of life!
Tips & tricks for transforming tree stumps into vertical gardens
Here's what I learned after turning my own yard into a stump garden—these tricks make all the difference.
Drying Time Matters: That 24-48 hour drying period in Step 1 is non-negotiable. I once rushed ahead after just 12 hours and ended up with moldy soil—trust me, the extra patience prevents that. Place stumps in direct sunlight and check daily. If you're in a humid climate, extend to 48 hours. The wood needs to be completely dry to prevent fungal issues that can kill your plants before they even sprout.
Drainage Pattern Tip: When drilling those ¼-inch holes in Step 1, think of them like a waterfall. Start the holes at the bottom of the stump and spiral upward—this creates a natural drainage path. If your stump is particularly wide, add extra holes near the edges where water tends to pool. I also recommend using a step bit to make the holes slightly wider at the bottom, which helps prevent clogging with soil particles.
Soil Mix Secrets: The equal parts potting mix and perlite blend in Step 2 is perfect, but here's the pro move: add a handful of worm castings to each stump. This boosts nutrient content without over-fertilizing. For larger stumps, you can also mix in a small amount of composted bark—it helps retain moisture while still allowing drainage. Just avoid anything too dense, like regular garden soil, which will compact and suffocate roots.
Plant Placement Strategy: In Step 3, when arranging your plants, put the tallest varieties in the center of the stump and trailing plants like ivy along the edges. This creates a natural tiered effect that draws the eye upward. For a 4-stump garden, I recommend planting one stump with mostly foliage plants (like ferns), one with mostly flowers (like petunias), one with a mix, and one with trailing varieties to create visual interest throughout your yard.
Pro Tips for Planting Flowers In Tree Stumps
- Here's what I learned after turning my own yard into a stump garden—these tricks make all the difference.
- Drying Time Matters: That 24-48 hour drying period in Step 1 is non-negotiable.
- Drainage Pattern Tip: When drilling those ¼-inch holes in Step 1, think of them like a waterfall.
Frequently asked questions
Got questions about turning tree stumps into floral masterpieces? You’re not alone! Here are some of the most common queries—and their answers—to help you nail your vertical garden project.
Can I plant flowers in any tree stump?
Not all stumps are created equal! Opt for hardwood stumps (oak, maple, or fruit trees) since they decay slower and hold moisture better. Softwood stumps (like pine) rot too quickly. Also, avoid stumps with active fungus or pests—start fresh for healthier blooms!
How long does it take for flowers to grow in a stump?
Patience is key! Most annual flowers (like petunias or marigolds) sprout in 2–4 weeks, while perennials (e.g., lavender or sedum) may take 6–12 weeks to establish. Soil moisture, sunlight, and stump age all play a role—keep an eye on your green thumbs!
Do I need to water stump-planted flowers differently?
Stumps dry out fast—water deeply 2–3 times per week (more in heatwaves) and mulch the top to retain moisture. Avoid soggy soil (root rot is a risk!), and check moisture by sticking a finger 1 inch into the soil.
What if my stump flowers aren’t thriving?
Troubleshoot like a pro:
Yellow leaves? Overwatering or poor drainage—add perlite to the soil mix.
No growth? Low light? Move to a sunnier spot (6+ hours of light daily).
Pests? Neem oil or insecticidal soap can save your blooms.
Pro tip: Refresh the soil annually for nutrients!Are there alternatives if I don’t have a tree stump?
No stump? No problem! Try:
- Repurpose large pots or wooden planters (drill drainage holes!).
- Use vertical pallet gardens or hanging pockets for small spaces.
- Plant directly into the ground with a raised bed or spiral design.
Wrapping up and next steps
Transforming old tree stumps into vibrant flower beds is a creative way to breathe new life into your space—and you’ve got all the tools to make it happen! 🌸 Whether you’re a gardening newbie or a seasoned green thumb, this project proves that even small spaces can spark big beauty.
Now that you’re inspired, why not pick a stump, grab your supplies, and start planting today? Your future garden (and pollinators!) will thank you.
🌱 Next Steps:
- Sketch a quick design—where will your stump garden shine?
- Check local plant nurseries for stump-friendly flowers.
- Share your progress with #StumpGardenMagic for a little community cheer!