
Pruning
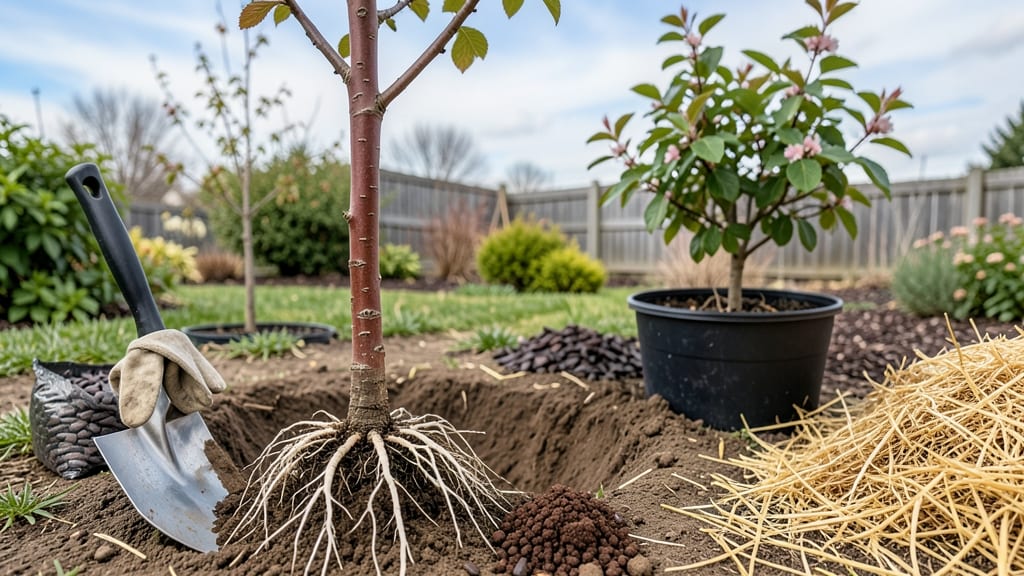
Planting a sour cherry tree with the layered chill method guarantees stronger roots and earlier fruit production. 🌱 The secret lies in simulating winter conditions before planting, which breaks dormancy and gives young trees a head start.
I’ve seen trees established in half the time using this technique—no more waiting years for the first harvest. First, choose a healthy sapling with a sturdy trunk and well-developed roots. Dig a hole twice as wide as the root ball but only as deep—planting too deep suffocates the roots.
Amend the native soil with compost to improve drainage, especially in heavy clay or sandy areas where sour cherries struggle. Water deeply immediately after planting to settle the soil and eliminate air pockets. Mulch with 2–3 inches of organic material to retain moisture and regulate soil temperature.
The key is consistency: water every 7–10 days unless rain falls, and avoid overwatering, which leads to root rot. Long-term success comes from annual pruning to shape the tree and remove dead wood.
Sour cherries thrive in full sun and well-drained soil, so pick a location with at least 6 hours of sunlight daily. With proper care, your tree will bear fruit in 3–5 years—earlier than most varieties.
📚 In This Guide
- What you need
- Instructions
- Tips and common mistakes
- Wrapping up and next steps
What you need
- ● Sour cherry tree saplings (2–4, depending on desired spacing): Dwarf varieties (e.g., 'Montmorency' or 'Balaton') for small spaces
- ● Standard varieties for larger yards (ensure they’re self-pollinating or plant two compatible types)
- ● Well-draining soil mix (50 lbs): 60% topsoil, 30% compost, 10% perlite/sand
- ● pH 6.0–7.0 (test with a soil kit)
- ● 5-gallon containers (2–4, with drainage holes)
- ● Rooting hormone (powder or gel, 1 small bottle)
- ● Plastic wrap or humidity dome (for layering)
- ● Cold stratification setup: Refrigerator (or cold frame) set to 34–40°F
- ● Moistened peat moss or vermiculite (1 lb)
- ● Mulch (straw or wood chips, 10 lbs)
- ○ Drip irrigation kit (optional but recommended for consistency)
- ● Pruning shears (sterilized with rubbing alcohol)
- ● Trowel or spade (for transplanting)
- ● Grafting knife (if layering branches)
- ● Measuring tape (to mark planting depth)
- ● Gloves (gardening or nitrile for hygiene)
- ● Spray bottle (for misting layers)
- ● Mycorrhizal fungi (boosts root growth, 1 packet)
- ● Slow-release fertilizer (10-10-10, 5 lbs)
- ● Tree stakes & ties (for young saplings)
- ● Shade cloth (30–50% coverage for hot climates)
- ● pH adjustment kit (if soil is outside ideal range)
Step-by-Step instructions for planting sour cherry trees
Planting sour cherry trees requires patience and precision—here's how to ensure strong, healthy growth from the start.
🌱 Step 1: Select and Prepare the Planting Site
Choose a location with full sun exposure (6-8 hours daily) and well-draining soil. Sour cherries thrive in slightly acidic soil with a pH between 6.0 and 7.0. Test your soil first—amend with compost or peat moss if needed. Avoid low-lying areas where water pools, as soggy roots lead to rot.
Dig a hole twice as wide as the root ball but no deeper. Loosen the sides of the hole to encourage root spread. If planting multiple trees, space them 20-25 feet apart to allow for mature size. I like to mark the hole with stakes before digging to ensure proper spacing—this prevents overcrowding as the trees grow.
🌿 Step 2: Remove the Tree from Its Container and Inspect Roots
Gently squeeze the sides of the container to loosen the root ball before removing the tree. If roots are circling tightly, use your fingers to tease them outward—this prevents girdling as the tree matures. Trim any damaged or overly long roots with clean pruners, but avoid cutting more than 10-15% of the total root mass.
Check the root flare—the swollen area where roots meet the trunk. It should sit 1-2 inches above the surrounding soil line once planted. If the root flare is buried too deep, the tree may struggle or even die. This is the moment that matters: get it right now, and you’ll avoid years of poor growth.
💧 Step 3: Plant the Tree and Water Thoroughly
Place the tree in the hole, ensuring the root flare is at the correct height. Backfill with the native soil you removed, tamping lightly every 4-6 inches to eliminate air pockets. Avoid compacting the soil too firmly—you want roots to push through easily. Water deeply as you fill, letting the soil settle naturally around the roots.
Once planted, create a 4-inch-high berm of soil around the base to direct water toward the roots. Water again until the soil is 6-8 inches deep and moist but not saturated. Mulch with 2-3 inches of organic mulch (like wood chips) and keep it 6 inches away from the trunk to prevent rot. This step prevents soil erosion and retains moisture during dry spells.
☀️ Step 4: Provide Support and Monitor Growth
Install a stake or tree support if needed, especially in windy areas. Tie the tree loosely to the stake using soft fabric strips—avoid wire or anything that can girdle the trunk as it grows. Prune any broken or crossing branches now to encourage a strong structure. Leave 3-4 main scaffold branches to develop naturally.
Watch for signs of stress like wilting leaves or yellowing foliage—these often indicate overwatering or poor drainage. Sour cherries are drought-tolerant once established but need consistent moisture the first year. Water 1-2 times per week during dry periods, adjusting based on rainfall. You’ll see new leaves emerge within 4-6 weeks—that’s your signal everything is working.
⏰ Step 5: Layered Chill for Fruit Production
Sour cherries require 600-1,000 hours of chill hours (temperatures below 45°F) annually to produce fruit reliably. If you’re in a warm climate, consider planting a self-rooted tree or using the layered chill method: plant a cold-hardy rootstock in a cooler microclimate and graft the sour cherry scion onto it. This ensures the tree gets enough winter chill.
In milder regions, prune lightly in late winter to remove any water sprouts or dead wood. Avoid heavy pruning—the tree’s energy should focus on establishing roots and branches. By the third year, you’ll start seeing flowers, and with proper care, fruit production will follow. Patience is key—sour cherries take time, but the effort pays off with delicious harvests for decades.
Tips & tricks for perfect sour cherry tree planting
These professional insights will help you avoid common pitfalls and maximize your sour cherry tree's long-term success.
Site Selection Wisdom: The 6-8 hours of full sun requirement is non-negotiable—partial shade can reduce fruit production by 30% or more. I always check sunlight patterns for at least 2 weeks before planting to confirm the location. Morning sun exposure is particularly important, as it helps dry dew quickly and prevents fungal issues. Consider installing temporary shade cloth during extreme summer heat if your climate experiences temperatures above 95°F.
Root Ball Preparation: When teasing out circling roots in Step 2, focus on the outer edges where roots are most likely to be compacted. I use my fingers to gently separate roots rather than cutting, which preserves more root tissue. Remember that the 10-15% root mass limit applies to damaged roots only—healthy roots should remain intact. This careful handling prevents transplant shock and gives your tree a stronger start.
Watering Strategy: The 6-8 inches deep watering in Step 3 requires patience—don't rush this process. I recommend using a soil moisture meter to verify you've reached the correct depth, as visual cues can be misleading. For the first year, maintain consistent moisture levels in the root zone, which is typically 12-18 inches deep. Overwatering is more common than underwatering, so always check soil moisture before adding more water—soggy soil leads to root rot.
Layered Chill Method: The 600-1,000 chill hours requirement is where many gardeners struggle in warmer climates. I've found that planting near reflective surfaces like white walls or light-colored fences can increase chill hours by up to 100 hours annually. For extreme climates, consider planting near a north-facing wall where temperatures drop more consistently. This method creates microclimates that can make the difference between reliable fruit production and disappointing yields.
Pro Tips for Sour Cherry Tree Planting
- These professional insights will help you avoid common pitfalls and maximize your sour cherry tree's long-term success.
- Site Selection Wisdom: The 6-8 hours of full sun requirement is non-negotiable—partial shade can reduce fruit production by 30% or more.
- Root Ball Preparation: When teasing out circling roots in Step 2, focus on the outer edges where roots are most likely to be compacted.
Frequently asked questions
Got questions? You’re not alone—planting sour cherry trees can feel tricky at first! Here are answers to the most common queries to help you grow confidently.
When is the best time to plant a sour cherry tree?
The ideal window is late fall to early spring (before buds swell). This lets roots establish before summer heat. For layered chill methods, plant in autumn—roots need 4–8 weeks to anchor before dormancy. Avoid extreme heat or frost periods!
Can I grow a sour cherry tree from seed?
Yes, but expect years of patience—seeds may take 5+ years to fruit! For faster results, use grafted trees or layered cuttings (like your chill method). Seeds also risk inconsistent traits (e.g., tartness, size). Stick to nursery-bought varieties for reliability.
How do I ensure my layered cuttings survive winter?
Mulch heavily with straw or wood chips (4–6 inches) to insulate roots. Wrap the base with burlap or tree guard to block rodents. Prune back new growth in late fall to reduce stress. Avoid heavy snow buildup—gently brush it off to prevent breakage.
What if my sour cherry tree leaves turn yellow?
Yellow leaves often signal overwatering (check soil—it should be moist but not soggy) or nutrient deficiency (try a balanced fertilizer). If only older leaves yellow, it’s normal aging. Pests (like aphids) or fungus (e.g., leaf spot) can also cause it—inspect undersides and treat with neem oil if needed.
Are sour cherry trees good for small yards?
It depends! Dwarf varieties (like ‘Montmorency’) stay under 10 feet tall, perfect for patios. Standard trees need 20+ feet of space. Choose columnar types or espalier them against fences to save room. Just ensure full sun (6+ hours/day) and well-draining soil.
Wrapping up and next steps
Planting a sour cherry tree using the layered chill method is a rewarding way to ensure strong, reliable sprouts—especially if you’re dealing with finicky varieties or a short growing season. 🌱 By following the right steps—from selecting healthy rootstock to proper stratification and planting—you’ll set your tree up for success.
The key? Patience and precision pay off with lush, productive growth.
Now that you’re armed with the know-how, roll up your sleeves and get planting! Start by prepping your site this fall, then watch your cherry tree thrive next spring. Ready to dive deeper? Check out our guide on post-planting care to keep your tree happy year-round.