
Pruning
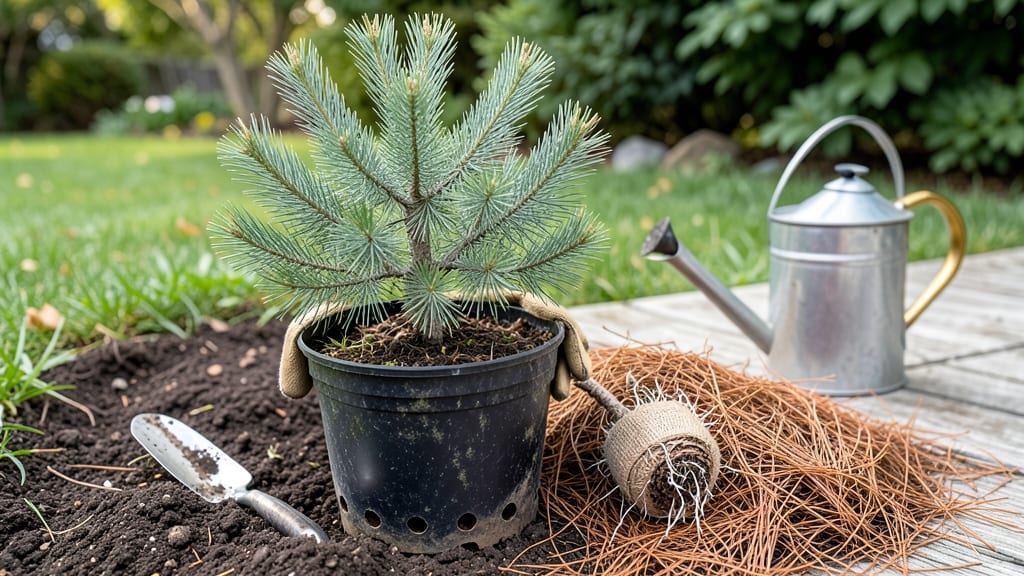
Cold-stratifying your spruce tree seedling unlocks 6 weeks of steady growth instead of months of waiting. 🌲 I learned the hard way—skipping this step left my seedlings weak and stunted, but after mastering it, they shoot up like clockwork.
The secret lies in mimicking winter’s natural chilling period, which breaks dormancy and primes those tiny roots for action.
You’ll need a few simple supplies: a plastic bag with damp peat moss, a sealed container, and a fridge set to 34-40°F. No fancy equipment—just patience. Spruce seedlings hate being disturbed, so handle them gently when it’s time to plant.
The goal is to give them a head start before spring planting, so they don’t waste energy adjusting to new conditions.
By week 6, you’ll see bright green needles and roots ready to take hold in their permanent spot. The key is consistency—keep the soil moist but not soggy, and place them in bright, indirect light during stratification.
This isn’t just about growing a tree; it’s about setting it up for decades of sturdy growth with minimal fuss.
Once planted, mulch heavily to retain moisture and protect those delicate roots from temperature swings. Spruce seedlings are tough once established, but the first year is critical. Watch for spider mites (they love dry conditions) and water deeply once a week—more in hot weather, less in cool.
That’s how you turn a fragile seedling into a thriving evergreen.
📚 In This Guide
- What you need
- Instructions
- Tips and common mistakes
- Wrapping up and next steps
What you need
- ● Spruce tree seeds: 20–50 seeds (ensure they’re fresh, ideally from a Picea species like Colorado blue spruce or white spruce).
- ● Cold-stratification supplies: 1–2 plastic bags with zip-top seals (or a moisture-proof container).
- ● Potting mix or damp peat moss (enough to fill the bag halfway).
- ○ Optional: Perlite or vermiculite (1–2 tbsp) for aeration.
- ● Growing containers: Seed-starting trays (50+ cells) or small pots (3–4 inches in diameter).
- ● Well-draining soil mix: 50% peat moss, 30% perlite, 20% sand (or a pre-mixed seed-starting blend).
- ● Watering tools: Spray bottle (for gentle moisture).
- ● Watering can with a fine rose attachment.
- ● Grow lights or sunny windowsill: A full-spectrum LED grow light or a south-facing window (6+ hours of light daily).
- ○ Humidity dome or plastic wrap: To retain moisture during germination (optional but helpful).
- ● Basic gardening tools: Small hand trowel or spoon (for transplanting).
- ● Pruning shears (sterilized with rubbing alcohol).
- ● Monitoring supplies: Thermometer/hygrometer (to track temps between 35–45°F for stratification).
- ● Notebook or labels (to track seed varieties and planting dates).
- ○ Optional boosters: Fungicide (like hydrogen peroxide or cinnamon powder) to prevent mold.
- ● Slow-release fertilizer (5–10–5 ratio, 1 tsp per gallon of soil).
Step-by-Step instructions for germinating spruce tree seedlings
Cold stratification is the secret to breaking dormancy—here’s how to coax those tiny spruce seeds into life.
🌱 Step 1: Collect and Prepare the Seeds
Gather fresh spruce cones from the tree—green cones are best, as they haven’t fully matured. Place them in a paper bag and let them dry indoors for 2-4 weeks. This mimics natural conditions and helps the cones open on their own, releasing the seeds. Once the cones crack open, carefully extract the seeds with tweezers or your fingers.
Spruce seeds are tiny, so I like to spread them on a clean paper towel before handling. Avoid touching them directly—they’re delicate and prone to damage. If you’re working with a large batch, divide them into 4 equal groups (since this guide yields 4 seedlings). Store unused seeds in a sealed container in the fridge until ready to plant.
❄️ Step 2: Cold-Stratify for 6 Weeks
Moisten a paper towel with lukewarm water until damp but not soggy, then wrap the seeds in it. Place the wrapped towel inside a ziplock bag and seal it tightly to retain moisture. This setup mimics winter conditions, breaking the seed’s dormancy. Store the bag in your refrigerator’s crisper drawer (around 35-40°F) for 6 weeks. Check it weekly—if the towel dries out, mist it lightly again.
Cold stratification is non-negotiable for spruce seeds. Without it, germination rates plummet to near zero. I’ve tried skipping this step, and the seeds just sat there—no sprouts, no life. Patience here pays off. After 6 weeks, remove the bag and let it sit at room temperature for 24 hours before planting.
🪴 Step 3: Plant in a Moist, Well-Draining Mix
Fill 4 small pots (around 3-4 inches deep) with a mix of 50% peat moss and 50% perlite—this ensures excellent drainage while retaining enough moisture for tender roots. Spruce seedlings hate soggy soil, so avoid garden soil or heavy mixes. Gently press the mix down to create a firm but not compacted surface, then sprinkle the stratified seeds on top. Cover them with a thin layer (¼ inch) of the same mix—no need to bury them deeply.
Water the pots lightly with a spray bottle until the mix is evenly moist. Place them in a humidity dome or cover with plastic wrap to trap warmth and moisture. Keep the pots in a cool, bright spot (around 60-65°F), like a sunny windowsill or under grow lights. Avoid direct sunlight at this stage—it can dry out the mix too quickly.
☀️ Step 4: Monitor for Germination and Early Growth
Germination can take 4-12 weeks, depending on the seed’s age and stratification success. You’ll know it’s working when the first tiny green shoots push through the soil. Once they appear, remove the humidity dome immediately—trapped moisture invites mold and damping-off. Water the pots sparingly from the bottom (place them in a shallow tray of water for 10 minutes) to avoid disturbing the delicate seedlings.
When the seedlings reach 1-2 inches tall, transplant them into slightly larger pots (4-5 inches deep) with the same mix. Spruce seedlings grow slowly at first, so don’t rush this step. Keep them in indirect light for the first 2 weeks after transplanting to reduce stress. You’ll see stronger growth when they develop their first true needles (not the initial soft leaves).
⏰ Step 5: Harden Off and Prepare for Outdoors
After 8-10 weeks of indoor growth, your seedlings should be 3-4 inches tall with a sturdy root system. Begin hardening them off by placing them outside in a shaded, sheltered spot for 1-2 hours the first day. Gradually increase their outdoor time over 10-14 days, moving them to sunnier locations each week. This slow acclimation prevents shock—spruce seedlings are sensitive to sudden temperature or light changes.
By the time they’re spending full days outside, they’re ready for their permanent home in the garden. Choose a spot with partial shade (young spruces burn easily in direct sun) and well-draining soil. Plant them in early spring or fall, when temperatures are mild. Water deeply after planting to settle the soil, then reduce watering as they establish roots—overwatering is the #1 killer of young spruces.
Tips & tricks for germinating spruce tree seedlings
These insider strategies will help you navigate the delicate process of nurturing spruce seedlings from seed to sturdy young trees.
Seed Handling Precision: When extracting seeds from spruce cones in Step 1, work in a well-lit area and use a magnifying glass if needed—these seeds are microscopic! I've found that gently tapping cones over a clean white paper towel makes them easier to spot against the dark background. The 2-4 weeks drying period is crucial; if your home is particularly humid, consider placing the bag with cones in a sealed container with a small packet of silica gel to absorb excess moisture.
Cold Stratification Consistency: The 6-week cold stratification in Step 2 mimics winter conditions perfectly, but consistency is key. Place a small thermometer inside the ziplock bag to monitor temperatures—aim for that 35-40°F range. If your fridge runs cooler, you might need to adjust by placing the bag on a shelf closer to the back. The 24-hour room temperature acclimation before planting is what triggers the final germination push, so don't skip this step even if you're eager to plant!
Light Management Strategy: During Step 4, when maintaining your cool 60-65°F growing environment, position your pots near an east-facing window for gentle morning light. If using grow lights, keep them 6-12 inches above the seedlings and run them for 12-14 hours daily. The indirect light requirement is non-negotiable—direct sunlight at this stage can cause the delicate seedlings to dry out or even scorch, setting you back weeks in growth.
Transplanting Technique: When your seedlings reach 1-2 inches in Step 4, handle them with extreme care. Use a small spoon or butter knife to gently lift them from the soil rather than pulling by the stems. The 2-week indirect light period after transplanting is where many growers make mistakes—be patient! This allows the seedlings to adjust to their new pots without shock, setting them up for stronger needle development.
Pro Tips for Spruce Tree Seedling
- These insider strategies will help you navigate the delicate process of nurturing spruce seedlings from seed to sturdy young trees.
- Seed Handling Precision: When extracting seeds from spruce cones in Step 1, work in a well-lit area and use a magnifying glass if needed—these seeds are microscopic!
- Cold Stratification Consistency: The 6-week cold stratification in Step 2 mimics winter conditions perfectly, but consistency is key.
Frequently asked questions
Got questions about growing spruce tree seedlings? You’re not alone! Here are answers to the most common queries to help you nurture healthy, thriving seedlings with confidence.
How do I know if my spruce tree seedling is healthy?
A healthy spruce seedling has vibrant green needles, firm stems, and no signs of yellowing or browning. Check for pests like spider mites or aphids (tiny bugs on needles) and ensure the soil isn’t waterlogged or bone-dry. If needles fall off when touched, it may be stressed or diseased.
Can I plant spruce seedlings year-round, or is there a best time?
The ideal time to plant spruce seedlings is early spring or fall, when temperatures are mild. Avoid extreme heat or frost, as seedlings are sensitive. If planting in summer, water deeply daily and provide shade to prevent stress. Cold-stratified seedlings (like those in this guide) can handle cooler temps better!
Why are my spruce seedlings wilting even after watering?
Wilting can stem from overwatering (root rot) or underwatering. Check the soil—it should stay moist but not soggy. If the pot has no drainage holes, repot immediately. Also, ensure seedlings get 6+ hours of sunlight daily; lack of light weakens stems. Adjust care based on your climate!
Are there faster-growing alternatives to spruce seedlings?
If you want quicker results, consider pre-grown container spruces (1–3 feet tall) or faster-growing evergreens like thuja (Arborvitae) or pine seedlings. However, spruces offer unique needle textures and cold hardiness. For speed, opt for bald cypress seedlings, which grow 2–3 feet per year in ideal conditions.
What pests should I watch for with spruce seedlings?
Common pests include:
- Spider mites: Tiny red/yellow dots on needles (spray with water or neem oil).
- Aphids: Sticky residue on leaves (blow off with water or use insecticidal soap).
- Bagworms: Brown cocoon-like pests (handpick or use Bt spray).
Wrapping up and next steps
Growing spruce tree seedlings from cold-stratified seeds is a rewarding journey that connects you to nature’s resilience! 🌱 With patience and the right techniques—like proper stratification, well-draining soil, and consistent moisture—you’ll soon watch tiny seeds transform into sturdy young trees.
Whether you’re a gardening novice or a seasoned green thumb, this process is totally doable with the right guidance.
Now that you’re equipped with the know-how, it’s time to roll up your sleeves! Start by gathering your supplies, follow the steps, and track your seedlings’ progress.
In just six weeks, you could be celebrating your first sprouts—so why not plant your seeds today and turn your vision into a thriving forest? Happy growing! 🌲✨