
Landscaping
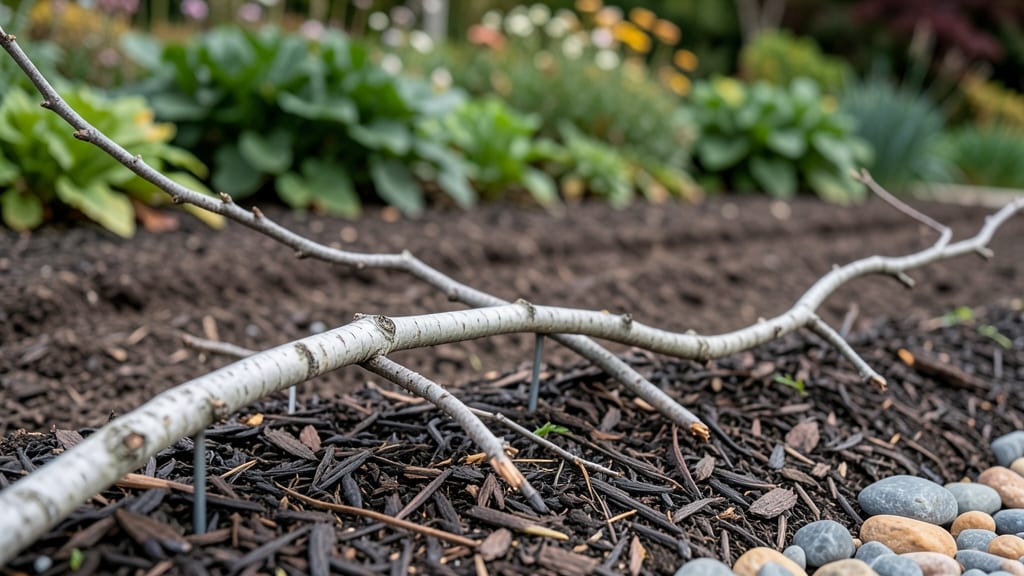
Transform your garden with tree branch garden edging—a rustic, nature-inspired way to define borders while keeping your yard’s organic charm. The best part? You’re using what nature already provides—no store-bought materials needed. Branches add organic texture, soften hard edges, and blend seamlessly with woodland or cottage-style gardens.
Start by collecting branches in winter when trees are dormant—look for straight, sturdy pieces about 1-2 inches thick. Soak them in water for a few days to prevent rot, then let them dry completely before arranging.
You can weave them into simple lines, spiral patterns, or even artistic shapes for a whimsical touch.
This edging lasts years with minimal upkeep: just refresh dried branches every 1-2 seasons. Pair it with mulch or stones for extra definition, and watch how your garden feels like an extension of the forest. Perfect for anyone who loves low-maintenance, high-impact landscaping.
Works in any garden style—from wildflower meadows to modern minimalist plots. The key is letting the branches’ natural shape guide the design. Ready to transform your borders? Let’s get started!
📚 In This Guide
- What you need
- Instructions
- Tips and common mistakes
- Wrapping up and next steps
What you need
- ● Tree branches: 10–20 medium-sized branches (3–6 feet long, 1–3 inches in diameter)
- ● Tip: Choose branches with natural curves for a whimsical look!
- ● Garden gloves: 1 pair (to protect your hands from thorns or rough bark)
- ● Pruning shears or loppers: 1 set (for trimming branches to size)
- ● Post-hole digger or shovel: 1 (for securing stakes)
- ● Concrete or landscape staples: 1 bag (for anchoring branches to stakes)
- ● Stakes or wooden posts: 10–15 (4–6 feet long, ½–1 inch thick)
- ● Twine or zip ties: 1 roll (to bundle branches together)
- ● Measuring tape: 1 (for marking even spacing)
- ● Level or string line: 1 (to ensure a straight or curved border)
- ● Natural twine or jute rope: For a rustic tie-down look instead of staples
- ● Wood stain or sealant: To preserve branches and enhance color (e.g., dark walnut or natural)
- ● Decorative elements: Small solar lights (for evening ambiance)
- ● Moss or ivy (to soften the edges over time)
- ● Knee pads: For comfort during long installation sessions
Step-by-step instructions for creating tree branch garden edging
Transform fallen branches into a natural border that enhances your garden’s organic beauty.
Collect and Prepare Branches
Gather branches that are at least 3-4 feet long and 1-2 inches thick—they should be dry but still sturdy. I prefer branches with natural curves and interesting textures, as they add character to the border. Prune any sharp edges or thorns with pruning shears to make handling safer, especially if you have children or pets.
Clean the branches thoroughly by wiping away dirt, moss, or loose bark with a damp cloth. This ensures they’ll last longer and look more polished. Let them dry completely in a shaded area for 24-48 hours before using. If the branches are fresh-cut, allow them to dry for at least a week to prevent rot or mold once installed.
Mark and Dig the Border Line
Sketch the desired shape of your edging on the ground using a garden hose or spray paint. For a 4-foot border, space the branches about 6-8 inches apart along the line. This creates a cohesive look while allowing flexibility for future adjustments. If your garden has curves, follow the natural flow of the landscape—tree branch edging thrives in organic, irregular designs.
Dig a shallow trench along your marked line, about 2-3 inches deep and 1-2 inches wide. This trench will anchor the branches securely without damaging the roots of nearby plants. Use a spade or edging tool to keep the trench uniform, and remove any rocks or debris that could interfere with placement.
Install the Branches
Place the first branch into the trench at one end, angling it slightly so the bottom rests flat against the soil. Gently press it down until it sits at a 45-degree angle for stability. For a more rustic look, alternate branches with varying thicknesses and lengths—this mimics a natural forest floor and adds visual interest.
Continue placing branches along the trench, overlapping them slightly at the ends to create a seamless transition. If a branch feels unstable, secure it temporarily with landscape staples or a few small nails driven into the soil at the base. Avoid over-tightening, as branches should still allow for slight movement in wind or seasonal shifts.
Secure and Finish the Edging
Once all branches are in place, use landscape fabric or hardware cloth to cover the trench, then backfill it with soil. This stabilizes the branches and prevents erosion. Press the soil firmly around the base of each branch to eliminate gaps, and water lightly to settle everything into place. For extra durability, apply a clear sealant to the branches to protect them from moisture and pests.
Step back and assess the look—if any branches feel out of place, adjust them now. Over time, the branches will weather naturally, blending even more seamlessly into the garden. To maintain the edging, check annually for loose branches and replace any that break down. This low-maintenance border will keep your garden looking effortlessly natural for years.
Tips & tricks for perfect tree branch garden edging
Here's what I've learned to make this project go smoother—and last longer—than ever before.
Branch Selection: Look for branches with natural tapers and interesting bark patterns—they create visual texture that makes your edging look intentional rather than random. Avoid branches with deep cracks or hollow spots, as these can harbor pests or rot more quickly. I also recommend collecting branches from different trees to add subtle color variations that blend beautifully with your garden's palette.
Drying Time: The 24-48 hour drying period is non-negotiable for fresh-cut branches—this prevents mold and ensures the branches won't warp after installation. If you're working with green branches, consider splitting them lengthwise before drying to speed up the process. Place them in a well-ventilated area where they can dry evenly without direct sunlight, which can cause cracking.
Trench Preparation: When digging your 2-3 inch deep trench, pay special attention to the soil consistency. Sandy soil may require slightly deeper trenches for stability, while clay soil can be shallower. I've found that adding a thin layer of coarse sand to the trench bottom improves drainage and prevents future settling that could shift your branches over time.
Seasonal Considerations: Install your edging in early spring or fall when temperatures are moderate. Extreme heat can cause branches to dry out too quickly after installation, while winter installation may require additional securing against wind. If you must install in summer, water the branches lightly after placement to help them acclimate to the heat.
Pro Tips for Tree Branch Garden Edging
- Here's what I've learned to make this project go smoother—and last longer—than ever before.
- Branch Selection: Look for branches with natural tapers and interesting bark patterns—they create visual texture that makes your edging look intentional rather than random.
- Drying Time: The 24-48 hour drying period is non-negotiable for fresh-cut branches—this prevents mold and ensures the branches won't warp after installation.
Frequently asked questions
Got questions about using tree branches for garden edging?
You’re not alone! Here are answers to the most common queries to help you create a stunning, natural border with ease.
What’s the best time of year to install tree branch garden edging?
The ideal time is late fall or early spring when the ground is workable but not frozen. This gives branches time to dry and settle before summer heat or winter freeze-thaw cycles. Avoid installing during wet seasons—moisture can cause rot or mold on untreated wood.
Do I need to treat the branches to prevent rot or pests?
While natural branches can last 1–3 years, treating them extends their lifespan. Apply a non-toxic wood preservative or linseed oil to deter insects and moisture damage. For extra durability, bury the bottom 6 inches in the soil to protect against rot. Pro tip: Avoid pressure-treated wood—it can leach chemicals into your garden.
How deep should I bury the branches for stability?
For a secure edge, bury branches 6–12 inches deep, depending on soil type and branch thickness. Loose or sandy soil may require deeper planting (up to 18 inches) for stability. Use a post-hole digger or shovel to create a trench, then tamp the soil firmly around the base.
Can I use branches from any tree, or are some better than others?
Opt for hardwood branches (like oak, maple, or hickory) for longevity—they resist rot better than softwoods (e.g., pine or willow). Avoid branches with peeling bark, sap, or signs of disease, as these can attract pests. Freshly fallen branches work best; let them dry for 2–4 weeks before installing.
What if my branches lean or look uneven after installation?
Uneven branches happen! Use landscape staples or zip ties to secure wobbly sections to stakes temporarily. For a curved edge, bend branches slightly before planting. If gaps appear, fill them with smaller twigs or mulch. Troubleshoot tip: Trim branches at a 45-degree angle for a cleaner, more natural look.
Are there alternatives if I don’t have access to tree branches?
Try these eco-friendly options:
- Bamboo stakes – Lightweight and biodegradable.
- Recycled plastic lumber – Durable and low-maintenance.
- Straw bales or coir logs – Great for temporary or organic edging.
- Living edges – Plant fast-growing grasses (like switchgrass) for a green border.
Wrapping up and next steps
Transforming your garden with tree branch edging is more than just a landscaping upgrade—it’s a celebration of nature’s raw beauty! This rustic, eco-friendly solution adds charm while requiring minimal effort and cost. Whether you’re drawn to its simplicity, sustainability, or that cozy woodland vibe, your garden will thank you.
Ready to get started? Grab those branches and tools—your dream borders are just a few steps away! 🌿✨