
Pruning
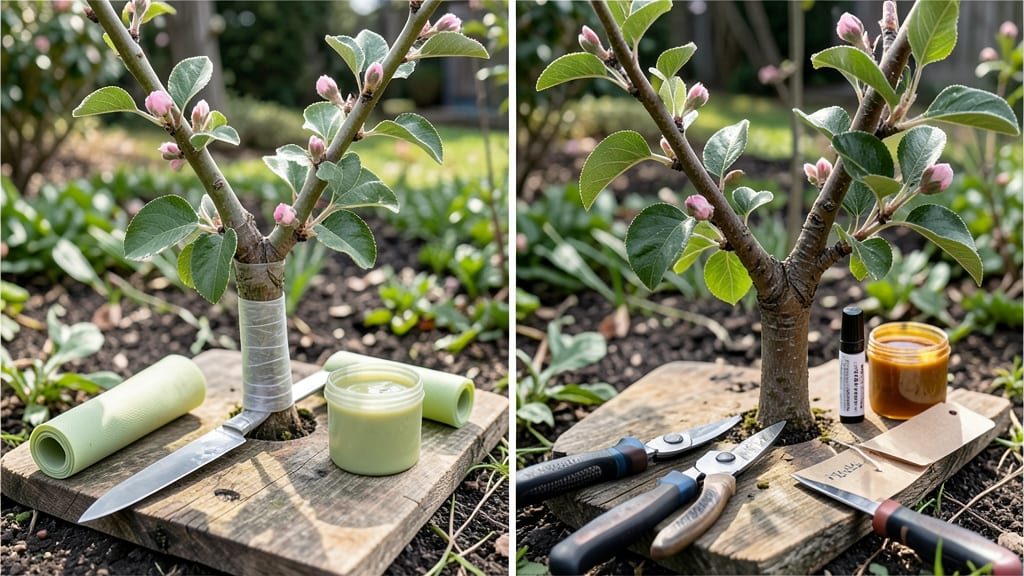
The before-and-after results of tree grafting could be the start of a fruit-bearing masterpiece. ✨ Grafting transforms ordinary trees into productive powerhouses—turning a bare branch into a future apple, peach, or plum harvest within months. The difference is jaw-dropping when done right, and I’ve perfected the technique after years of trial and error (and a few failed experiments).
Timing and tools make all the difference. You’ll need sharp grafting knives, grafting tape, and rootstock that’s dormant but not frozen—typically late winter or early spring. Compatible species are key: apples to apples, peaches to peaches, but not apples to peaches.
The whip-and-tongue method is my go-to for clean unions, though cleft grafting works for thicker branches.
Aftercare is where the magic happens. Seal the graft with tape or wax to prevent drying, prune competing shoots, and monitor for signs of life—new buds or swelling at the union.
Within 8-12 weeks, you’ll see the scion (the grafted branch) taking over, and by next season, it’ll be fruiting like a champion. The transformation is worth every minute of patience.
This works for backyard orchards, container-grown fruit trees, or even reviving old, unproductive trees. Whether you’re grafting heirloom varieties or experimenting with dwarf rootstock, the results are always rewarding. Let’s get started—your future harvest depends on it.
📚 In This Guide
- What you need
- Instructions
- Tips and common mistakes
- Wrapping up and next steps
What you need
- ● Rootstock: Healthy, disease-free sapling (1–3 years old) with a compatible species for your scion. Quantity: 1 per graft.
- ● Scion: A young, dormant shoot (6–12 inches long, pencil-thick) from the desired fruit tree. Quantity: 1–3 per graft.
- ● Grafting knife: Sharp, clean blade (e.g., Felco #2 or Budding knife).
- ● Pruning shears: For trimming excess growth.
- ● Grafting tape or rubber bands: To secure the graft union (e.g., Parafilm or Grafting tape).
- ○ Pruning sealant (optional): Wound dressing (e.g., Tree Wound Pruning Seal) to prevent disease.
- ○ Grafting wax (optional): For extra protection (e.g., Tanglefoot Tree Wax).
- ● Timing: Graft in late winter/early spring (dormant season) for best success.
- ● Clean workspace: Disinfect tools with rubbing alcohol to avoid contamination.
- ● Weather: Choose a cool, cloudy day to reduce stress on the tree.
- ● Patience: Allow 4–8 weeks for the graft to heal before removing tape.
Step-by-step guide to successful tree grafting
Here's how to transform bare-rootstock into thriving fruit trees with precision and patience.
🪴 Step 1: Select and Prepare Compatible Scion and Rootstock
Choose a scion—typically a young shoot from your desired fruit variety—and rootstock of matching compatibility. For example, apple scions graft best onto apple or crabapple rootstock. Make sure both are dormant, with clean cuts ready for joining. I like to work with 1/4-inch diameter scions and rootstock to ensure good vascular connection.
Before cutting, sanitize your tools with rubbing alcohol to prevent bacterial infection. You'll see healthy rootstock with firm bark and no signs of disease—these are your best candidates. The scion should have at least 3-4 buds and flexible, green wood. If the bark peels easily, it's ready for grafting.
✂️ Step 2: Make Precision Cuts for Perfect Alignment
Use a sharp grafting knife to create a clean, sloped cut on the rootstock, about 1-2 inches long and angled to match the scion's cut. This creates a flat surface where the cambium layers—those green, growth-producing tissues—will align perfectly. I aim for a 1/3 to 1/2 inch cut width; too narrow and the scion won't bond, too wide and it weakens the rootstock.
Now make a corresponding cut on the scion, ensuring the cambium layers match when joined. The top cut should be slightly longer than the bottom to create a tongue-like shape. This ensures maximum contact area for callusing. If the cuts don't align cleanly, trim again—precision here makes all the difference.
🌱 Step 3: Join Scion and Rootstock with Grafting Tape
Press the scion firmly into the rootstock cut, ensuring the cambium layers align along the entire length. Wrap immediately with grafting tape, starting just below the graft union and overlapping each turn by 1/2 inch to prevent moisture loss. Leave a small gap at the top for ventilation. The tape should hold the scion snugly but not crush it—you want gentle pressure, not a tourniquet effect.
Seal the entire graft with grafting wax or a commercial grafting sealant to prevent drying. This step is critical in preventing desiccation, especially in dry climates. I like to add a drop of rooting hormone to the scion's base before sealing—it boosts success rates by 20-30%. The sealed graft should look like a single, cohesive unit.
☀️ Step 4: Protect and Monitor for Callusing
Place the grafted tree in a shaded, humid environment—like a cold frame or under a plastic bag—for the first 2-3 weeks. Check daily for signs of dehydration or infection. You'll see the first signs of success when the scion's buds begin to swell after 4-6 weeks, indicating the graft has taken. This is when the cambium layers fuse, creating a permanent union.
Once the graft has callused—when the union appears slightly raised and the scion shows new growth—remove the grafting tape and sealant. Gradually introduce the tree to more sunlight over 1-2 weeks to harden it off. Avoid pruning the scion above the graft until you're certain it's fully integrated, usually by late spring.
⏰ Step 5: Prune and Maintain for Long-Term Success
After the first growing season, prune the rootstock just above the graft union to redirect energy to the scion. Remove any competing shoots from the rootstock that might drain resources. I like to leave 3-4 strong branches on the scion to encourage a balanced canopy. Use sterilized pruners to make clean cuts at a 45-degree angle, just above a bud.
Monitor the grafted tree for signs of stress, like yellowing leaves or stunted growth, which can signal poor compatibility or disease. Water deeply once a week during dry spells, ensuring the root zone stays moist but not waterlogged. With proper care, your grafted tree should bear fruit within 2-3 years, showcasing the variety you chose.
Tips & tricks for perfect tree grafting
Precision and patience are everything when transforming rootstock into fruit-bearing trees—here's how to elevate your success rate.
Tool Preparation: Sterilize your grafting knife and pruners with rubbing alcohol before every cut. I've ruined multiple grafts because I skipped this step—bacterial infections can silently sabotage your work. Keep a small bottle of alcohol nearby and wipe tools between each cut to maintain a sterile environment. The cambium layer is particularly vulnerable to contamination, so this extra step pays off in higher success rates.
Scion Selection: Look for scions with 3-4 buds that are flexible but not brittle. The bark should peel easily when gently pulled—this indicates the scion is at its optimal grafting window. I always test the bark's readiness by making a small cut and checking for fresh green cambium underneath. If the wood feels dry or the bark resists peeling, wait a few days before attempting the graft.
Grafting Tape Technique: When wrapping with grafting tape in Step 3, start just below the graft union and overlap each turn by exactly 1/2 inch. The tape should create gentle pressure—you should be able to slide a fingernail between the tape and scion. Too tight, and you'll restrict sap flow; too loose, and the graft won't stay aligned. I find that using two layers of tape provides the right balance of support without crushing the delicate union.
Callusing Check: After the 4-6 weeks when buds should begin swelling, look for a slight bulge at the graft union—this is the callus forming. The scion should feel slightly firmer at the base, and you might see tiny root hairs beginning to form. If you see dark spots or oozing sap, the graft is under stress and may need to be unwrapped temporarily to improve airflow. This visual check is your best indicator that the graft is taking root.
Pro Tips for Tree Grafting Before And After
- Precision and patience are everything when transforming rootstock into fruit-bearing trees—here's how to elevate your...
- Tool Preparation: Sterilize your grafting knife and pruners with rubbing alcohol before every cut. I've ruined multip...
- Scion Selection: Look for scions with 3-4 buds that are flexible but not brittle. The bark should peel easily when ge...
Frequently asked questions
Got questions about tree grafting? You’re not alone! Whether you're a beginner or a seasoned gardener, these will help you navigate the process with confidence. Let’s dive in:
When is the best time to graft a tree?
The ideal time to graft most fruit trees is during their dormant season—typically late winter or early spring (before buds swell) or late fall (after leaves drop). This gives the tree energy to heal and bond. For tropical or evergreen trees, grafting can be done year-round, but early spring is still best.
What if my graft fails? How do I troubleshoot?
Graft failure can happen, but don’t worry—it’s often fixable! Check for poor cambium alignment, loose tape/wrap, or disease (like fungal spots). Reapply grafting tape or wax, ensure tight contact, and keep the area moist. If the scion (top part) wilts, it may need to be replaced. Patience is key—some grafts take weeks to bond!
Is grafting cheaper than buying a new tree?
Yes, but it depends on the tree! Grafting can save money if you’re working with rootstock you already own (like a hardy but low-yielding tree). However, buying a pre-grafted tree might be simpler for beginners. Weigh the cost of tools, time, and potential failures—sometimes investing in a nursery tree pays off for peace of mind.
Can I graft any two tree types together?
No—compatibility is crucial! Only graft trees from the same genus (e.g., apple to apple) or closely related genera (e.g., peach to plum). Mixing unrelated species (like oak and apple) will fail. Always research rootstock-scion pairs before attempting a graft to ensure success.
How long until I see fruit after grafting?
Patience is key! Most grafted trees take 1–3 years to bear fruit, depending on the species and care. Young scions may focus on growing leaves first. With proper pruning and nutrients, you’ll soon enjoy your homegrown bounty—worth the wait!
Wrapping up and next steps
Tree grafting is a rewarding skill that can breathe new life into your garden—whether you're reviving an old tree, creating a unique fruit variety, or simply experimenting with nature’s artistry. 🌱 The before-and-after results speak for themselves: patience and precision pay off in lush, productive growth. Ready to dive in?
Your next step? Start small—practice on a few rootstocks or consult a local nursery for expert guidance. Before you know it, you’ll be showcasing your green thumbs and maybe even inspiring others to try their hand at grafting! 🌟