
Pruning
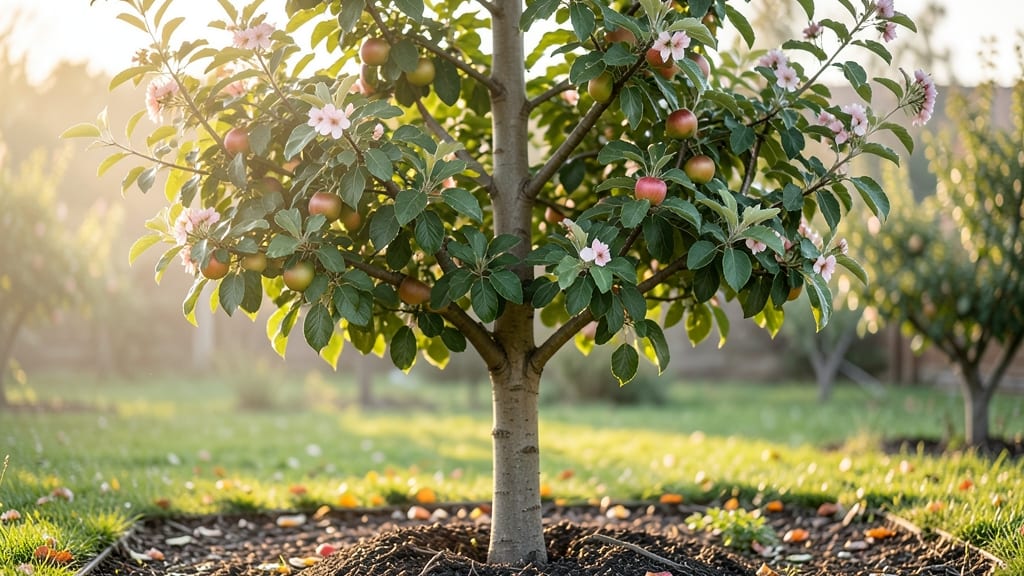
Pruning apple trees with the central leader method transforms a wild, tangled mess into a sturdy, fruit-filled structure that lasts decades. 🌳 I’ve watched my own central leader apple tree go from a scraggly sapling to a productive powerhouse—all because I learned to prune with the tree’s natural growth, not against it.
The magic happens in three simple principles: keeping one strong vertical leader, opening the canopy for sunlight, and removing competing branches before they steal energy from fruit production.
Most gardeners over-prune in winter, but the real work happens in late winter and summer—when you can see where the tree wants to grow.
By summer’s end, you’ll have a tree that supports its own weight with minimal wood, produces fruit along every branch, and resists disease better than a tree that’s been hacked back.
The branches stay thick, the fruit stays accessible, and you avoid the heartbreak of a tree that collapses under its own weight. This method works for dwarf, semi-dwarf, and standard apple trees alike. Here’s how to get started without turning your tree into a disaster zone.
📚 In This Guide
- What you need
- Instructions
- Tips and common mistakes
- Wrapping up and next steps
What you need
- ● Pruning shears: Bypass pruners (sharp, 6–8" blades) for small branches (under ½ inch). Pro tip: 💡 Sanitize blades with rubbing alcohol between cuts to prevent disease!
- ● Loppers: 8–12" long-handled loppers for medium branches (½–2" diameter). Look for ratcheting models for extra leverage.
- ● Pruning saw: Curved-tooth saw (10–12") for thick branches (2"+). Pro tip: 🔥 Always cut away from the trunk to avoid bark damage.
- ● Gloves: Heavy-duty, cut-resistant gloves (e.g., blank">Fellex or blank">Felco brands).
- ● Ladder: Sturdy, extendable ladder (12–16 ft) with non-slip feet. Safety first! 🎯
- ● Disinfectant: 70% isopropyl alcohol or blank">copper fungicide (for sterilizing tools).
- ○ Pruning sealant: Optional but helpful for large wounds (e.g., blank">Tanglefoot Tree Wound Pruning Seal).
- ● Tarp or drop cloth: To collect debris and protect the ground.
- ● Weather: Prune on a dry, cloudy day (avoid frost or extreme heat). Ideal temps: 40–70°F.
- ● Tree health check: Inspect the tree for pests (aphids, mites) or disease (e.g., fire blight). Treat before pruning if needed.
- ● Safety gear: Safety glasses (to shield from debris) and long sleeves/pants.
- ○ Marking tools: Optional: Colored tape or spray paint to mark branches for removal.
- ● Tree growth regulator: Such as blank">Paclobutrazol (to control vigorous growth).
- ● Branch spreaders: For training young limbs (e.g., blank">spreader clips).
- ● Camera/phone: To document the tree’s structure before/after pruning.
- ● Compost bin: For repurposing pruned branches as mulch.
Step-by-Step guide to pruning an apple tree using the central leader method
This method keeps your tree open, healthy, and productive for decades—here’s how to do it right.
🌿 Step 1: Identify the Central Leader and Main Scaffolding Branches
Start by finding your tree’s central leader—the single, strong, upright stem growing from the trunk. This is your tree’s backbone. Look for 3-5 well-spaced scaffold branches (about 4-6 feet apart) growing outward at a 45-60° angle from the trunk. These branches should be at least 1/3 the diameter of the central leader.
If your tree already has competing leaders, you’ll need to prune one back to a strong lateral branch. I always check for dead, crossing, or inward-growing branches first—these are your first cuts. Mark them with a piece of tape if you’re unsure, then remove them completely at the branch collar (the swollen area where the branch meets the trunk).
✂️ Step 2: Prune Back New Growth and Thin the Canopy
During late winter or early spring (before buds swell), remove any water sprouts—those fast-growing, vertical shoots that steal energy from fruit production. Cut these back to a bud facing outward or to a lateral branch. Use clean, sharp pruners to make cuts at a 45° angle, about 1/4 inch above a bud.
Next, thin the canopy by removing 10-20% of the smallest branches inside the tree. This improves airflow and sunlight penetration, which reduces disease and boosts fruit quality. Look for branches that cross or rub against others—these are prime candidates for removal. Always cut back to a healthy bud or lateral branch to encourage outward growth.
☀️ Step 3: Maintain the Central Leader and Balance the Tree
As your tree grows, the central leader should remain the tallest, straightest stem. If side branches start competing for dominance, prune them back to a strong lateral branch or to a bud facing the direction you want growth. Never leave stubs—this invites disease and weak growth.
In summer, lightly prune any branches that grow too vigorously or block sunlight from the center. You can also pinch back the tips of new shoots to encourage bushier growth. The goal is to keep the tree open and balanced, with sunlight reaching all branches. If your tree starts leaning, prune the longer side slightly to encourage upright growth.
⏰ Step 4: Winter Cleanup and Long-Term Maintenance
In late winter, remove any dead, diseased, or damaged wood—this is your tree’s annual reset. Sterilize your pruners with rubbing alcohol between cuts to prevent spreading disease. Prune out old fruitwood (branches that produced fruit last year) to make room for new, vigorous growth.
Every 3-5 years, reassess your tree’s structure. If the central leader weakens or breaks, you may need to convert to a modified central leader system, where you select a strong lateral branch to become the new leader. Keep records of where you prune—this helps track growth patterns over time.
Tips & tricks for perfect apple tree central leader pruning
Here's what I've learned from years of shaping fruit trees—these tricks will help you avoid common mistakes and keep your apple tree thriving.
Branch Angle Matters: When selecting scaffold branches in Step 1, aim for that 45-60° angle from the trunk. This creates the perfect balance between sunlight exposure and structural support. I've seen trees with branches growing straight up or too close to the trunk develop weak crotches that eventually snap under fruit weight. Use a small angle gauge or even a protractor app on your phone to check angles if you're unsure.
Seasonal Timing Secret: The instructions mention late winter/early spring for water sprout removal, but I also do a quick summer check. In summer, look for new growth that's blocking sunlight from reaching the center of the tree. Pinching back these shoots (removing just the tips) encourages bushier growth without the dramatic cuts needed in winter. This keeps your tree balanced throughout the growing season.
Branch Collar Rescue: If you accidentally cut too close to the trunk and damaged the branch collar during Step 1, don't panic. The tree can often recover if you leave the cut alone. The collar contains important healing tissues, so never paint or seal over it—just let nature take its course. I've seen trees regrow new branches from undamaged collar tissue even after seemingly severe cuts.
Long-Term Record Keeping: Start a simple pruning journal right away. Note which branches you remove, their size, and why you pruned them. I use a small notebook with sketches of my tree's structure. After 3-5 years, you'll notice patterns in growth habits that help you make better decisions. This becomes especially valuable when assessing whether to convert to a modified central leader system as mentioned in Step 4.
Pro Tips for Apple Tree Central Leader
- Here's what I've learned from years of shaping fruit trees—these tricks will help you avoid common mistakes and keep ...
- Branch Angle Matters: When selecting scaffold branches in Step 1, aim for that 45-60° angle from the trunk. This crea...
- Seasonal Timing Secret: The instructions mention late winter/early spring for water sprout removal, but I also do a q...
Frequently asked questions
Got questions about mastering the central leader pruning method for your apple tree? You’re not alone! Here are answers to the most common queries to help you prune like a pro and keep your tree thriving.
What’s the best time of year to prune an apple tree using the central leader method?
The ideal time is late winter or early spring (before buds swell) when the tree is dormant. This minimizes stress and disease risk. However, you can also do light pruning in summer to remove water sprouts or dead branches—but avoid heavy cuts then. Pro tip: Never prune in fall (it invites pests and diseases).
How long does it take for an apple tree to recover after central leader pruning?
Recovery depends on the severity of cuts, but most trees bounce back within 2–4 weeks for minor trims. Heavy pruning (like removing large limbs) may take 6–12 months for full regrowth. Focus on 15–25% of the tree’s canopy per year to avoid shocking it. Watch for new growth by late spring—it’s a sign of healing!
Can I use the central leader method on any apple tree variety?
While many standard (non-dwarf) apple trees thrive with central leader pruning, some varieties (like columnar or spindle-bush types) are better suited for other methods. Check your tree’s label or consult a local extension office. Dwarf trees also work well but need more frequent pruning to maintain shape.
What should I do if my apple tree’s central leader dies after pruning?
Don’t panic! If the main trunk or leader dies, select the strongest upward-growing branch (called a water sprout or suckers) and train it as the new leader. Make the transition cut just above a bud at a 45° angle. If no suitable branch exists, you may need to replace the tree—but this is rare with proper pruning.
Is there an alternative pruning method if central leader isn’t working for my tree?
Try the open-center or modified central leader methods for older trees or those with weak leaders. Open-center (used for fruit trees like peaches) removes the central leader entirely, while modified central leader keeps a shorter trunk with multiple scaffold branches. Both encourage better airflow and fruit production.
Wrapping up and next steps
Mastering the apple tree central leader pruning technique is your golden ticket to a thriving orchard—packed with luscious fruit and a stunning, well-balanced shape! 🍏 By understanding seasonal timing, proper cuts, and structural goals, you’re not just pruning; you’re sculpting the future of your tree.
Remember, patience and consistency are key, so don’t rush the process.
Ready to take the next step? Grab your pruners, dust off those gloves, and schedule your first pruning session this season! Whether you’re a beginner or a seasoned gardener, every cut brings you closer to that perfect, productive apple tree. Happy pruning! 🌱✂️