
Container Gardens
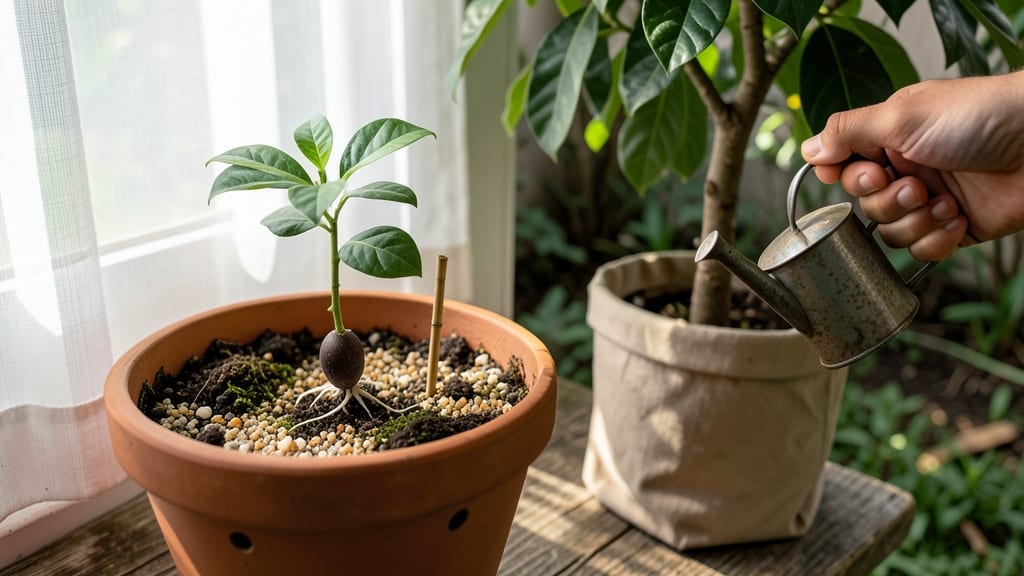
Growing an avocado tree in a container turns your kitchen scrap into a living plant that could bear fruit in 5-10 years. 🌱 The process starts with a single pit—no fancy equipment, just patience and the right care.
I’ve watched mine grow from a sprout to a 3-foot-tall indoor tree, and the best part? It’s forgiving enough for beginners but rewarding enough to keep you hooked.
The secret lies in the details: a well-draining pot, bright indirect light, and a soil mix that mimics tropical conditions. Most people rush germination or underestimate how much space roots need—both mistakes lead to stunted growth.
My tree thrives in a 10-gallon container now, but it started in a simple glass of water. Repotting every 2 years keeps it happy, and pruning encourages fuller growth.
By year 3, you’ll see glossy leaves and maybe even a flower or two—proof the plant is healthy. The real magic happens when you move it outdoors in summer (if you’re in a warm climate), where it soaks up direct sunlight.
Even indoors, it stays lush with the right light and occasional misting. Pests are rare, but watch for spider mites if the air gets too dry.
This isn’t a quick project—think years, not months—but the journey is oddly satisfying. Every new leaf feels like progress, and that first potential fruit? Worth every wait. Whether you keep it as a houseplant or move it outside, the container keeps it manageable. Let’s get that pit growing!
📚 In This Guide
- What you need
- Instructions
- Tips and common mistakes
- Wrapping up and next steps
What you need
- ● Avocado pit – 1 fresh, organic pit (preferably from a Hass avocado for best results) 🥑
- ● Container – 1 large pot (at least 10–12 inches in diameter) with drainage holes
- ● Well-draining potting mix – 2–3 gallons of a lightweight, airy mix (e.g., cactus/succulent blend or 50% potting soil + 50% perlite)
- ● Toothpicks or small skewers – 3–4 (to suspend the pit)
- ● Water – Room-temperature, filtered if possible
- ○ Spray bottle – For misting (optional but helpful for humidity)
- ● Knife or peeler – To clean the pit
- ● Fertilizer – Balanced liquid fertilizer (e.g., 10-10-10) or organic options like fish emulsion
- ● Grow lights or sunny windowsill – If natural light is limited (avocados need 6+ hours of bright light daily)
- ○ Humidity tray or pebbles – Optional, to maintain moisture levels
- ● Pruning shears – For future trimming (once your tree grows!)
Step-by-step instructions for growing an avocado tree in a container
Here's the simple method I use to turn kitchen scraps into a thriving houseplant that might even bear fruit someday.
🌱 Step 1: Prepare the Avocado Pit for Planting
First, wash the avocado pit thoroughly to remove any fruit residue that could rot. I like to use a paper towel to gently scrub away any remaining flesh before rinsing. The key is to keep it clean but not soaked—excess moisture speeds up decomposition.
Next, insert 4-6 toothpicks evenly around the pit, about ½ inch from the top. These will suspend it over water without letting it touch the bottom. This prevents rot while allowing roots to grow downward. Place the pit in a glass or jar with just enough water to cover the bottom ¼ inch—enough to keep it hydrated but not submerged.
💧 Step 2: Create the Right Conditions for Germination
Set your avocado pit in a warm, bright spot where temperatures stay between 65-75°F. A windowsill facing east or west works well, but avoid direct afternoon sun which can overheat the water. Keep the water level constant—add more when it drops below ¼ inch.
Germination can take 2-8 weeks, depending on the pit's freshness. You'll know it's working when you see a small sprout emerging from the top and tiny roots growing downward into the water. I've seen some pits sprout in as little as 10 days, while others take months—patience is key here.
🪴 Step 3: Transplant the Sprouted Pit into Soil
Once your avocado has 2-3 inch long roots and a 1-2 inch sprout, it's ready for soil. Use a 6-8 inch pot with drainage holes and fill it with well-draining potting mix. I like to add a handful of perlite to improve aeration—avocado trees hate soggy roots.
Gently remove the pit from the water, being careful not to damage the roots. Plant it just below the soil line, leaving the top half exposed. Water lightly until moisture seeps out the drainage holes, then let it drain completely. Place the pot in bright, indirect light for the first week to help it adjust.
☀️ Step 4: Care for Your Young Avocado Tree
Keep your avocado tree in a spot with bright, indirect light—think filtered sunlight rather than harsh direct rays. A south-facing window with sheer curtains works well. Rotate the pot ¼ turn weekly so the tree grows straight rather than leaning toward the light.
Water when the top 1-2 inches of soil feel dry to the touch. Avocado trees are drought-tolerant once established, but young plants need consistent moisture. I usually water every 5-7 days, but check the soil first—overwatering is the #1 killer of container-grown avocados.
✂️ Step 5: Prune and Encourage Growth
When your avocado reaches about 12 inches tall, it's time for its first pruning. Pinch off the top set of leaves to encourage bushier growth. This might seem counterintuitive, but it helps the tree develop a stronger structure. Use clean, sharp scissors to make the cut just above a leaf node.
Fertilize every 2 months with a balanced houseplant fertilizer (like 10-10-10) diluted to half strength. Avocado trees are heavy feeders, but too much fertilizer can burn tender roots. Watch for new leaves appearing about 4-6 weeks after fertilizing—that's your sign it's working.
Tips & tricks for growing an avocado tree in a container
These simple tricks will help you turn that kitchen scrap into a thriving houseplant with the best chance of success.
Pit Selection: Choose pits from organic avocados when possible—they're less likely to have been treated with fungicides that can inhibit germination. I've found Hass avocado pits work best, as they're larger and seem to sprout more reliably. If your pit feels heavy for its size, it's a good sign it has more stored energy for growth.
Water Quality Matters: Use filtered or room-temperature water for your germination jar to prevent shock to the developing roots. Tap water often contains chlorine or fluoride that can stress young plants. I change the water every 2-3 days to prevent bacterial growth, even though the instructions say to keep it at ¼ inch—this extra step keeps things fresh.
Germination Environment: The 65-75°F temperature range is ideal, but consistency matters more than exact numbers. If your kitchen gets too cold at night, move the jar to a warmer spot like near a sunny window during the day, then bring it back to a warmer room at night. I've seen germination speed up dramatically when the temperature stays consistently in the 70-75°F range.
Transplant Timing: Don't rush to transplant just because your avocado has roots—wait until you see both 2-3 inch roots AND a 1-2 inch sprout. The roots need to be strong enough to support the growing top. I've had transplants fail when the roots were too short to anchor the plant properly in soil.
Pro Tips for Grow An Avocado Tree In A Container
- These simple tricks will help you turn that kitchen scrap into a thriving houseplant with the best chance of success.
- Pit Selection: Choose pits from organic avocados when possible—they're less likely to have been treated with fungicides that can inhibit germination.
- Water Quality Matters: Use filtered or room-temperature water for your germination jar to prevent shock to the developing roots.
Frequently asked questions
Got questions?
Growing avocados in containers is rewarding but comes with unique challenges. Here are answers to the most common queries to help you succeed!
How long does it take for an avocado tree to bear fruit in a container?
With patience and care, an avocado tree grown from a pit can take 3–13 years to produce fruit in a container. Dwarf varieties (like Wurtz) may fruit sooner, but size and sunlight play a huge role. Focus on nurturing healthy growth first—fruit comes later!
Why is my container-grown avocado tree dropping leaves?
Leaf drop is often caused by overwatering, underwatering, or temperature stress. Check the soil—it should stay slightly moist but never soggy. Also, ensure your tree gets bright, indirect light (avoid harsh sun or drafts). Yellowing leaves? It might be nutrient deficiency—fertilize lightly with citrus-specific food.
Can I grow an avocado tree indoors year-round, or does it need outdoor time?
While possible indoors, avocados thrive with outdoor exposure (6+ hours of sunlight daily). If indoors, place near a south-facing window and supplement with a grow light in winter. Move it outside in spring/summer for optimal growth—just acclimate it gradually to avoid shock!
What’s the best container size for an avocado tree?
Start with a 5-gallon pot for young trees, then upgrade to 15–20 gallons as it matures. Avocados have shallow but wide roots, so choose a wide, shallow container with drainage holes. Avoid tiny pots—they restrict growth and fruit production!
How do I protect my container avocado tree from cold weather?
Avocados are tropical and die in temps below 30°F (-1°C). Move potted trees indoors near a sunny window or use a greenhouse. For outdoor pots, wrap them in bubble wrap or use a frost cloth. If freezing is expected, mulch the soil and avoid watering excessively.
Can I eat fruit from a container-grown avocado tree?
Yes! Homegrown avocados are safe and delicious, but taste and size may vary from store-bought. Container trees often produce smaller fruit (1–2 lbs). To improve quality, pollinate flowers manually (use a small brush) and ensure the tree gets full sun and balanced nutrients.
Wrapping up and next steps
Growing an avocado tree in a container is a rewarding journey that turns kitchen scraps into a thriving tropical plant! With the right pot, soil, sunlight, and care, you’ll enjoy lush foliage—and maybe even fruit—right from your balcony or patio. 🌱✨
Now that you’re armed with tips and troubleshooting advice, why not take the first step today? Grab that avocado pit, follow the steps, and watch your green thumb grow—literally! Share your progress or ask questions in the comments; we’d love to see your container garden come to life.