
Propagation
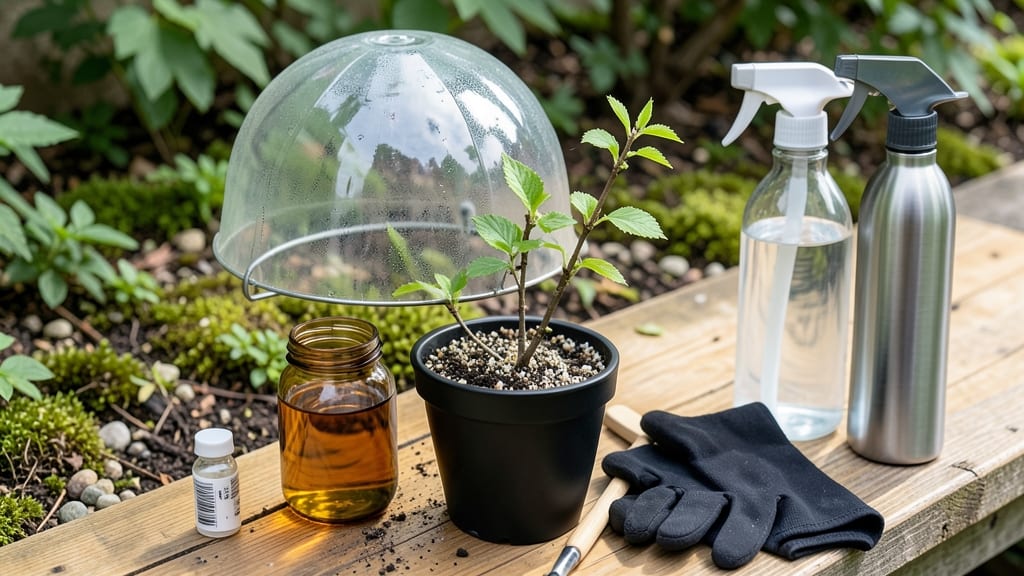
Starting a tree from a clipping feels like magic—especially when you watch roots sprout from what was once just a stem. 🌱 I’ve propagated willows, maples, and even dogwoods this way, and the best part?
You don’t need a green thumb, just patience and the right timing. The secret lies in choosing the right branch, making the perfect cut, and giving it the ideal environment to thrive.
You’ll need sharp pruners, rooting hormone (optional but helpful), a clear jar or small pot, and either water or moist soil. The key is taking cuttings in late spring or early summer when the tree is actively growing—not too soft, not too woody.
A 45-degree angle on the cut maximizes surface area for roots to form, and removing lower leaves keeps energy focused on root growth instead of foliage.
Within 4-8 weeks, you’ll see tiny roots forming in water or soil, though some trees take months. Keep humidity high with a plastic bag or misting, and place your cuttings in bright, indirect light.
The first signs of success? New leaves and roots growing an inch or more—proof your tree is alive and ready to plant outdoors.
Works for willows, maples, and dogwoods, but avoid oaks or pines—they’re tougher to root this way. Even if some fail, you’ll likely get a few sturdy new trees to transplant. Here’s how to do it right the first time.
📚 In This Guide
- What you need
- Instructions
- Tips and common mistakes
- Wrapping up and next steps
What you need
- ● Healthy clipping: A 4–6 inch (10–15 cm) cutting from a non-flowering, semi-hardwood branch (preferably from the current year’s growth). Tip: Use clean, sharp pruners for the best results!
- ○ Roots stimulator (optional but helpful): A small bottle of rooting hormone (powder or gel) to boost root growth.
- ● Water (for water propagation): Room-temperature, filtered or distilled water in a clean glass or jar.
- ● Well-draining soil (for soil propagation): A mix of 50% perlite or sand and 50% potting soil (or a pre-made propagation mix).
- ● Containers: For water: A glass jar or vase with a wide enough opening for the cutting.
- ● For soil: Small pots (3–4 inches in diameter) with drainage holes.
- ● Plastic bag or humidity dome: A clear plastic bag (or a store-bought propagation dome) to retain moisture.
- ● Spray bottle: For misting cuttings and keeping soil moist.
- ● Pruning shears or scissors: Sterilized tools to make clean cuts.
- ● Grow lights or sunny windowsill: A bright, indirect light source (6+ hours of light daily).
- ● Heating mat (for soil propagation): A 70–75°F (21–24°C) mat to speed up rooting.
- ● Label markers: To track which tree is which!
- ● Fertilizer (after rooting): A diluted liquid fertilizer (½ strength) once roots appear.
Step-by-step instructions for growing trees from clippings
Here's how I turn cuttings into thriving trees—no fancy tools, just patience and the right technique.
🌱 Step 1: Select and Prepare the Right Clipping
Choose a healthy, disease-free cutting from the current season's growth—look for stems about ¼ to ½ inch thick and 4-6 inches long. The best time is late spring or early summer when new growth is firm but still flexible. Cut just below a leaf node (that little bump where leaves attach) using clean, sharp scissors or pruners.
Strip all but the top 2-3 leaves—this reduces moisture loss while keeping enough foliage for photosynthesis. Make a clean diagonal cut just above a leaf node at the bottom. If you're rooting in water, trim the bottom at a 45-degree angle to maximize surface area for root growth. Dip the cut end in lukewarm water for 10 minutes to help remove air bubbles that could block root formation.
💧 Step 2: Root in Water or Moist Soil
For water rooting, place the cutting in a clean glass jar filled with 2-3 inches of room-temperature water. Change the water every 2-3 days to prevent bacterial growth. Set the jar in bright, indirect light—direct sun causes algae buildup that can suffocate the cutting. You'll see tiny white roots forming in 3-6 weeks.
For soil rooting, mix equal parts perlite and peat moss (or use a pre-made rooting hormone mix) to create a fast-draining, airy medium. Dip the cut end in rooting hormone powder, then insert the cutting 2 inches deep into the mix. Keep the soil consistently moist but never soggy—stick your finger in to check top inch feels damp. Cover with a clear plastic bag to retain humidity, but remove it daily for 10 minutes to prevent mold.
☀️ Step 3: Provide Ideal Growing Conditions
Place your cuttings in a spot with bright, indirect light—east or west-facing windows work best. Avoid harsh midday sun, which can scorch tender new leaves. Maintain a temperature between 65-75°F; warmer than that speeds up moisture loss, while cooler temps slow root growth. If using water, rotate the jar weekly so the cutting grows straight instead of bending toward the light.
Watch for new growth as your signal everything's working. For water-rooted cuttings, you'll see 2-3 new leaves in 4-8 weeks. For soil-rooted cuttings, gently tug on the stem after 6-8 weeks—if roots resist, they've taken hold. This is the moment to transplant into a small pot with regular potting mix if you're keeping it indoors.
✂️ Step 4: Transplant and Care for New Trees
Once roots reach 2-3 inches long (for water-rooted) or show resistance when tugged (soil-rooted), it's time to plant. For water-rooted cuttings, rinse off any algae from the roots, then plant in a 4-inch pot with well-draining soil. Press the soil gently around the stem to eliminate air pockets. Water lightly until it drains from the bottom.
Keep new trees in bright light but reduce direct sun for 1-2 weeks to help them adjust. Water when the top inch of soil feels dry, but avoid overwatering—this is the #1 killer of young trees. Fertilize lightly with a diluted houseplant fertilizer after 4-6 weeks to encourage strong growth. You'll know you've succeeded when your cutting grows 6-12 inches in its first year.
Tips & tricks for perfect tree rooting from clippings
These simple tricks will help you avoid common mistakes and boost your success rate with every cutting.
Selection Tip: Look for stems that are still slightly flexible but not rubbery—this is your best indicator of healthy, rootable growth. Avoid stems that are woody or have started to harden, as they're less likely to develop roots. I've found that cuttings from the current season's growth (not last year's) root most successfully. Confession: I skipped this step for years and wondered why some cuttings just wouldn't take!
Rooting Secret: When using water rooting, change that 2-3 inches of water every 2-3 days—this prevents bacterial growth that can rot your cutting before roots form. I like to use filtered or distilled water, as tap water minerals can sometimes inhibit root development. For soil rooting, that top inch damp check is crucial—overwatering leads to mold, while underwatering stresses the cutting.
Light Matters: Bright, indirect light is key—think of it as a gentle sunbath, not a tanning session. East-facing windows are ideal, but if you only have south-facing light, place your cuttings 3-4 feet away from the window. I've seen cuttings get sunburned when placed too close to a sunny window, which looks like white, crispy patches on the leaves. Rotate your water jars weekly so your cutting grows straight rather than leaning toward the light.
Transplant Timing: Wait until roots reach 2-3 inches before transplanting—this gives your cutting enough strength to handle the shock of moving. For water-rooted cuttings, gently rinse off any algae before planting, as it can harbor bacteria. I always press the soil gently around the stem to eliminate air pockets, which helps the roots establish contact with the soil immediately. After transplanting, reduce direct sun for 1-2 weeks to help your new tree adjust.
Pro Tips for Start A Tree From A Clipping
- These simple tricks will help you avoid common mistakes and boost your success rate with every cutting.
- Selection Tip: Look for stems that are still slightly flexible but not rubbery—this is your best indicator of healthy, rootable growth.
- Rooting Secret: When using water rooting, change that 2-3 inches of water every 2-3 days—this prevents bacterial growth that can rot your cutting before roots form.
Frequently asked questions
Got questions about propagating a tree from a clipping? You’re not alone! Here are answers to the most common concerns—from timing to troubleshooting—to help you grow roots with confidence.
Can I root any tree clipping, or do some types work better?
Not all trees root easily, but many common varieties—like willow, maple, and dogwood—succeed with the right care. Deciduous trees (leafy, non-evergreen) are your best bet. Avoid evergreens like pine or spruce, as they’re harder to propagate from cuttings. Check your tree’s species for tips!
How long does it take for roots to form in water or soil?
Patience is key! In water, roots may appear in 2–4 weeks, while soil rooting can take 4–12 weeks (sometimes longer). Keep the clipping in a warm, bright spot (but out of direct sun) and change the water every 3–5 days to speed things up.
What’s the best temperature for rooting success?
Aim for a cozy 65–75°F (18–24°C) range—like a sunny windowsill or a heated propagator. Avoid drafts or extreme temps, which can stress the clipping. If your home runs cold, a seedling heat mat (or even a warm spot near a lamp) can give roots a helpful boost.
My clipping is turning brown or mushy—what went wrong?
Brown edges or slimy stems usually mean rot from overwatering, bacteria, or poor air circulation. If rooting in water, trim the base and refresh the water immediately. For soil, ensure it’s well-draining and avoid soggy conditions. Pro tip: Use a rooting hormone to prevent fungal issues!
Can I skip water rooting and go straight to soil?
Soil rooting (like in a perlite/potting mix) often yields stronger roots faster. Dip the clipping in rooting hormone, plant it in moist soil, and cover it with a plastic bag to trap humidity. Just keep the soil lightly damp—not soggy—and mist occasionally for best results.
Wrapping up and next steps
Starting a tree from a clipping is a rewarding journey that combines a little patience, care, and nature’s magic! 🌱 Whether you choose water or soil propagation, the key is consistency—keeping your cutting moist, providing the right light, and giving it time to root.
With these steps, you’re not just growing a plant; you’re nurturing life and adding a personal touch to your green space.
Now that you’re armed with knowledge, why not take the next step? Grab those clippings, set up your propagation station, and watch your green thumb grow stronger. Happy planting—your future tree is waiting! 🌳✨