
How To
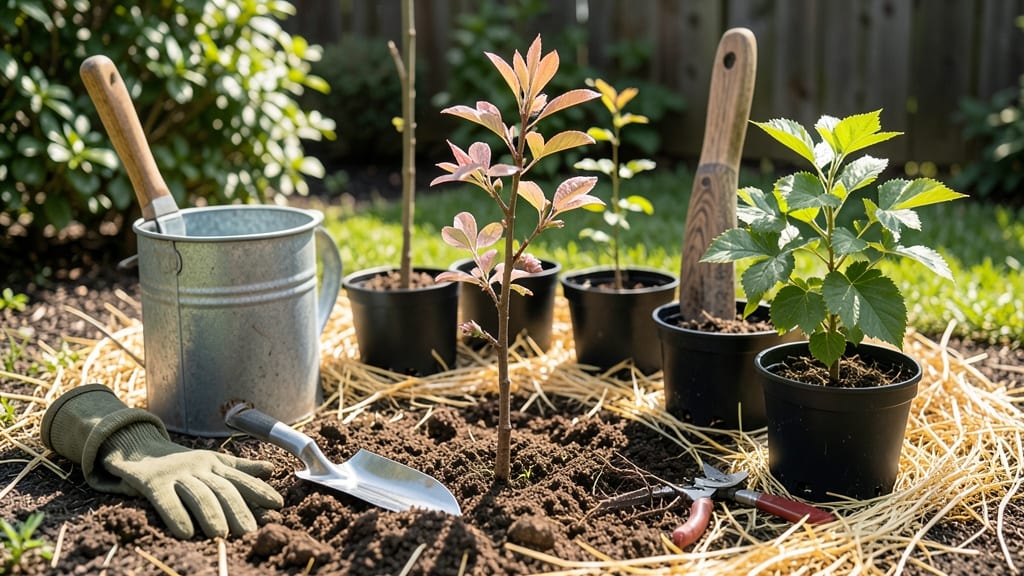
Transplanting tree shoots saves them from root-bound stress and gives them room to grow strong. 🌳 I’ve rescued dozens of stunted saplings this way—once you see how simple it is, you’ll never let a root-bound plant die again.
The key is timing (spring or fall), the right tools, and gentle handling to keep those delicate roots intact.
Start with a shovel, pruners, and a bucket of water. Dig a hole twice as wide as the root ball and loosen the soil at the bottom. Lift the shoot carefully, keeping the root mass together, then place it in the new spot—no deeper than it was before.
Water deeply to settle the soil, and you’re done. Most shoots bounce back in just a few weeks with proper care.
📚 In This Guide
- What you need
- Instructions
- Tips and common mistakes
- Wrapping up and next steps
What you need
- ● Garden trowel or small shovel – A sharp, medium-sized trowel (6–8 inches wide) works best for delicate roots.
- ● Pruning shears or sharp scissors – For trimming roots or shoots if needed (sterilized with rubbing alcohol).
- ● Garden gloves – Heavy-duty gloves (waterproof) to protect your hands from dirt and thorns.
- ● Watering can or hose with a gentle spray nozzle – For hydrating roots before and after transplanting.
- ● Mulch (organic or inorganic) – 2–3 inches of shredded bark, straw, or pine needles to retain moisture.
- ● Transplanting pot or container – Slightly larger than the current root ball (if repotting) or a hole dug in the ground (if planting outdoors).
- ● Well-draining potting mix or garden soil – A blend of topsoil, compost, and perlite (for pots) or native soil amended with compost (for outdoor planting).
- ● Rooting hormone – A gel or powder to boost root growth (especially for woody or slow-rooting species).
- ● Burlap or transplanting fabric – To wrap around root balls if moving large shoots to minimize root disturbance.
- ● Stakes and twine – For supporting tall or top-heavy shoots until they establish.
- ● Soil moisture meter – To check hydration levels post-transplant.
- ● Fertilizer (low-nitrogen, slow-release) – Apply 4–6 weeks after transplanting to avoid shocking the plant.
Step-by-Step instructions for transplanting tree shoots
Here’s how to move young trees without shocking their roots—my go-to method for stress-free transplanting.
🪴 Step 1: Choose the Right Time and Dig Carefully
Transplant tree shoots on a cool, cloudy day—avoid midday heat or frost. Dig around the base with a shovel or spade, keeping the soil attached to the roots like a root ball. I like to go 3-4 inches wider than the shoot’s spread to preserve feeder roots. If the shoot is in a pot, gently squeeze the sides to loosen compacted soil—don’t force it, or you’ll tear roots.
Check for circular roots wrapped tightly around the base. These are a red flag—you’ll need to untangle or trim them to encourage outward growth. Use clean, sharp pruners to make clean cuts if needed. The goal is to disturb as few roots as possible while freeing the shoot completely.
🌱 Step 2: Prepare the New Hole and Handle the Root Ball
Dig a hole twice as wide as the root ball but no deeper—planting too deep suffocates the trunk. Mix the removed soil with compost or aged manure (if available) to enrich it. Place the shoot in the hole so the top of the root ball sits level with the surrounding soil—never bury the trunk higher than it grew before.
Before lowering the shoot, soak the root ball in a bucket of water for 10-15 minutes to hydrate the roots. This helps them recover faster. If the roots are tangled, gently spread them outward as you place the shoot in the hole. Fill the hole halfway with soil, then water deeply to settle everything. This prevents air pockets that can strangle roots.
☀️ Step 3: Backfill, Water, and Provide Support
Fill the hole with soil, pressing lightly to remove air gaps but not compacting too firmly. Create a small watering basin around the base by mounding soil outward—this directs water straight to the roots. Water deeply until moisture reaches 6 inches down, then let the soil drain completely before watering again. Overwatering now causes rot.
Stake the shoot only if it’s taller than 2 feet or in a windy area. Use soft ties (like strips of old T-shirt) to attach the trunk to the stake—never wire, which can girdle the bark. Mulch the base with 2-3 inches of organic mulch, keeping it 6 inches away from the trunk to prevent rot. This retains moisture and regulates soil temperature.
⏰ Step 4: Monitor and Adjust for Recovery
Keep the soil evenly moist for the first 2-3 weeks—water when the top 2 inches feel dry. Avoid fertilizing during this time; new roots need energy to establish, not growth. Watch for wilting or yellowing leaves, which signal stress. If this happens, trim any damaged leaves and shade the shoot with frost cloth if needed.
After 4-6 weeks, the shoot should show new growth—this means the roots have taken hold. Gradually reduce watering as the plant adjusts to its new home. If you see new leaves forming at the top, you’ve succeeded. If growth stalls after 8 weeks, the roots may need more space—consider transplanting again or loosening compacted soil gently.
Tips & tricks for transplanting tree shoots
These simple tricks will help your young trees thrive after transplanting—and avoid the heartbreak of stunted growth.
Timing is Everything: The 10-15 minute root soak in Step 2 is non-negotiable. This short hydration jumpstarts recovery by reviving stressed roots. I've seen shoots wither when skipped—don't skip it! Use a bucket with an inch of water, and let the root ball absorb moisture until the soil feels damp but not soggy. This prepares roots to handle the shock of their new home.
Root Rescue Technique: If you encounter circular roots in Step 1, don't panic. These roots form when plants grow in containers and need to be gently separated. Use your fingers to tease them apart—think of it like untangling headphones. If they're too tight, make clean cuts with sharp pruners at the point where they circle the trunk. This encourages outward root growth instead of suffocating the plant.
Mulching Matters: The 2-3 inches of organic mulch in Step 3 isn't just decoration—it's a moisture regulator and temperature stabilizer. Spread it in a donut shape, keeping it 6 inches away from the trunk to prevent rot. I like to use wood chips or straw because they break down slowly, adding nutrients to the soil over time. This simple layer can mean the difference between a struggling transplant and a thriving one.
Post-Transplant Checklist: After planting, mark your calendar for the 2-3 week watering schedule in Step 4. Use your finger to check moisture—if the top 2 inches feel dry, it's time to water. I've found that morning watering prevents fungal issues, and using a drip irrigation system delivers water right to the roots without wetting the leaves. This consistency is what helps roots establish properly.
Pro Tips for Transplant Tree Shoots
- These simple tricks will help your young trees thrive after transplanting—and avoid the heartbreak of stunted growth.
- Timing is Everything: The 10-15 minute root soak in Step 2 is non-negotiable.
- Root Rescue Technique: If you encounter circular roots in Step 1, don't panic.
Frequently asked questions
Got questions about transplanting tree shoots? You’re not alone! Here are answers to the most common concerns to help you succeed with confidence.
When is the best time to transplant tree shoots?
The ideal time is early spring or fall when temperatures are mild and the tree isn’t actively growing. Avoid extreme heat or frost—root systems are most resilient during these transitional seasons. For container-grown shoots, you can transplant anytime if they’re root-bound, but spring gives them the best head start for recovery.
Can I transplant tree shoots in summer?
Summer transplanting is riskier because of heat stress and drought. If you must do it, choose early morning or late evening, keep the root ball moist, and provide shade for a few weeks. Young shoots or small trees handle summer moves better than mature ones. Always prioritize watering and mulching to support recovery.
What if my tree shoot looks stressed after transplanting?
Stress is normal! Watch for wilting, yellowing leaves, or slow growth—these are signs the tree is adjusting. To help, water deeply but infrequently (avoid soggy soil), trim any damaged roots or branches, and apply a balanced fertilizer 4–6 weeks post-transplant. Most trees bounce back within 2–4 weeks with proper care.
Do I need to prune roots before transplanting?
Only prune roots if the root ball is severely root-bound (circling or tightly packed). Use clean, sharp shears to trim 10–20% of the roots around the edges, focusing on thick, gnarled roots. Avoid over-pruning—healthy roots are your tree’s lifeline. Water thoroughly after pruning to reduce shock.
What’s the best way to tell if a tree shoot is root-bound?
Check for these signs: roots circling the pot, growing out of drainage holes, or a root ball that falls apart easily when removed. Gently loosen the soil—if roots are dense and tangled, it’s time to transplant. Root-bound shoots often show slower growth or leaf yellowing due to limited nutrients.
Can I transplant tree shoots into the ground or should I keep them in pots?
It depends on the tree’s size and type! Small shoots or young trees thrive in pots for 1–2 years before planting. Larger root-bound shoots can go straight into the ground if the soil is well-draining and the climate suits the species. For container plants, choose pots 1–2 sizes larger than the current one and use quality potting mix.
Wrapping up and next steps
Transplanting tree shoots may seem daunting, but with the right tools, patience, and care, you can give your young trees a thriving new home. Remember, the key is gentle handling, proper root care, and choosing the ideal season—spring or early fall—for the best results. 🌱
Now that you’re armed with knowledge, roll up your sleeves and get growing! Start small—practice with a few shoots first to build confidence. Soon, you’ll be nurturing a lush, healthy garden with trees that stand tall for years to come. Happy planting! 🌳✨