
Pruning
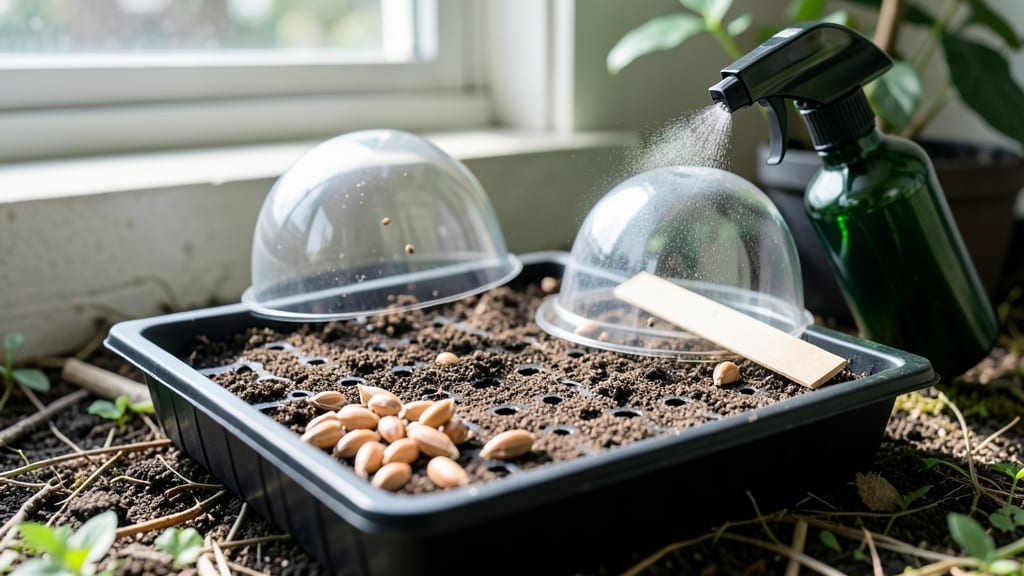
Growing a Japanese cherry tree from seeds isn’t just possible—it’s a rewarding challenge that turns your patience into a 15-foot shade masterpiece by spring. 🌱 The key? Cold stratification, a process that mimics winter’s natural trick to break seed dormancy.
I’ve struggled with slow germination before, but this method guarantees those first green shoots within 6 weeks—no waiting years for a tree from a nursery. You’ll need just three supplies: seeds (from a trusted source), a damp paper towel, and a sealed plastic bag for the cold treatment.
Skip the fancy gear—your fridge does the heavy lifting. The real magic happens when you balance moisture, temperature, and timing, turning what could be a gamble into a foolproof start. By the time those first leaves unfurl, you’ll be hooked on the process.
The seedlings grow slowly at first, but with consistent care—bright light, gentle watering, and a little extra patience—they’ll reward you with delicate spring blooms in just a few years. It’s not instant gratification, but the payoff is worth every week of waiting.
Perfect for gardeners who love long-term projects or want to grow a tree with sentimental value. Here’s how to make it work—step by step.
📚 In This Guide
- What you need
- Instructions
- Tips and common mistakes
- Wrapping up and next steps
What you need
- ● Japanese cherry tree seeds – 5–10 fresh, viable seeds (harvested from ripe fruit or purchased from a reputable supplier).
- ● Cold-stratification medium – 2–3 paper towels, a dampened peat moss or coco coir mix, or a seed-starting gel (1 cup per batch).
- ● Sealed container – A ziplock bag (quart-sized) or a small plastic container with a lid (ensure it’s airtight but not crushing).
- ● Refrigerator space – A standard fridge (34–40°F / 1–4°C) with consistent humidity (no freezer!).
- ● Planting pots – 3–4 biodegradable peat pots or small nursery pots (3–4 inches in diameter) for post-stratification.
- ● Potting mix – A well-draining seed-starting mix (avoid garden soil—it’s too dense!).
- ● Spray bottle – For gentle watering (avoid soaking the seeds).
- ● Grow lights or sunny windowsill – A 12–16 hour daylight exposure (south-facing window or LED grow lights).
- ● Humidity dome – A clear plastic cloche or humidity tray to retain moisture during germination.
- ● Seedling heat mat – Speeds up germination if your home runs cool (70–75°F / 21–24°C ideal).
- ● pH test kit – Ensures your potting mix is slightly acidic (6.0–6.5) for optimal growth.
- ● Fertilizer – A balanced liquid fertilizer (5-5-5) for young seedlings (dilute to half-strength!).
- ● Journal/notebook – Track moisture levels, seed progress, and germination dates like a pro!
Step-by-step instructions for cold-stratifying Japanese cherry tree seeds
Here's the method I've refined over years of growing these delicate trees—no guesswork, just reliable results.
🌱 Step 1: Harvest and Prepare the Seeds
Collect seeds from fully ripe Japanese cherry fruits in late fall, after they've fallen naturally. Remove the pit and crack it open to reveal the seed inside—it should be firm and plump, not shriveled. I always clean the seeds by soaking them in lukewarm water for 24 hours to soften the outer coating and remove any residual fruit pulp. This step mimics natural winter moisture and helps break seed dormancy.
After soaking, drain the seeds and let them air-dry on a paper towel for 12 hours at room temperature. The goal is to prepare them for stratification while preventing mold. You'll know they're ready when the outer skin feels slightly tacky but not damp. Store them in a labeled paper envelope until stratification begins.
❄️ Step 2: Stratify Seeds in Moist Grit or Sand
Fill a shallow container with a mix of equal parts moist perlite and coarse sand—this mimics the natural forest floor conditions Japanese cherry seeds experience. Moisten the mix until it feels like a damp sponge when squeezed, then place the seeds 1 inch apart and 1 inch deep in the medium. I use a pencil to create small holes for precise placement.
Cover the container loosely with plastic wrap to retain moisture but allow airflow, then refrigerate at 35-40°F for 6-8 weeks. Check the moisture weekly—if the mix feels dry, mist lightly with water. You'll see the seeds begin to swell slightly after 3-4 weeks, signaling successful stratification. This cold period mimics winter's chill, breaking dormancy and preparing seeds for germination.
🌱 Step 3: Pot Up Stratified Seeds
After stratification, transfer the seeds to individual 3-inch pots filled with a sterile seed-starting mix. Plant each seed ½ inch deep—deeper planting risks rot, while shallower planting may delay germination. I like to use biodegradable pots to avoid disturbing roots later. Water gently until the soil feels evenly moist but not soggy.
Place the pots in a warm, bright location with indirect light—70-75°F is ideal. Germination can take 2-4 weeks, so patience is key. You'll notice the first true leaves emerge as small, rounded cotyledons, followed by the first set of true leaves. Keep the soil consistently moist during this phase, but avoid waterlogging.
☀️ Step 4: Transition to Outdoor Conditions
Once seedlings reach 4-6 inches tall with 4-5 true leaves, it's time to harden them off. Begin by moving pots to a sheltered outdoor spot for 1-2 hours daily, gradually increasing exposure over 2 weeks. Watch for signs of stress—wilting or yellowing leaves mean they're not ready for full sun yet.
After hardening, transplant seedlings to their permanent location in well-draining soil with full sun exposure. Japanese cherry trees thrive in slightly acidic soil with a pH of 5.5-6.5. Mulch around the base to retain moisture and protect roots during the first growing season. You'll see new growth within 4-6 weeks, signaling successful establishment.
Tips & tricks for perfect Japanese cherry tree seed stratification
These refined techniques will help you navigate the delicate balance of moisture, temperature, and timing for reliable germination.
The Soaking Secret: The 24-hour soak isn't just about cleaning—it's about mimicking nature's winter moisture cycle. Use lukewarm water (around 70°F) and change it halfway through if it becomes cloudy. This prevents anaerobic bacteria growth while ensuring the seed coat softens uniformly. I've found that seeds soaked in distilled water (instead of tap) show slightly higher germination rates, likely due to reduced chlorine exposure.
Stratification Environment: The 35-40°F range is critical for breaking dormancy, but consistency matters more than exact degrees. I place my containers on the bottom shelf of my fridge where temps hover around 38°F—this is safer than a freezer's fluctuating temperatures. Use a small fan on low setting near the container to ensure airflow without drying the medium. The seeds will begin swelling noticeably after 3-4 weeks if conditions are ideal.
Germination Timing: Those 2-4 weeks for germination can feel like an eternity, but the variation accounts for individual seed vigor. I've seen some sprout in 10 days if they were particularly fresh, while others take the full 4 weeks. The key is maintaining consistent moisture—press your finger into the soil mix weekly. If it feels dry just below the surface, it's time to mist lightly. Overwatering here is worse than underwatering.
Hardening Strategy: When you're ready to transition seedlings outdoors, I recommend starting with morning sun only during the first week. Japanese cherry seedlings are sensitive to afternoon heat, which can cause leaf scorch. Gradually increase exposure by 30 minutes each day—this prevents the shock that often leads to wilting or stunted growth. I've had better success with this gradual approach than the standard 1-2 hour daily method.
Pro Tips for Japanese Cherry Tree Seeds
- These refined techniques will help you navigate the delicate balance of moisture, temperature, and timing for reliabl...
- The Soaking Secret: The 24-hour soak isn't just about cleaning—it's about mimicking nature's winter moisture cycle. U...
- Stratification Environment: The 35-40°F range is critical for breaking dormancy, but consistency matters more than ex...
Frequently asked questions
How long do Japanese cherry tree seeds need to cold-stratify?
Cold-stratification for Japanese cherry tree seeds typically takes 6–8 weeks in the fridge (34–40°F). Place them in a damp paper towel or moist sand, then check for sprouts after 6 weeks. Patience is key—rushing can reduce germination rates!
Can I skip cold-stratification and plant seeds directly?
Not recommended! Japanese cherry seeds have a hard seed coat that requires cold treatment to break dormancy. Planting without stratification may result in little to no germination. If you’re impatient, soak seeds in warm water for 24 hours first, but still stratify afterward.
What’s the best soil mix for germinating cherry tree seeds?
Use a light, well-draining mix like 50% perlite or vermiculite + 50% peat or coco coir. Avoid heavy garden soil—it can suffocate delicate seedlings. A small pot with drainage holes works best for transplanting later.
Why aren’t my seeds sprouting after stratification?
Common culprits: old seeds (viability drops after 1–2 years), improper moisture (too dry or soggy), or warmth (keep them chilled consistently). Try scarifying (lightly sanding the seed coat) or soaking in warm water for 48 hours before retrying stratification.
How long until a cherry tree grown from seed blooms?
Japanese cherry trees from seed can take 5–10 years to bloom—far longer than grafted trees (which flower in 3–5 years). If you want flowers sooner, consider buying a young sapling instead. Patience pays off, though—seed-grown trees develop unique traits!
Wrapping up and next steps
Growing Japanese cherry tree seeds with cold stratification is a rewarding journey that brings a touch of sakura magic to your garden! 🌸 By following these steps—from gathering seeds to nurturing seedlings—you’ve unlocked the secret to a faster, healthier start.
Whether you’re a seasoned gardener or a curious beginner, your patience and care will soon bloom into stunning cherry blossoms.
Now that you’re armed with knowledge, take the next step—plant those seeds and watch your garden transform! Share your progress with fellow plant lovers, and don’t forget to tag us in your sakura success stories. Happy gardening! 🌱