
Pruning
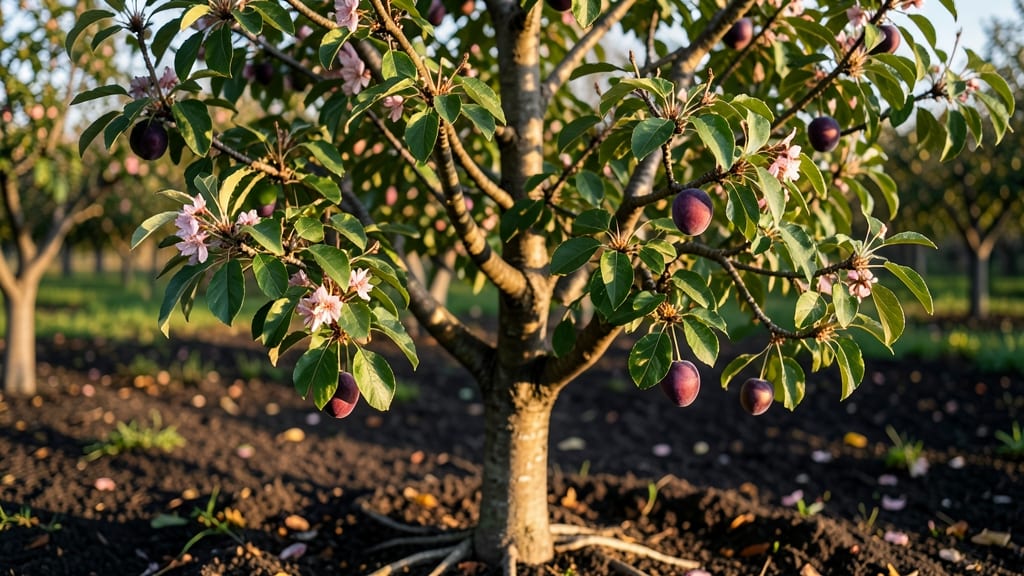
Plum trees turn your backyard into a fruit orchard with just a little patience and the right cuts. 🌿 I planted my first plum tree three years ago, and now it produces enough fruit to share with neighbors—all thanks to understanding how pruning shapes fruit production.
The secret isn't just cutting branches; it's knowing when and why to make those cuts to maximize harvests.
Start with the right variety for your climate—European plums thrive in cooler zones, while Japanese varieties handle heat better. Plant in full sun with well-draining soil, and water deeply once established.
The key to fruit production lies in pruning: open the center of the tree for airflow, remove dead wood, and thin crowded branches. I learned the hard way that skipping this step leads to smaller, fewer fruits.
With proper care, your plum tree will reward you with juicy fruit from late summer through fall. The first year might be sparse, but by year three, you'll have bushels of plums ready for jam, fresh eating, or sharing.
The smell of ripe plums in late August is worth every pruning session.
This method works for both young trees and mature ones needing a refresh. Whether you're growing in containers or full ground, the principles stay the same. Let's get those branches shaped for maximum harvests!
📚 In This Guide
- What you need
- Instructions
- Tips and common mistakes
- Wrapping up and next steps
What you need
- ● Pruning shears – Sharp, bypass-style shears (for cuts up to ½ inch thick). Quantity: 1 pair.
- ● Loppers – Heavy-duty, long-handled for thicker branches (up to 2 inches). Quantity: 1 pair.
- ● Pruning saw – For large branches (2+ inches). Quantity: 1.
- ● Gloves – Thick, cut-resistant gloves to protect hands from thorns and sharp tools.
- ● Disinfectant – 70% isopropyl alcohol or a 10% bleach solution to sterilize tools between cuts.
- ○ Pruning sealant – Optional but helpful for sealing larger wounds (e.g., tree wound paint).
- ● Ladder or step stool – For reaching higher branches safely. Height: At least 10–12 feet.
- ● Knowledge of plum tree varieties – Research whether your tree is Japanese, European, or American to tailor pruning timing and techniques.
- ● Weather check – Prune on a dry, calm day (avoid rain or wind). Best time: Late winter/early spring (dormant season).
- ● Safety gear – Safety glasses (to protect from debris) and sturdy footwear.
- ● Compost bin or trash bag – For disposing of pruned branches (disease-free ones can be composted).
- ○ Tree growth regulator (optional) – Products like dormant oil to protect against pests before bud break.
- ○ Marking spray (optional) – Fluorescent paint to mark branches for removal (helps with visibility).
Step-by-step guide to pruning and harvesting plum trees for year-round fruit
Here’s how I keep my plum trees producing fruit reliably—even in winter—with pruning techniques that boost yield and health.
✂️ Step 1: Prune for Airflow and Light in Late Winter
Start pruning 3-4 weeks before your last frost date while the tree is still dormant. Remove dead, diseased, or crossing branches first—these compete with healthy growth and invite pests. Cut just outside the branch collar (the swollen area where the branch meets the trunk) to prevent wounds from healing improperly.
Next, thin out 25% of the total branches to open the canopy. Focus on branches growing inward or rubbing against others—these create weak spots and limit sunlight penetration. A well-pruned tree lets air circulate freely, reducing humidity and fungal risks like brown rot. You’ll see stronger new growth by early spring as the tree redirects energy to fruit production.
☀️ Step 2: Thin Fruit in Early Spring for Larger Harvests
When plum blossoms appear (usually 3-4 weeks after last frost), thin clusters so each branch holds 6-8 fruit per shoot. Remove smaller or misshapen plums first—they’ll drain the tree’s energy. Use clean, sharp pruners to avoid crushing stems. This step might seem harsh, but it ensures bigger, sweeter fruit and prevents branches from breaking under weight.
Watch for fruit set (when tiny plums form after pollination). If your tree is heavy with fruit, thin again 2-3 weeks later to maintain the 6-8-per-shoot ratio. Overloaded branches often snap in summer storms, wasting your harvest.
🌿 Step 3: Summer Pruning to Encourage Next Year’s Fruit
After harvest, inspect the tree for suckers (shoots growing from the base) and water sprouts (vertical shoots with no fruit). Remove these aggressively—they sap energy from fruit-bearing branches. Prune lightly in mid-summer (around July) to shape the tree and encourage next year’s blossoms.
Look for new growth near last year’s fruit clusters. These areas will produce next season’s blooms, so avoid heavy pruning here. Instead, trim just enough to improve airflow. You’ll notice fewer leaves but more robust branches by fall—a sign the tree is focusing energy on structure, not just foliage.
⏰ Step 4: Winter Care to Protect Fruit Buds
Before hard frosts, wrap the tree trunk with tree guard (if in a cold climate) to prevent sunscald. In USDA Zones 5-7, cover young trees with burlap or frost cloth during extreme cold snaps (below 15°F). This protects dormant buds without trapping moisture, which causes rot.
Remove covers gradually on sunny days to avoid shocking the tree. Check for dormant bud swell in late winter—this is your cue that the tree is waking up. If buds appear shriveled or blackened, prune those branches immediately to prevent disease spread. Healthy buds mean better fruit set come spring.
🍑 Step 5: Harvest at Peak Ripeness for Best Flavor
Plums ripen unevenly, so check every 2-3 days starting 2-3 weeks after color deepens. Gently twist a plum—if it detaches with a slight pop, it’s ready. Avoid pulling too hard; you’ll damage the branch. Harvest early in the morning when sugars are highest and temperatures are cool.
Leave 10-15% of the fruit on the tree if you want seeds for next year’s crop. Store plums at room temperature for 1-2 days to soften, then refrigerate. You’ll taste the difference: plums harvested at peak ripeness stay juicy for 2 weeks in the fridge, while underripe ones spoil faster.
Tips & tricks for perfect year-round plum tree fruit
These simple secrets will help you maximize your plum harvest and keep your trees thriving through every season.
Timing is Everything: The 3-4 week window before your last frost is your golden opportunity for late winter pruning. Check your local frost date calendar—pruning too early can stimulate new growth that won't survive cold snaps, while waiting too long risks spring pests. I always mark my calendar with highlighters to avoid missing this critical window. The dormant season is when trees heal cleanest, so take advantage of that natural resilience.
Branch Selection Strategy: When thinning those 25% of branches in Step 1, prioritize branches that are growing inward or crossing others. These aren't just space hogs—they create perfect conditions for fungal diseases like brown rot by trapping moisture. Look for branches that form a "V" shape when viewed from above; these are your keepers as they allow maximum sunlight penetration to the center of the tree. Think of it like creating a tree-shaped skylight for your fruit.
Fruit Thinning Visual Cues: That 6-8 fruit per shoot guideline in Step 2 can be tricky to visualize. Here's my trick: after blossoms appear, look for clusters where you can see sunlight reaching the center. Those are your keepers. For the ones you remove, look for fruit that's noticeably smaller than its neighbors—these are the energy vampires that will leave your tree exhausted. The goal is to leave enough space between fruit that air can circulate freely, which prevents those dreaded summer rots.
Winter Protection Pro Tip: When covering young trees below 15°F, leave the bottom few inches uncovered. This prevents moisture buildup at the soil line where rot organisms love to party. I've seen too many trees lose their buds to winter rot because they were completely wrapped like burritos. Also, secure your frost cloth with stakes—not just weights—which prevents it from blowing off in wind storms and exposing your tree to sudden temperature swings.
Pro Tips for Plum Tree Fruit
- These simple secrets will help you maximize your plum harvest and keep your trees thriving through every season.
- Timing is Everything: The 3-4 week window before your last frost is your golden opportunity for late winter pruning.
- Branch Selection Strategy: When thinning those 25% of branches in Step 1, prioritize branches that are growing inward or crossing others.
Frequently asked questions
Got questions about growing, harvesting, or caring for your plum tree fruit? Here are some of the most common queries—and their answers—to help you master year-round plum perfection!
When is the best time to prune a plum tree for maximum fruit?
The ideal time to prune a plum tree is late winter or early spring (just before buds swell but before new growth starts). This timing ensures healthy regrowth and prevents disease spread. Avoid pruning in fall—it can leave wounds vulnerable to pests and fungal infections. For European plums, prune after harvest if needed, but Japanese plums thrive with winter pruning.
How do I know when plums are ripe and ready to pick?
Ripe plums are easy to pluck (they detach with gentle tugging), have a deep, rich color (varies by variety—purple, red, or yellow), and yield slightly to pressure. Avoid picking when unripe—they won’t sweeten off the tree! For storage, harvest when firm but fully colored. Pro tip: Smell the stem—ripe plums often release a fragrant aroma.
Why are my plum tree leaves turning yellow, and what can I do?
Yellow leaves on a plum tree usually signal nutrient deficiencies (like iron or nitrogen), overwatering, or disease (e.g., bacterial leaf spot). Check soil moisture—plums prefer well-draining soil. For deficiencies, apply a balanced fertilizer in early spring. If disease is suspected, prune infected branches immediately and treat with copper fungicide. Prevention tip: Space trees properly for airflow!
Can I grow plums in containers, or do they need a yard?
Yes! Dwarf plum varieties (like ‘Santa Rosa’ or ‘Methley’) thrive in large containers (at least 20-gallon pots) with well-draining soil. Place them in full sun and ensure the container has drainage holes. Container-grown plums may produce smaller fruit but are perfect for patios or small gardens. Pollination note: You’ll need two trees for cross-pollination unless you choose a self-pollinating variety.
What’s the best way to prune plum trees to encourage more fruit?
Focus on open-center pruning to improve airflow and sunlight penetration:
- Remove dead/diseased wood first (cut back to healthy tissue).
- Thin out crossing branches to reduce rubbing.
- Prune suckers (vigorous shoots at the base) to redirect energy to fruit production.
- Shorten overly long branches by 1/3 to promote bushier growth.
After pruning, sanitize tools with rubbing alcohol to prevent disease spread. Bonus: Prune at a 45-degree angle just above an outward-facing bud for best results.
Wrapping up and next steps
Growing a thriving plum tree with a year-round harvest is totally within reach—even for beginners! 🌱 With the right pruning techniques, seasonal care, and a little patience, you’ll enjoy juicy plums for years to come. Remember, consistent maintenance is key, whether you’re shaping young branches or managing pests.
Ready to take the next step? Start small:
- Pick one plum variety that suits your climate.
- Grab your pruners and schedule your first trim this season!
- Join a local gardening group for shared tips and inspiration.