
Pruning
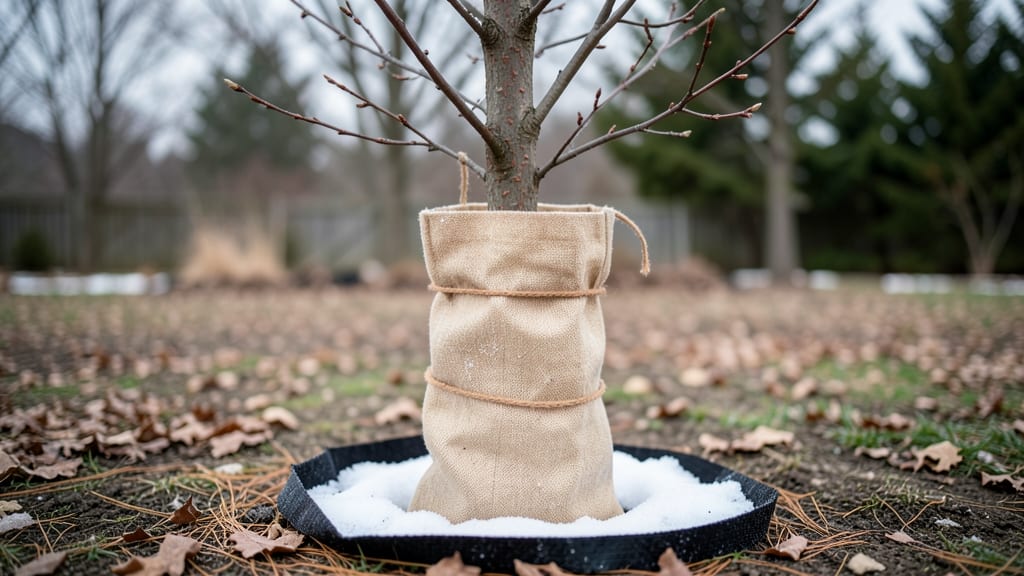
Winter can strip bark off tender trees in a single freeze-thaw cycle. 🌳 Tree bags create a windproof barrier that saves your frost-sensitive plants from sun scald and frost cracks—something I learned the hard way when my young apple tree lost a strip of bark last January.
The right wrap keeps temperatures stable, prevents drying winds, and gives young trees their best shot at surviving winter.
You’ll need breathable burlap (not plastic—it traps moisture and causes rot), tree wrap (like the stretchy kind you can find at garden centers), or even old bedsheets in a pinch. Measure the trunk height before applying, and overlap edges by 2 inches to seal out drafts.
For extra protection, add a layer of reflective bubble wrap on the sunny side—it reflects heat back onto the bark.
By spring, you’ll see healthy, unscratched bark ready for new growth. The bags also prevent animals from chewing on tender bark, which is a bonus I didn’t expect.
Just remember to remove them as soon as buds swell in early spring—leaving them on too long can trap heat and cause new problems.
Works for young fruit trees, tender evergreens, and even newly planted shade trees. Here’s how to do it right the first time—no guesswork, just protection.
📚 In This Guide
- What you need
- Instructions
- Tips and common mistakes
- Wrapping up and next steps
What you need
- ● Tree bags (breathable frost cloth or burlap): Quantity: 1 per plant (or pair for larger trees)
- ● Size: At least 2–3 feet taller than the plant + extra for anchoring
- ● Material: 15–30 lb test burlap or frost cloth rated for -20°F to -30°F
- ● Staple gun + 1/4" staples: For securing bags tightly (avoid plastic staples—they can damage bark).
- ● Twine or zip ties: To reinforce bag closures or anchor edges.
- ● Scissors or utility knife: For trimming bags to size.
- ● Measuring tape: To ensure proper bag dimensions.
- ● Plastic wrap or clear plastic: Layer over burlap for extra cold protection (remove during thaw!).
- ● Rocks or bricks: Weigh down bag edges to prevent wind lift.
- ● Spray adhesive: Temporarily secure loose edges before stapling.
- ● Markers: Label bags if protecting multiple varieties (e.g., "Azalea – Remove 3/15").
- ● ✅ Dry weather: Avoid installing bags if rain/snow is forecasted (moisture = mold risk).
- ● ✅ Pruned plants: Remove dead/diseased branches before bagging.
- ● ✅ Sturdy ladder: For reaching tall trees (safety first!).
Step-by-step instructions for protecting frost-tender plants with tree bags
Here's how I shield frost-sensitive trees and shrubs from winter's harshest elements.
🪴 Step 1: Choose the Right Tree Bags for Your Plants
Select breathable tree bags made from burlap or frost cloth—never plastic, which traps moisture and causes rot. I prefer 30-inch diameter bags for small trees and 48-inch bags for larger specimens. Check the label for cold resistance ratings: 10°F to 20°F works for most frost-tender plants like citrus, figs, and young fruit trees.
Measure your plant's trunk and canopy width before buying. Bags should extend 12-18 inches beyond the plant's spread on all sides. For plants taller than the bag, wrap the top edge tightly with twine to prevent wind from catching and tearing the fabric. I always buy a few extra bags—you'll need them for next winter's pruning or unexpected late frosts.
✂️ Step 2: Prepare Plants Before Wrapping
Prune dead or weak branches first—remove anything that could tear the bag or harbor pests. I cut back leggy growth by 25% to encourage a bushier shape, which holds up better under snow. Avoid heavy pruning now; you're shaping, not renovating. Water the plant deeply 2-3 days before wrapping to ensure roots are hydrated but not soggy.
Shake off any remaining leaves or debris from the branches. A clean plant lets the bag fit snugly without gaps where cold air can sneak in. If your plant has thorns or sharp branches, wear gloves—you don't want to snag the fabric when handling it later. This is also a good time to apply a dormant oil spray if you're dealing with pests like scale or mites.
🌿 Step 3: Secure the Tree Bags Properly
Start wrapping from the bottom, leaving the top open until the last step. Pull the bag down over the plant, ensuring it covers the entire canopy and trunk. For small plants, one bag usually suffices. For larger ones, overlap two bags seam-to-seam and secure with plastic zip ties or soft twine—never wire, which can cut into bark.
Tuck the bottom edge into the soil at the drip line to block cold air from creeping underneath. If your plant has a thick trunk, fold the bag's bottom edge inward to create a snug fit. Leave the top open until you're ready to secure it—this prevents trapped heat from building up during the day. I always check for gaps where light can peek through; even small holes let in damaging cold drafts.
💧 Step 4: Finalize and Monitor Through Winter
Once the bag is in place, fold the top edge over and secure it tightly with twine or zip ties. This creates a sealed barrier that traps warmth while still allowing airflow. For extra protection, add a layer of straw mulch around the base, extending out 12 inches beyond the bag. This helps insulate the roots and prevents frost from seeping upward.
Check your wrapped plants every 2-3 weeks to ensure the bag hasn't shifted or torn. If heavy snow accumulates, gently brush it off to prevent branches from breaking. In late winter, before new growth appears, remove the bags on a warm, dry day—this gradual transition prevents shock. I keep a few bags on hand year-round; you'll always need them for unexpected late frosts or early springs.
Tips & tricks for perfect winter plant protection
These practical strategies will help you shield your frost-tender plants like a pro—without the common mistakes that leave them vulnerable.
Material Matters: The 10°F to 20°F cold resistance rating on tree bags is non-negotiable for plants like citrus and figs. I've learned the hard way—plastic bags trap moisture and cause rot, even if they seem cheaper. Look for burlap or frost cloth with that specific rating, and always check the label. The extra few dollars now saves you from losing a prized plant later.
Size and Fit: Measure your plant's canopy width before buying bags—those 12-18 inches of extra coverage beyond the spread make all the difference. I once wrapped a young citrus tree with a bag that was too tight, leaving gaps where cold air sneaked in. For plants taller than the bag, secure the top edge with twine like you're tying a package—this prevents wind from catching and tearing the fabric during storms.
Pre-Winter Prep: That 25% pruning of leggy growth in Step 2 isn't just about aesthetics—it creates a bushier shape that holds up better under snow weight. I also make sure to water deeply 2-3 days before wrapping. This ensures roots are hydrated but not soggy, which helps the plant handle the stress of being wrapped. Don't skip this step, even if your plants look healthy.
Monitoring Strategy: The 2-3 week check-ins in Step 4 aren't just about looking—you're actually creating a winter maintenance routine. I keep a small notebook by my garden tools to mark inspection dates. If you notice any shifting or tears, address them immediately. A small repair now prevents a full winter of inadequate protection. And remember, those gaps where light peeks through? Even small ones let in damaging cold drafts.
Pro Tips for Tree Bags For Winter
- These practical strategies will help you shield your frost-tender plants like a pro—without the common mistakes that leave them vulnerable.
- Material Matters: The 10°F to 20°F cold resistance rating on tree bags is non-negotiable for plants like citrus and figs.
- Size and Fit: Measure your plant's canopy width before buying bags—those 12-18 inches of extra coverage beyond the spread make all the difference.
Frequently asked questions
Got questions about protecting your plants with tree bags for winter? You’re not alone! Here are answers to the most common concerns to help you prep like a pro.
When is the best time to apply tree bags for winter?
Apply tree bags before the first hard frost hits—typically in late fall (October–November, depending on your climate). If winter arrives early, don’t wait! Even a light frost can damage tender plants like hydrangeas or azaleas. Pro tip: Check your local frost date and bag plants 2–3 weeks ahead.
How long should I leave tree bags on my plants?
Remove tree bags in early spring (March–April) once the threat of frost has passed. Leave them on too long, and you risk trapping moisture, which can lead to rot or fungal issues. Test the time: If daytime temps consistently stay above 40°F (4°C) for a week, it’s safe to uncover your plants!
Are tree bags reusable, or should I buy new ones each year?
Yes! High-quality tree bags (like burlap or breathable fabric) can last multiple seasons if stored properly. Clean them after use to remove debris, fold them flat, and store in a dry place. Budget hack: Reuse old burlap sacks or even lightweight frost cloths as a DIY alternative.
Will tree bags attract pests like mice or insects?
Not if you choose the right material! Opt for breathable, mesh-like bags (like those made for fruit trees) to prevent moisture buildup, which deters pests. Avoid plastic—it traps humidity and can attract critters. Extra defense: Sprinkle cedar chips or diatomaceous earth around the base before bagging for added pest control.
What if my plant outgrows its tree bag mid-winter?
No stress! If your plant (like a young tree or shrub) grows too tall for its bag, trim the excess or secure the bag loosely with twine. For larger plants, consider overlapping multiple bags or using a tree wrap instead. Safety first: Never leave gaps—animals might sneak in and gnaw on bark!
Wrapping up and next steps
Protecting your frost-tender plants with tree bags for winter is a simple yet effective way to safeguard their health and ensure a vibrant spring rebirth. 🌱 By following the right steps—choosing the right materials, proper installation, and timely removal—you’re giving your plants the best chance to thrive.
Now that you’re armed with the knowledge, why not take action today? Grab your supplies, gather the family, and give your garden the winter care it deserves!
🌟 Ready for Next Steps?
- Check your garden’s needs and shop for tree bags now.
- Tag a friend who loves gardening—teamwork makes the season brighter! 🌿