
Planting
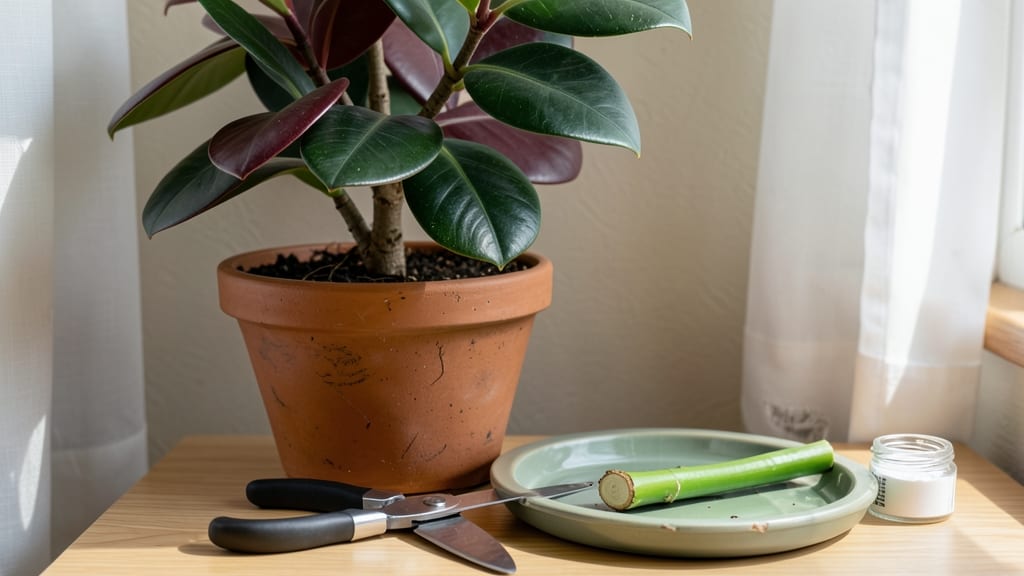
Precision trimming your rubber tree plant isn't just about shaping—it's how you get that bushier, fuller look without sacrificing health. 🌿 I've learned the hard way that cutting too much or at the wrong time can shock these resilient plants, but the right approach turns them into lush, multi-stemmed statement pieces.
The key lies in understanding where to cut, when to do it, and how to encourage new growth from those leafless stems.
You'll need just a few simple tools: sharp pruners (clean and sterilized), rooting hormone (optional but helpful), and small pots with well-draining soil mix. Timing matters too—spring and summer are ideal, when the plant is actively growing.
The magic happens when you cut just above a leaf node, where new shoots will emerge. It's not rocket science, but there are a few tricks to maximize success and avoid common pitfalls that leave your plant looking stressed.
What you'll end up with is a rubber tree that looks intentionally designed, not just randomly pruned. Those bare stems become the perfect canvas for fresh new leaves, and with proper care, your cuttings will root and grow into full-sized plants.
The best part? You're essentially creating free backups of your favorite plant. Just be patient—rooting can take 4-8 weeks, and the first few leaves might be small, but they'll grow.
This method works for both indoor rubber trees and outdoor varieties, though indoor plants respond faster to consistent humidity. Whether you're shaping a single stem or encouraging a full bush, these steps will give you professional-looking results without the professional price tag.
Ready to transform those leggy stems into something spectacular?
📚 In This Guide
- What you need
- Instructions
- Tips and common mistakes
- Wrapping up and next steps
What you need
- ● Sharp bypass pruning shears – Clean, sterilized, and with a 2-4 inch blade (for smaller branches).
- ● Pruning saw – For thicker stems (½ inch or larger) (avoid dull blades!).
- ● Rubbing alcohol (70% or higher) – 1 small bottle (4 oz) for sterilizing tools.
- ○ Pruning sealant (optional but helpful) – Like tree wound dressing or beeswax (½ oz tube).
- ● Garden gloves – Nitrile or latex-free (to avoid latex allergy reactions).
- ● Disposable pruning bags or bucket – For collecting cuttings (1-2 gallon capacity).
- ○ Rooting hormone (optional) – Powder or gel form (1 small jar).
- ● Small trowel or knife – For cleaning up debris around the base.
- ● Hand lens or magnifying glass – For inspecting cuts up close.
- ● Spray bottle with water – To mist cuttings and prevent drying.
- ● Plant food (balanced fertilizer) – Diluted solution (e.g., 10-10-10) for post-pruning care.
- ● Disinfectant wipes – For quick tool cleaning between cuts.
Instructions for cutting a rubber tree plant
Here's how to trim your rubber plant like a pro for thicker stems and lush foliage.
🌿 Step 1: Gather Your Tools and Assess the Plant
Start by sharpening a clean, sterilized pruning shears or knife—dull tools crush stems and invite disease. I like to wipe the blades with rubbing alcohol before cutting to prevent any bacterial transfer between branches. Examine your rubber plant for the tallest stems first; these are your priority for trimming.
Look for stems that have grown 6-12 inches taller than the others—these will give you the best bushier growth when cut back. Avoid trimming more than one-third of the plant's height in a single session, or you'll shock the plant and stunt its recovery.
✂️ Step 2: Make Clean Cuts at the Right Spots
Find the leaf node—that's the small bump where a leaf attaches to the stem—about ½ inch below where you want the new growth to start. Make your cut just above this node at a 45-degree angle to allow water to run off and prevent rot. If you're cutting a leggy stem, you can trim it all the way back to a lower node to encourage branching.
I always cut just above a leaf node rather than in the middle of a stem. This ensures the plant knows exactly where to send new growth energy. For thicker stems, use your pruners; for delicate new shoots, a sharp knife works better to avoid tearing the bark.
🌱 Step 3: Encourage New Growth After Trimming
After cutting, place your rubber plant in bright, indirect light—direct sun can scorch new growth while it's vulnerable. Water the plant lightly right after pruning to help it recover, but don't overdo it. The soil should stay slightly moist but not soggy for the first 2-3 weeks post-trimming.
You'll notice small bumps forming at the nodes where you cut within 1-2 weeks. These are the buds that will grow into new branches. If you see yellowing leaves, it's a sign of too much water or stress—reduce watering slightly and increase humidity with a pebble tray if needed.
☀️ Step 4: Rotate and Maintain for Even Growth
Turn your plant a quarter turn every few days so all sides get equal light exposure. This prevents the plant from leaning toward the window and keeps growth balanced. You'll see new shoots emerging from the nodes within 4-6 weeks, and these will develop into full branches over time.
Continue regular care with moderate watering (when the top 1-2 inches of soil feel dry) and weekly wipe-downs of the leaves to remove dust. Avoid fertilizing immediately after pruning—wait until new growth appears before adding nutrients to support the plant's recovery.
Tips & tricks for perfect rubber tree plant trimming
Here's what nobody tells you about getting that perfect bushy look without stressing your plant.
Tool Prep Matters: I learned this the hard way after ruining three stems—sterilizing your tools isn't just about hygiene, it's about preventing infections that can kill new growth. After cutting, wipe your blades with rubbing alcohol between each stem to avoid transferring sap that can cause rot. For stubborn sap buildup, keep a small brush handy to clean between cuts. This might seem excessive, but trust me, your plant will thank you.
The Node Secret: That little bump where leaves attach isn't just decoration—it's where all the magic happens. When you make your cut just above a node at a 45-degree angle, you're telling the plant exactly where to focus its energy. I always double-check by running my finger along the stem to find the highest viable node before cutting. This simple step can mean the difference between sparse new growth and a full, bushy plant.
Light Aftercare: After trimming, your plant's new growth is like a newborn—delicate and sensitive. Bright indirect light is your best friend here. I keep mine about 3 feet from an east-facing window where it gets morning sun but avoids harsh afternoon rays. If you notice leaves curling or turning yellow, it's a sign you've got too much direct sun. A sheer curtain can help diffuse the light if needed.
Watering Wisdom: The first 2-3 weeks after pruning are critical for recovery. I've made the mistake of overwatering during this time, thinking the plant needed extra hydration. Instead, keep the soil slightly moist but never soggy—think of it like a damp sponge rather than a wet one. You'll know you're doing it right when you see those telltale bumps forming at the nodes within 1-2 weeks.
Pro Tips for Cutting A Rubber Tree Plant
- Here's what nobody tells you about getting that perfect bushy look without stressing your plant.
- Tool Prep Matters: I learned this the hard way after ruining three stems—sterilizing your tools isn't just about hygiene, it's about preventing infections that can kill new growth.
- The Node Secret: That little bump where leaves attach isn't just decoration—it's where all the magic happens.
Frequently asked questions
Got questions about cutting your rubber tree plant? You’re not alone!
Here are some of the most common concerns—and their answers—to help you trim with confidence.
When is the best time to cut a rubber tree plant?
The ideal time to prune a rubber tree is in early spring (just before new growth begins) or late summer. Avoid heavy pruning in winter, as the plant is dormant. Light shaping can be done year-round, but major cuts should wait for active growth to minimize stress.
How much can I cut off a rubber tree without harming it?
Rubber trees are resilient, but avoid removing more than 25-30% of the foliage in a single session. Focus on shaping rather than drastic reductions. Over-pruning can weaken the plant, stunt growth, or even kill it. If you’re unsure, start with small cuts and observe the plant’s response.
What should I do if my rubber tree starts bleeding sap after cutting?
Sap bleeding is normal and harmless! The latex sap may ooze from cuts, but it’s a sign the tree is healthy. To minimize mess, wear gloves and use a sharp, sterile tool. Let the sap dry naturally—no need to seal the cuts unless they’re large (use beeswax or pruning sealant if concerned).
Can I propagate my rubber tree from cuttings?
Rubber trees root easily from stem cuttings. Take 4-6 inch sections from healthy branches, let them dry for a day, then dip in rooting hormone before planting in well-draining soil. Keep the soil moist and place in bright, indirect light. Roots should form in 4-8 weeks.
What if my rubber tree doesn’t grow bushier after pruning?
If your rubber tree isn’t filling out, check these factors:
- Light: Ensure it gets bright, indirect light (direct sun can scorch leaves).
- Water: Keep soil consistently moist but not soggy.
- Fertilizer: Use a balanced, water-soluble fertilizer every 2-3 months during growing season.
- Patience: New growth takes time—wait 4-6 weeks to see results.
Wrapping up and next steps
Cutting your rubber tree plant doesn’t have to be intimidating—with the right tools, timing, and technique, you’ll encourage healthier, bushier growth while keeping your plant thriving. Remember, precision matters: clean cuts, proper spacing, and seasonal awareness are your best friends.
Whether you're pruning for shape, size, or latex yield, confidence comes with practice!
Ready to take the next step? Start small—try trimming just a few branches this season and observe how your rubber tree responds. Over time, you’ll master the art of cutting like a pro! 🌿✂️