
Pruning
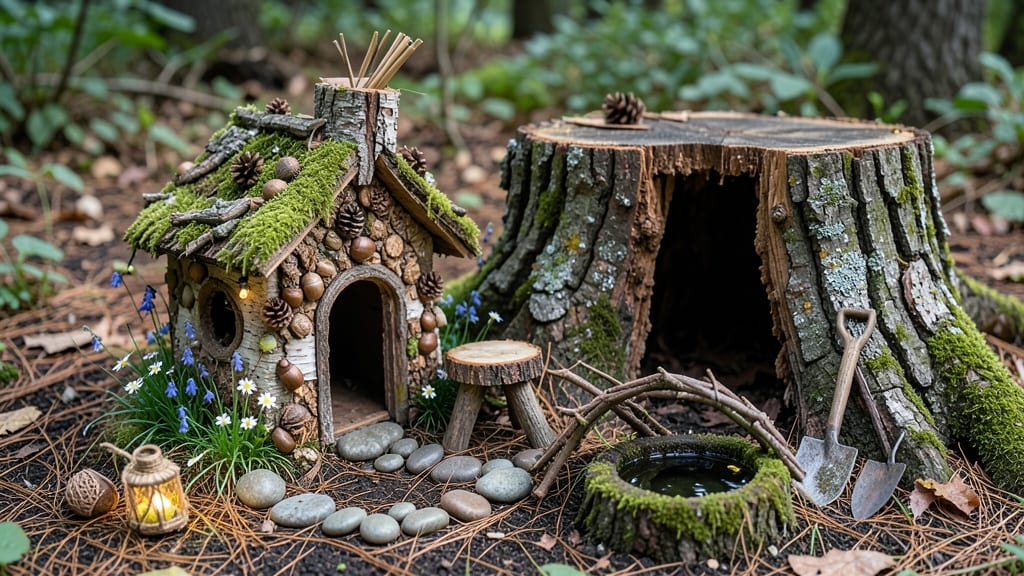
Creating a fairy house out of a tree stump turns decaying wood into enchanting mini-dwellings by etching tiny doorways, arched windows, and miniature furniture using precision carving tools or simple hand tools. Keep the stump’s rustic texture intact while adding whimsical touches like moss-covered roofs or twig-lined pathways for an authentic fairy garden retreat.
Turning a tree stump into a fairy abode lets you blend nature’s imperfections with magical craftsmanship. 🌿 The key is choosing a stump with natural hollows or soft spots—these become the foundation for your fairy’s home.
I’ve found that weathered stumps with cracks already provide built-in architectural details, like built-in shelves or hidden storage spaces. Start with a whittling knife for delicate carvings, then refine with sandpaper to smooth edges while preserving the wood’s natural grain.
The magic happens in the details: a single acorn can become a door handle, and pebbles make perfect stepping stones for your fairy’s front path.
For extra charm, consider adding bioluminescent moss or tiny LED lights to create a glowing interior—just be sure to seal the wood first with non-toxic varnish. The goal is to make it look like the fairies have been living there for centuries, not like it was just built.
Whether you’re using power tools for precision or keeping it rustic with hand-carved features, the result is a one-of-a-kind garden centerpiece that tells a story.
💡 In This Article
- How to Select and Prepare Tree Stumps for Fairy Houses
- Miniature Carving and Decorating Ideas for Tree Stump Fairy Homes
How to select and prepare tree stumps for fairy houses
The best stumps for fairy houses are those with natural hollows, soft rot, or existing cracks—these features become the foundation for your fairy’s architectural details. Look for stumps that are partially decayed (but not completely crumbly) as the softer wood carves more easily while still holding its shape.
A stump with a diameter of 12-24 inches provides ample space for multiple rooms or a single grand structure, while smaller stumps work well for single-room cottages or hidden nooks.
Before carving, assess the stump’s structural integrity by gently probing for weak spots with a screwdriver—these areas will be perfect for built-in shelves or secret doors. Sand the surface with 80-grit to 220-grit sandpaper to smooth rough edges while preserving the wood’s natural grain patterns, which add texture and authenticity.
For extra durability, seal the stump with a non-toxic, water-based polyurethane (like AFM Safecoat) to protect against moisture while allowing the wood to breathe—this step is crucial for outdoor stumps that’ll face rain and sun.
Preserving natural textures is key to achieving that "lived-in" fairy aesthetic. Leave some bark patches intact for a rustic look, or use a whittling knife to create subtle grooves that mimic weathering.
If you’re working with a stump that’s too smooth, lightly distress the surface with steel wool or a wire brush to add character. The goal is to make it look like the fairies have been shaping this home for decades, not like it was just built yesterday.
For stumps that need extra stability, consider adding a wooden base or securing them to a larger stump with hidden brackets—this prevents wobbling while keeping the fairy house’s foundation invisible.
If your stump has a particularly deep hollow, line it with moss or small pebbles to create a cozy interior floor. The preparation phase is where you set the stage for the magic—every crack, knot, or hollow becomes a potential feature in your fairy’s world.
Lighting plays a surprising role in preparation too. If you’re planning to add LED lights for a glowing effect, pre-drill holes for wiring before sealing the stump. Use solar-powered fairy lights or battery-operated LEDs to avoid visible cords, and place them strategically to mimic candlelight or firefly glows.
The contrast between the stump’s natural tones and the soft illumination creates a dreamy atmosphere that’s pure fairy-tale magic.
Finally, consider the stump’s location in your garden. Place it near existing foliage for a seamless blend, or position it where it’ll catch morning sunlight to enhance the fairy-tale glow. The preparation phase isn’t just about woodworking—it’s about creating a habitat that feels alive and inviting to tiny visitors.