
Planting
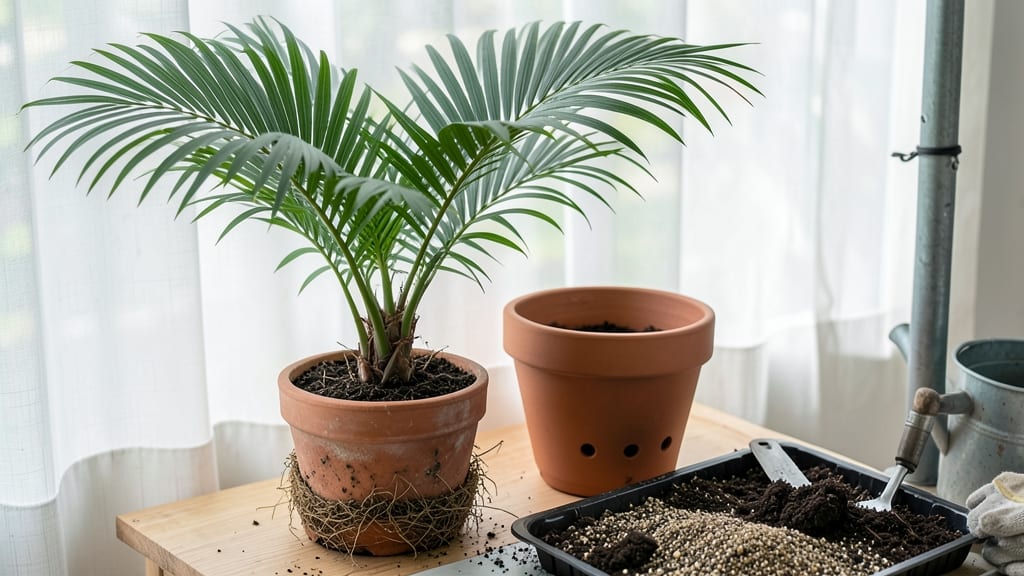
Repotting a palm tree plant feels like giving it a fresh start—when done right, it wakes up roots and fuels faster growth. 🌿 My first attempt ended with brown fronds after I ignored the drainage warnings, but now I’ve got a foolproof system that keeps palms happy through the transition.
Start with the right pot: 2-4 inches wider than the current one, with drainage holes—palms hate soggy roots. Use a well-draining mix (cactus/succulent blend works) and avoid compacting soil around the roots. The key is gentleness: tease apart tangled roots with your fingers, never force them.
After repotting, keep your palm in bright, indirect light and mist the fronds daily for a week. Water lightly—only when the top inch of soil feels dry—to avoid shocking the roots. Within a month, you’ll see new growth signaling success.
This works for indoor palms like parlor palms or arecas, and outdoor varieties too. The secret? Patience and proper prep—skip the shortcuts, and your palm will thank you with lush, vibrant fronds.
📚 In This Guide
- What you need
- Instructions
- Tips and common mistakes
- Wrapping up and next steps
What you need
- ● New pot: 1-2 inches larger in diameter than the current pot (e.g., if your palm is in a 12-inch pot, upgrade to 14-16 inches).
- ● Depth: At least 6–12 inches deeper than the root ball (palm trees love room to stretch!).
- ● Material: Terracotta (breathable, great for drainage) or plastic (lighter, retains moisture). Avoid glazed pots—roots need to breathe!
- ● Well-draining potting mix: 50% palm-specific mix (or a blend of peat moss, perlite, and sand for DIYers).
- ● 20-30% orchid bark or coconut coir (for aeration).
- ● 20% compost or worm castings (for nutrients).
- ● Avoid: Garden soil (too dense) or mixes with high clay content.
- ● Tools for the job: 1 hand trowel (for digging and layering soil).
- ● 1 pruning shears or sharp knife (sterilized with rubbing alcohol).
- ● 1 garden hose or watering can (with a gentle spray nozzle).
- ● 1 gloves (palm fronds can be spiky—protect your hands!).
- ● 1 plate or tray (to catch soil runoff).
- ● 1 root stimulator (like Mycorrhizal fungi or seaweed extract—mix into the bottom 2 inches of soil for a growth boost).
- ● 1 moisture meter (to check soil hydration post-repotting).
- ● 1 palm fertilizer (slow-release, low-salt formula—apply 4-6 weeks after repotting).
- ● 1 pot saucer or drip tray (to catch excess water and protect surfaces).
- ● 1 spray bottle with water (for misting fronds if your palm looks stressed post-move).
Step-by-Step instructions for repotting a palm tree plant
Palms hate root disturbance, but with the right approach, repotting can refresh their growth and keep them thriving for years.
🪴 Step 1: Choose the Right Pot and Timing
Select a pot 2-4 inches larger in diameter than the current one—palms grow best when slightly root-bound. Terra cotta pots work well because they allow moisture to evaporate, preventing soggy roots. I always repot in early spring before new growth begins, when the plant is most resilient.
Check the drainage holes—if they’re clogged with old soil, clean them with a wire or drill new ones. Place a 1-inch layer of fresh potting mix at the bottom of the new pot to create a cushion for the roots. This prevents them from sitting directly on the drainage hole, which can cause rot.
🌿 Step 2: Gently Remove the Palm and Inspect the Roots
Water the palm 24 hours before repotting to reduce stress. This helps the roots slide out more easily without breaking. Grasp the base of the plant firmly and tip it sideways while gently pulling upward. If the roots are tightly bound, run a knife around the edge of the pot to loosen the root ball.
Inspect the roots for dark, mushy, or tangled growth—these are signs of rot or overcrowding. Trim any damaged roots with sterilized pruning shears, but leave healthy, white or light tan roots intact. Real talk: If you see more roots than soil in the current pot, it’s definitely time to repot.
💧 Step 3: Repot and Adjust the Soil Level
Place the palm in the new pot and fill the sides with fresh palm-specific potting mix, pressing lightly to eliminate air pockets. The soil line should sit 1 inch below the pot’s rim—palms need room for water to pool slightly but not overflow. If the plant sits too high, it can topple; if too low, drainage suffers.
After repotting, water lightly to settle the soil, but don’t drown it. Overwatering now can suffocate the roots and cause stress. I like to wait 3-5 days before giving a deeper watering, giving the roots time to adjust to their new home.
☀️ Step 4: Provide Recovery Care for Strong Growth
Place the repotted palm in bright, indirect light for the first 2 weeks—direct sun can scorch newly stressed leaves. If you notice yellowing or wilting, it’s a sign of shock, not failure. Most palms bounce back within 4-6 weeks with steady care.
Hold off on fertilizing for 6-8 weeks to let the roots establish. Once new fronds start unfurling, resume feeding with a balanced palm fertilizer every 2 months during the growing season. This ensures nutrients go to root development, not leaf production.
⏰ Step 5: Monitor and Adjust for Long-Term Health
Check the soil moisture weekly—palms prefer it to dry out slightly between waterings. Stick your finger 2 inches deep into the soil; if it feels dry, water thoroughly until it drains from the bottom. Overwatering is the #1 killer of repotted palms, so err on the side of caution.
If the palm shows signs of stress—like brown leaf tips or slow growth—adjust your care. Too little light? Move it closer to a window. Too much humidity? Increase airflow with a small fan. With patience, your palm will rebound and reward you with lush, vibrant growth for years to come.
Tips & tricks for repotting palm trees without stress
Repotting palms might seem intimidating, but these practical tips will help you avoid common pitfalls and keep your plant thriving.
Timing is Everything: The 24-hour pre-watering in Step 2 isn't just about making removal easier—it's about giving your palm a hydration boost before the stress of repotting. Think of it like a pre-flight meal for your plant: it helps stabilize moisture levels so the roots don't go into shock when you disturb them. I've learned this the hard way after seeing palms wilt dramatically when repotted without this step.
Root Inspection Secrets: When you're checking roots in Step 2, look for healthy roots that are firm and white or light tan. Dark, mushy roots are a red flag for rot, while tangled roots indicate overcrowding. Here's what nobody tells you—healthy roots should smell fresh, not sour or musty. If you find rot, trim it back to clean tissue, but don't panic if you see some damage; palms are surprisingly resilient.
Soil Level Strategy: That 1-inch soil cushion in Step 3 isn't just for looks—it creates crucial space between roots and drainage holes. This prevents root rot by ensuring water flows freely through the pot rather than pooling at the bottom. I've seen too many repotted palms suffer from soggy roots because owners skipped this step, thinking "a little extra soil won't hurt." It absolutely will.
Recovery Care Timeline: The 6-8 week fertilizer break in Step 4 is non-negotiable. New roots need time to establish before they can handle nutrient uptake. During this period, focus on bright, indirect light and consistent moisture checks. You'll know your palm is recovering when you see new fronds starting to unfurl—this is your green light to resume feeding. Trust me on this: I've watched palms recover beautifully after this exact approach.
Pro Tips for Repot A Palm Tree Plant
- Repotting palms might seem intimidating, but these practical tips will help you avoid common pitfalls and keep your p...
- Timing is Everything: The 24-hour pre-watering in Step 2 isn't just about making removal easier—it's about giving you...
- Root Inspection Secrets: When you're checking roots in Step 2, look for healthy roots that are firm and white or ligh...
Frequently asked questions
Got questions about repotting your palm tree? You’re not alone! Here are answers to common concerns to help you navigate the process with confidence.
How often should I repot a palm tree?
Palm trees typically need repotting every 2–3 years, or when roots start circling the pot or growing out of drainage holes. Young palms may need more frequent repotting (annually) as they grow faster. Always check for root-bound signs—if roots are tightly packed, it’s time to upgrade!
What’s the best time of year to repot a palm?
Spring or early summer is ideal—this gives your palm warm temperatures and plenty of time to recover before winter. Avoid repotting in late fall or winter, as cooler weather slows root growth. If you must repot in winter, do so in a warm, sheltered spot and monitor closely for stress.
How do I know if my palm tree is stressed after repotting?
Watch for yellowing leaves, wilting, or leaf drop—these are common signs of stress. Overwatering is a frequent culprit, so let the soil dry slightly between waterings. If stress persists, trim damaged roots (if any) and ensure the new pot has proper drainage. Most palms bounce back within 4–6 weeks with care!
Can I repot a palm tree in its current pot with fresh soil instead?
Yes! If your palm isn’t root-bound but the soil is depleted, you can top-dress with fresh potting mix or do a partial repot: remove the top 2–3 inches of old soil, trim any gnarled roots, and replace it with fresh mix. This is gentler than a full repot and works well for mature palms.
What if my palm tree has a thick trunk—can I still repot it easily?
Mature palms with thick trunks are trickier but not impossible! Use a wide, shallow pot (never deeper than the root ball) to prevent toppling. If the trunk is too heavy, consider top-dressing or repotting in sections (e.g., removing the top layer of soil and replacing it). For very large palms, professional help may be needed.
My palm’s leaves are turning brown after repotting—what went wrong?
Brown leaves often signal overwatering, root damage, or transplant shock. Check the soil—if it’s soggy, reduce watering. If roots look mushy or black, trim them back to healthy tissue. Avoid fertilizing for 4–6 weeks post-repot, and keep the palm in bright, indirect light to aid recovery.
Wrapping up and next steps
Repotting your palm tree doesn’t have to be a daunting task—with the right tools, timing, and care, you’ll give your plant a fresh start for years of lush, healthy growth. 🌿 Remember, patience and gentle handling are key, whether you’re upgrading the pot size or refreshing the soil.
Your palm will thank you with vibrant fronds and steady progress!
Now that you’re ready to tackle the job, why not check out our guide on palm tree care tips to keep your tropical beauty thriving between repots? Happy gardening!