
Container Gardens
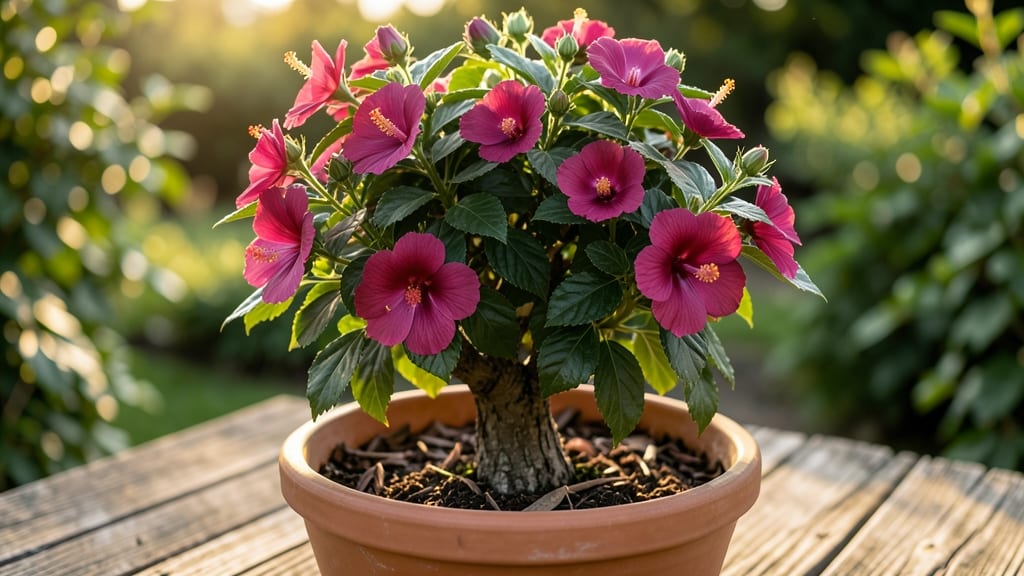
Growing a hibiscus tree in a container means vibrant blooms on your patio without sacrificing space. 🌸 I’ve turned my small balcony into a tropical oasis with just one 15-gallon pot and a few simple tricks—no yard required.
The key is matching the right variety to your climate and giving it the light, water, and care it craves. Tropical hibiscus (like the classic red varieties) need full sun and warm temperatures year-round, while hardy hibiscus can handle cooler zones.
Start with well-draining potting mix and a container with drainage holes—root rot is the silent killer of container hibiscus. Water deeply when the top inch of soil feels dry, and fertilize every 2 weeks during bloom season with a balanced liquid fertilizer.
By mid-summer, your hibiscus will reward you with football-sized blooms that last all day. The secret? Pruning lightly after blooms fade to encourage new growth, and moving pots indoors before frost if you’re in a colder zone. Even in small spaces, this tree becomes the star of your outdoor decor.
For balcony gardeners or renters, this is the ultimate low-maintenance showstopper. Just remember: hibiscus love heat, hate cold drafts, and thrive when you mimic their natural tropical habits. Let’s get that pot planted!
📚 In This Guide
- What you need
- Instructions
- Tips and common mistakes
- Wrapping up and next steps
What you need
- ● Container: A large, durable pot (at least 18–24 inches in diameter) with drainage holes. Opt for glazed ceramic, fiberglass, or heavy plastic to retain moisture.
- ● Potting Soil: A well-draining mix of 60% potting soil, 30% perlite or pumice, and 10% compost (or a pre-mixed tropical blend). Avoid garden soil—it compacts too easily!
- ● Hibiscus Plant: A dwarf or tropical hibiscus variety (e.g., Hibiscus rosa-sinensis or Hibiscus syriacus) suited for containers. Check for healthy leaves and vibrant blooms!
- ● Drainage Medium: Pebbles, broken pottery, or gravel (2–3 inches) to prevent root rot by improving drainage.
- ● Garden Gloves – Protect your hands from thorns and soil.
- ● Trowel or Spade – For planting and soil adjustments.
- ● Watering Can or Hose with Nozzle – Hibiscus loves deep, consistent watering (avoid overhead spraying to prevent fungal issues).
- ● Balcony or Patio Fertilizer – A slow-release granular fertilizer (10-10-10 or 20-20-20) or liquid bloom booster (like fish emulsion or hibiscus-specific feed).
- ○ Mulch (Optional) – Pine bark or coconut coir (1–2 inches) to retain moisture and regulate soil temperature.
- ○ Support Stake or Cage (Optional) – If your hibiscus grows tall, a bamboo stake or decorative trellis helps support its weight.
- ○ Sunlight Meter or Light Sensor (Optional) – Ensures your container gets 6+ hours of direct sunlight daily (critical for blooming!).
Step-by-Step instructions for growing a thriving hibiscus in a container
Here's how I keep my patio hibiscus lush and blooming all season long—no green thumb required.
🪴 Step 1: Choose the Right Container and Drainage
Pick a container at least 18 inches wide and deep—hibiscus roots need plenty of space to spread. I use glazed ceramic pots because they retain moisture better than plastic, but make sure it has 4-6 drainage holes at the bottom. If your pot doesn't have them, drill extra holes yourself. Place a broken terracotta shard over each hole to keep soil from washing out while still allowing water to drain freely.
Hibiscus hates soggy roots, so proper drainage is non-negotiable. I always add a 2-inch layer of gravel or pebbles at the bottom before adding soil—this creates an air pocket that prevents root rot. You'll know your drainage is working when water runs out the holes within 5-10 minutes of watering.
🌱 Step 2: Plant in Well-Draining Soil Mix
Fill your container with a mix of 50% potting soil, 30% perlite, and 20% compost. Hibiscus roots need excellent drainage but also nutrients to support heavy blooms. I avoid garden soil—it compacts too easily in containers and suffocates roots. Tap the container gently to settle the mix, then create a small hole in the center for your plant.
If you're transplanting an established hibiscus, dig up the root ball and place it in the hole, then fill around it with your soil mix. Press lightly to remove air pockets but don't compact the soil. Water thoroughly until it drains completely from the bottom holes. You'll see the soil settle slightly—this is normal and means the roots have room to expand.
☀️ Step 3: Position for Maximum Sunlight
Hibiscus needs 6-8 hours of direct sunlight daily to produce those showstopping blooms. Place your container where it gets morning sun and afternoon shade if you're in a hot climate—this prevents leaf scorch. I notice my hibiscus wilts slightly in the afternoon heat, so I move it to a shadier spot until evening. In cooler climates, full sun all day is perfect.
Rotate your pot a quarter turn weekly so the plant grows evenly. You'll see one side leaning toward the light? That's your cue to adjust. Hibiscus grows best when it gets light from all directions. If you're using a balcony or patio, check for afternoon shade from nearby buildings or trees—these can block critical sunlight hours.
💧 Step 4: Water Deeply and Consistently
Water your hibiscus when the top 2 inches of soil feel dry. Stick your finger in the soil—if it's dry at that depth, it's time to water. I use room-temperature water to avoid shocking the roots. Water until it runs freely from the drainage holes, then let it drain completely. Hibiscus roots rot quickly in soggy conditions, so never let your container sit in standing water.
During hot weather, you might need to water daily. I check the soil moisture in the morning—if it's dry, I water thoroughly. In cooler months, watering every 2-3 days is usually enough. Yellowing leaves often mean overwatering, while crispy edges signal underwatering. Both are easy to fix once you adjust your watering schedule.
✂️ Step 5: Prune and Fertilize for Continuous Blooms
Prune your hibiscus in early spring to shape the plant and encourage new growth. Cut back any dead or damaged branches with clean, sharp pruners. I also remove any flowers that fade—they sap energy that could go toward new blooms. Prune just above a leaf node where new growth will emerge. You'll see fresh green shoots within 2-3 weeks of pruning.
Feed your hibiscus with a balanced liquid fertilizer every 2 weeks during growing season. I use a 10-10-10 mix diluted to half strength to avoid burning the roots. Stop fertilizing in fall and winter when growth slows. Over-fertilizing causes salt buildup in the soil, which you'll notice as white crust on the surface or brown leaf tips.
Tips & tricks for perfect container hibiscus care
These simple strategies will help your patio hibiscus thrive without the guesswork—trust me, I've learned from my own trial-and-error with these tropical beauties.
Drainage Check: That 2-inch gravel layer in Step 1 isn't just about looks—it's your first line of defense against root rot. I've seen hibiscus plants saved by this simple step after sitting too long in soggy soil. For extra insurance, consider adding a layer of coconut coir beneath the gravel—it improves aeration while still allowing water to drain quickly.
Soil Mix Secrets: The 50-30-20 ratio in Step 2 works wonders, but here's what I've discovered: pre-moisten your perlite before mixing to prevent it from stealing moisture from the roots. Also, if you're using store-bought potting mix, sift it first to remove any large clumps that could compact around the roots. Think of it as giving your hibiscus a spa treatment for its root system.
Sunlight Strategy: That 6-8 hours of sunlight in Step 3 is non-negotiable, but here's how I handle the afternoon heat: I place a sheer white curtain nearby to drape over the plant during peak sun hours (around 11 AM to 3 PM). This diffuses the light while still allowing plenty of brightness. It's like giving your hibiscus a sun hat—just enough protection without sacrificing the light it craves.
Watering Wisdom: The 2-inch dry soil test in Step 4 is perfect, but I've found a better way to check moisture: stick a chopstick into the soil. When it comes out clean (not wet), that's your watering cue. Also, consider using a moisture meter for containers—it's worth the investment if you're serious about perfecting your hibiscus care. The key is consistency: better to underwater slightly than risk root rot from overwatering.
Pro Tips for Hibiscus Tree In Container
- These simple strategies will help your patio hibiscus thrive without the guesswork—trust me, I've learned from my own...
- Drainage Check: That 2-inch gravel layer in Step 1 isn't just about looks—it's your first line of defense against roo...
- Soil Mix Secrets: The 50-30-20 ratio in Step 2 works wonders, but here's what I've discovered: pre-moisten your perli...
Frequently asked questions
Got questions about growing a hibiscus tree in a container?
You’re not alone! Here are answers to the most common concerns—from pruning to pests—to help your tropical beauty thrive on your patio or balcony.
How often should I water a potted hibiscus tree?
A potted hibiscus needs consistent moisture—water when the top 1–2 inches of soil feel dry. In hot weather, this could mean daily watering! Use well-draining soil and a container with drainage holes to prevent root rot. Mulch the surface to retain moisture and keep roots cool.
Can a hibiscus tree survive winter in a container?
Hibiscus trees are tropical and need protection in cold climates. Move pots indoors (near a sunny window) or wrap them in frost cloth. If temps drop below 50°F (10°C), expect dormancy—reduce watering and fertilizing until spring. Hardy varieties like Hibiscus syriacus tolerate cooler temps better.
What’s the best fertilizer for container hibiscus?
Use a balanced, water-soluble fertilizer (like 20-20-20) every 2–4 weeks during spring and summer. For blooms, switch to a phosphorus-rich formula (e.g., 10-30-20) when buds form. Avoid over-fertilizing—yellow leaves or leaf drop can signal too much salt buildup. Flush soil occasionally with water.
Why are my hibiscus leaves yellowing or dropping?
Yellow leaves often mean overwatering, underwatering, or nutrient issues. Check soil moisture and drainage first. Other culprits: pests (like spider mites), root rot, or sudden temperature shifts. Prune affected leaves, adjust care, and inspect for bugs. Aphids or whiteflies? Spray with neem oil or insecticidal soap.
How big can a hibiscus tree grow in a container?
With proper care, container hibiscus can reach 6–10 feet tall, but size depends on pruning and pot size. Use a large pot (15+ gallons) for dwarf varieties like Hibiscus rosa-sinensis ‘Lil’ Kim’ (3–5 ft). Prune regularly to control height and encourage bushiness. Rotate the pot for even growth!
Can I grow a hibiscus from a cutting in water?
Take a 4–6 inch cutting just below a leaf node, strip lower leaves, and place it in water. Change water weekly and wait 2–4 weeks for roots to form. Once rooted, transplant to soil and keep humid until established. Use rooting hormone for faster success!
Wrapping up and next steps
Growing a hibiscus tree in a container is a rewarding way to bring tropical beauty to small spaces—whether it’s your cozy balcony or charming patio! 🌿 With the right pot, soil, sunlight, and care, your hibiscus can thrive, gracing you with stunning blooms year after year. Now that you’re armed with tips on pruning, fertilizing, and troubleshooting, it’s time to roll up your sleeves and create your own vibrant oasis!
Next step? Pick your favorite hibiscus variety, grab a container, and start planting—your future blooms will thank you! 🌸