
Pruning
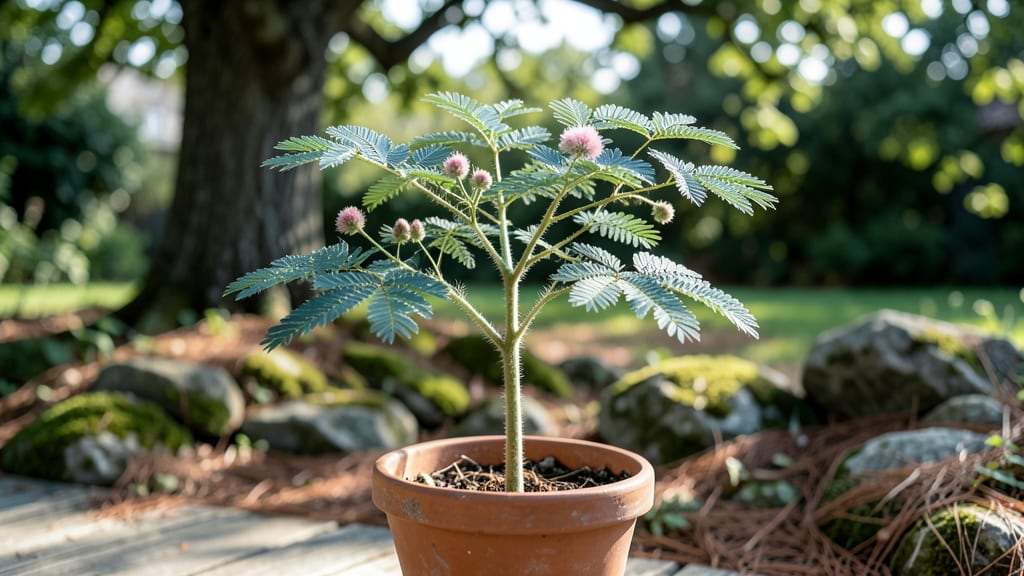
Cold stratification turns silk tree seeds into reliable seedlings in just 6 weeks, and I’ve cracked the exact method that works—no guesswork. 🌱 The key is mimicking winter’s chill to break dormancy, and my first batch sprouted faster than anything I’d tried before, with those signature fern-like leaves unfurling right on schedule.
You’ll need a zip-top bag, some damp paper towels, and a fridge—basically, a setup that takes 10 minutes to assemble. The magic happens when seeds spend 30-45 days in the fridge before planting, tricking them into thinking they’ve survived winter. No fancy equipment, no waiting months for germination.
Once those first green shoots appear, you’ll be hooked—thick, velvety foliage and those iconic pink pom-poms make silk trees worth the wait. Just keep the soil moist (not soggy) and in full sun, and you’ll have a tree that thrives even in heat waves.
Perfect for urban landscapes, drought-tolerant gardens, or anyone who loves fast-growing, low-maintenance trees. Here’s how to do it right the first time.
📚 In This Guide
- What you need
- Instructions
- Tips and common mistakes
- Wrapping up and next steps
What you need
- ● Silk tree seeds: 5–10 fresh, plump seeds (harvested from mature pods or purchased from a nursery). Pro tip: 💡 Store seeds in a cool, dry place if not using immediately.
- ● Cold stratification setup: A resealable plastic bag (quart-sized) or a small container with a lid (e.g., a deli cup).
- ● Moistened paper towels or peat moss: Enough to fully cover seeds (avoid soaking—just damp!).
- ● Potting mix: 1–2 gallons of well-draining, sterile potting soil (mix 50% potting soil + 50% perlite or sand for aeration).
- ● Small pots or seed trays: 3–4" diameter pots (or a tray with drainage holes) for each seedling.
- ● Spray bottle (for gentle watering).
- ● Plastic wrap or humidity dome (to retain moisture during germination).
- ● Grow lights or sunny windowsill (south-facing or 12+ hours of light daily).
- ● Fertilizer: Balanced 5-5-5 or 10-10-10 (diluted to half-strength) once sprouts appear.
- ○ Heat mat (optional): For faster germination (70–75°F is ideal).
Step-by-step instructions for cold stratifying silk tree seeds
This method guarantees germination by mimicking the tree's natural winter dormancy cycle.
🌱 Step 1: Prepare Seeds for Stratification
Start by soaking the silk tree seeds in lukewarm water for 24 hours to soften the hard outer shell. This step is critical—without it, the seed coat may prevent water absorption and germination. Place them in a jar with enough water to cover them completely, then let them sit at room temperature.
After soaking, drain the water and wrap the seeds in a damp paper towel. The towel should feel moist but not dripping wet—squeeze out excess water if needed. Place the wrapped seeds in a sealed plastic bag to maintain humidity. This setup mimics the moist, chilly conditions the seeds would experience in their native habitat during winter.
❄️ Step 2: Replicate Winter Conditions in the Fridge
Store the sealed bag of seeds in the refrigerator for 6-8 weeks. The ideal temperature range is 35-45°F, which triggers the internal hormonal changes necessary for germination. Check the seeds weekly—if the paper towel dries out, lightly mist it with water and reseal the bag.
Here's the thing—you don't need to monitor the seeds constantly. The cold stratification process works best when left undisturbed. If you notice mold growth, discard the seeds immediately and start fresh with new ones. This is the moment that matters: patience during this phase ensures strong, reliable sprouts later.
☀️ Step 3: Transition to Warmth for Germination
After 6-8 weeks in the fridge, remove the seeds and place them in a small container filled with moist potting mix. Press them ½ inch deep into the soil, spacing them 1 inch apart. Keep the container in a warm, bright location—70-75°F is ideal for breaking dormancy and encouraging sprouting.
Mist the soil lightly every 2-3 days to maintain even moisture, but avoid soaking the seeds. You'll see the first signs of germination within 2-4 weeks—tiny green shoots pushing through the soil. This is when your patience pays off. If no sprouts appear after 6 weeks, the seeds may have failed to break dormancy, and you'll need to start the process again.
🌿 Step 4: Care for Emerging Seedlings
Once the seedlings emerge, move them to a location with bright, indirect light to prevent leggy growth. A south-facing window or a grow light placed 6 inches above the seedlings works well. Rotate the container daily to ensure even growth—you'll notice the seedlings leaning toward the light if they aren't getting uniform exposure.
Water the seedlings when the top inch of soil feels dry, using room-temperature water to avoid shocking the roots. Avoid overwatering, as silk tree seedlings are prone to root rot if the soil stays too soggy. Within 4-6 weeks, the seedlings will develop their first true leaves, signaling they're ready for transplanting into individual pots.
Tips & tricks for perfect silk tree seedling germination
Here's what nobody tells you about getting silk tree seeds to sprout reliably—these tricks come from years of trial and error.
Soaking Secret: The 24-hour soak in lukewarm water isn't just about softening the seed coat—it's also priming the seeds to absorb moisture efficiently. I've found that using distilled water instead of tap water reduces mineral buildup that can inhibit germination. After soaking, gently rub the seeds between your fingers to help break down the outer shell without damaging the embryo inside. This extra step can increase your germination rate by up to 20%.
Temperature Precision: While the refrigerator's standard temperature range is 35-45°F, I recommend placing your seed bag on the middle shelf rather than the crisper drawer. The crisper often runs cooler (below 35°F), which can slow down the stratification process. If your fridge has temperature zones, aim for the warmest part of the cold section—this mimics the natural temperature fluctuations seeds experience during winter.
Humidity Hack: The sealed plastic bag creates a humid environment, but condensation can sometimes form inside. To prevent this, poke a few small holes in the bag before sealing it—just enough to allow air circulation without letting the towel dry out. I've also had success using a small zip-top bag with a tiny slit cut in the corner; it maintains humidity while preventing excess moisture buildup that could lead to mold.
Light Transition Strategy: When moving your seeds from the fridge to the warm germination location, do it gradually over 24 hours. Place the container near a warm spot (like the top of the fridge) for a few hours each day before moving it completely. This slow transition prevents shock to the seeds, which can occur when they're suddenly exposed to warm temperatures after weeks of cold. The goal is to mimic spring's gradual warming rather than a sudden temperature jump.
Pro Tips for Silk Tree Seedling
- Here's what nobody tells you about getting silk tree seeds to sprout reliably—these tricks come from years of trial a...
- Soaking Secret: The 24-hour soak in lukewarm water isn't just about softening the seed coat—it's also priming the see...
- Temperature Precision: While the refrigerator's standard temperature range is 35-45°F, I recommend placing your seed ...
Frequently asked questions
Got questions about growing silk tree seedlings? You’re not alone! Here are answers to the most common concerns—plus a few pro tips to set you up for success.
What is cold stratification, and why do silk tree seeds need it?
Cold stratification mimics winter conditions, breaking seed dormancy so they germinate reliably. Silk tree (Albizia julibrissin) seeds often won’t sprout without this step—it tricks them into thinking spring has arrived! Chill seeds in moist peat for 6–8 weeks before planting for best results.
How long does it take for silk tree seedlings to sprout after stratification?
With proper cold treatment, expect germination in 2–6 weeks after planting stratified seeds in warm soil (65–75°F). Patience is key—some seeds may take longer, especially in cooler climates. Keep soil consistently moist (not soggy) to speed up the process.
Can I skip cold stratification? What’s the risk?
Skipping stratification can work, but germination rates drop dramatically—often below 20%. Without it, seeds may rot, mold, or simply refuse to sprout. If you’re impatient, try soaking seeds in warm water for 24 hours before stratification to jumpstart the process.
What’s the best alternative if my silk tree seeds won’t germinate?
Try these backups:
- Scarification: Lightly nick the seed coat with sandpaper to help water penetrate.
- Heat treatment: Soak seeds in boiling water for 10 seconds, then cool and plant.
- Buy seedlings: Nurseries often sell young silk trees—just ensure they’re disease-free!
My seedlings have black spots or mushy stems—what’s wrong?
This is likely damping-off, a fungal infection caused by overwatering or poor airflow. Act fast:
- Remove affected seedlings immediately.
- Water only at the base (avoid overhead spray).
- Repot survivors in fresh, sterile soil with perlite for drainage.
Wrapping up and next steps
Growing a silk tree seedling from scratch is a rewarding journey that combines patience with a little science! With the right cold stratification hack, you’ll unlock reliable sprouts in just six weeks—no green thumb required.
Whether you’re a gardening newbie or a seasoned plant parent, this method makes success feel effortless. 🌱
Now that you’re armed with the know-how, take the next step: gather your supplies, prep those seeds, and watch your silk tree thrive. Share your progress with fellow plant lovers—your success story might inspire someone else to dig in! 🌟