
Pruning
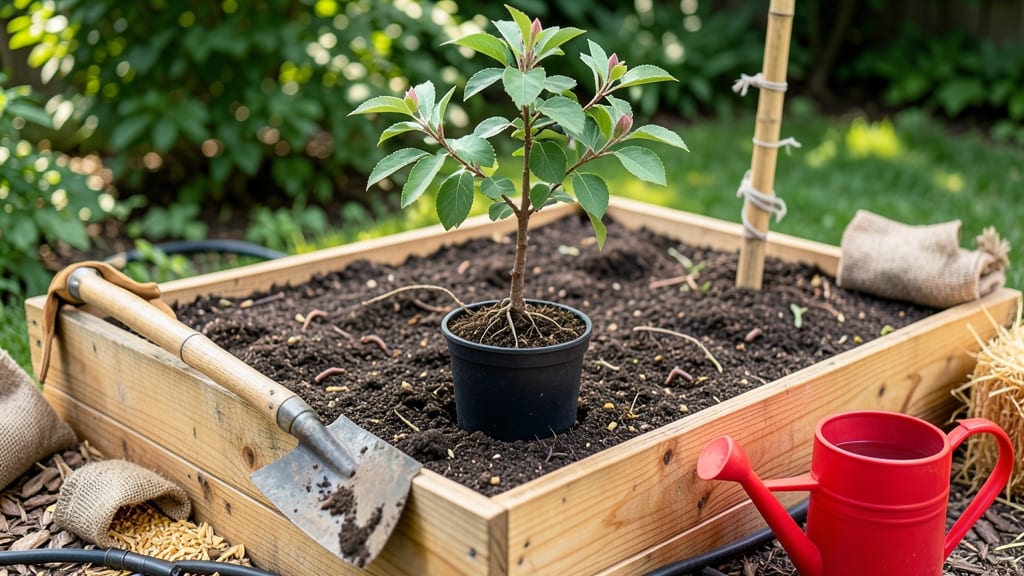
Planting trees in raised beds isn’t just possible—it’s a game-changer for small spaces. 🌳 The secret lies in layered soil that mimics natural forest conditions, giving roots room to breathe while preventing the common pitfalls of shallow soil and root restriction.
I’ve turned my backyard’s tight corner into a thriving orchard by stacking soil layers like a pro, and the results speak for themselves: trees that grow twice as fast as their in-ground counterparts.
First, you’ll need a deep raised bed (at least 3 feet tall) to accommodate mature root systems—think of it as a cozy apartment for your tree, not a cramped dorm room. The right soil mix is critical: a blend of topsoil, compost, and organic matter that stays loose and well-draining.
Smaller trees like dwarf fruit varieties or ornamental cherries thrive here, while larger species need extra care to avoid root-bound stress. Spacing matters too—18-24 inches between small trees keeps competition at bay.
What you’ll end up with is a lush, productive mini-forest that outpaces traditional planting methods. The layered soil retains moisture better, suppresses weeds naturally, and gives roots the depth they crave.
By year two, you’ll notice stronger trunks, fuller canopies, and—if you’re growing fruit—a harvest that puts store-bought to shame. The best part? No backbreaking digging or waiting years for maturity.
This method works for urban yards, balconies with large containers, or even repurposed whiskey barrels—just adjust the depth and soil mix to your tree’s needs. The key is patience: trees planted this way take a little longer to establish, but once they do, they’re unstoppable.
Ready to give it a try? Let’s dig in—literally.
📚 In This Guide
- What you need
- Instructions
- Tips and common mistakes
- Wrapping up and next steps
What you need
- ● Raised bed kit or frame: Choose a durable material like cedar, redwood, or galvanized metal. Dimensions should be at least 3 ft x 3 ft x 1.5 ft deep (or larger for mature trees).
- ● Landscape fabric: 1 roll (to block weeds and retain moisture).
- ● Soil layers: Cardboard or newspaper: 2–3 sheets (to smother weeds).
- ● Compost: 6–12 inches (organic, well-aged).
- ● Topsoil: 6–12 inches (high-quality, nutrient-rich).
- ● Mulch: 2–3 inches (wood chips or straw).
- ● Tree: 1–2 young trees (bare-root or potted, size depends on bed dimensions).
- ● Tools: Garden trowel or spade
- ● Wheelbarrow (for soil transport)
- ● Measuring tape
- ● Gloves (to protect your hands)
- ● Drip irrigation system: For consistent watering.
- ● Slow-release fertilizer: Mix into soil for a nutrient boost.
- ● Tree supports: Stakes or cages (for young, top-heavy trees).
- ● Soil pH tester: To ensure optimal growing conditions.
Step-by-Step instructions for planting trees in raised beds
Here's how to create the perfect layered soil environment for your trees to thrive.
🌱 Step 1: Prepare the Raised Bed Foundation
Start by building or selecting a raised bed that's at least 24 inches deep—trees need plenty of root space. I line mine with landscape fabric to prevent weeds while still allowing water and air to penetrate. The bed should be wide enough to accommodate your tree's mature spread, with at least 3 feet of clearance from other plants or structures.
Fill the bottom third with coarse material like gravel or broken bricks for drainage. This prevents waterlogging, which is deadly for tree roots. Compact this layer lightly with your hands or a tamper—just enough to stabilize it, but don't overdo it. You want roots to push through easily later.
🌿 Step 2: Build the Layered Soil Profile
For the next third, mix 50% topsoil with 50% compost to create a nutrient-rich layer. I like to add a handful of slow-release fertilizer here—this gives roots a steady supply of food as they establish. Spread this blend evenly and mix in a few handfuls of organic matter like leaf mold or well-rotted manure for extra structure.
The top third should be a lighter, fluffier mix of 60% topsoil and 40% perlite or coarse sand. This prevents compaction and encourages strong root branching. Water this layer thoroughly before planting—it should feel like a damp sponge, not a wet sponge. You'll see water bead up on the surface before soaking in.
🪴 Step 3: Plant the Tree at the Right Depth
Dig a hole just wide enough to accommodate your tree's root ball, but no deeper than the root flare—the swollen area where roots meet the trunk. This is critical: planting too deep suffocates roots and causes stress. I always remove the tree from its container and gently loosen the roots if they're circling.
Position the tree so the root flare sits 1-2 inches above the bed surface. This ensures proper drainage and prevents the trunk from rotting. Backfill with the topsoil mix, pressing gently as you go to eliminate air pockets. Water immediately after planting to settle the soil around the roots—you'll see the surface level drop slightly as it compacts.
☀️ Step 4: Mulch and Protect New Growth
Spread 3-4 inches of mulch over the bed surface, keeping it 6 inches away from the trunk to prevent rot. I use hardwood mulch because it breaks down slowly and improves soil structure over time. This layer conserves moisture, regulates soil temperature, and suppresses weeds—all while letting water penetrate.
Install a tree guard or wire cage around young trees to protect them from deer and rabbits. Water deeply every 5-7 days until the tree establishes, which usually takes 1-2 years. You'll know it's thriving when new leaves appear and the tree shows steady growth each season.
⏰ Step 5: Monitor and Maintain Through the First Year
Check the soil moisture weekly by sticking your finger 2 inches deep. If it feels dry, water slowly until moisture reaches 6 inches down. Avoid overhead watering—it can spread disease. Instead, use a soaker hose or drip irrigation right at the base of the tree.
Prune only to remove dead or crossing branches in the first year. I avoid heavy pruning until the tree is at least 3 years old. Watch for signs of stress like yellowing leaves or wilting—these often mean the tree is either overwatered or underwatered. Adjust your care routine accordingly and you'll see strong, healthy growth.
Tips & tricks for perfect raised bed tree planting
These pro-level insights will help you transform your raised bed into an ideal home for thriving trees.
Layering Technique: When building your three-layer soil profile in Step 2, think of it like creating a tree's perfect vertical ecosystem. The bottom drainage layer should be about 8 inches deep—this prevents root rot that can kill young trees. I use a mix of 60% gravel and 40% broken bricks because the bricks add calcium over time, which helps with cell wall development in roots. The key is to keep this layer loose so roots can easily penetrate downward rather than circling at the bottom.
Root Ball Preparation: In Step 3, the moment you remove your tree from its container is critical. I take a small hand trowel and gently tease apart any circling roots—this prevents girdling as the tree matures. For container-grown trees, I also make two shallow vertical cuts on opposite sides of the root ball with a sharp knife. This encourages roots to grow outward into your prepared soil rather than staying compacted. Water the root ball thoroughly before planting to help it settle into the hole.
Mulch Placement: That 3-4 inch mulch layer in Step 4 isn't just for looks—it's a moisture regulator and temperature stabilizer. I always create a 6-inch mulch-free zone around the trunk because wet mulch touching the bark invites fungal diseases. For extra protection, I add a 1-inch layer of coarse sand right against the trunk before applying mulch. This creates a natural barrier while still allowing water penetration to the roots.
Watering Wisdom: The 5-7 day watering schedule in Step 4 assumes average rainfall conditions. In my experience, most gardeners underestimate how much water young trees need—especially in the first year. I recommend checking soil moisture every 3-4 days during hot weather by inserting a moisture meter 6 inches deep. If it reads dry, water until moisture reaches 12 inches down. This deep watering encourages roots to grow downward rather than staying shallow.
Pro Tips for Raised Bed Tree Planting
- These pro-level insights will help you transform your raised bed into an ideal home for thriving trees.
- Layering Technique: When building your three-layer soil profile in Step 2, think of it like creating a tree's perfect...
- Root Ball Preparation: In Step 3, the moment you remove your tree from its container is critical. I take a small hand...
Frequently asked questions
Got questions about raised bed tree planting?
You’re not alone! Here are answers to the most common concerns to help you grow confidently.
Can I plant any tree in a raised bed?
Not all trees thrive in raised beds—stick to dwarf or container-friendly varieties like fruit trees (apple, peach), ornamental trees (Japanese maple), or small citrus. Avoid large, deep-rooted species like oak or pine; their roots need more space. Check the tree’s mature size and root spread before planting!
When is the best time to plant a tree in a raised bed?
Plant in early spring (after frost) or fall (6–8 weeks before first frost) for best success. Avoid extreme heat or winter planting. Young trees need time to establish roots before stress. Pro tip: Mulch heavily after planting to retain moisture and regulate soil temperature.
How often should I water a tree in a raised bed?
Raised beds dry out faster! Water deeply 2–3 times per week for the first year, then taper to 1–2 times weekly once established. Use a soaker hose or drip irrigation to avoid surface evaporation. Check soil moisture 2–3 inches down—if it’s dry, it’s time to water!
Why is my raised bed tree struggling? Troubleshooting tips
Yellow leaves? Overwatering or poor drainage could be the culprit. Brown edges? Underwatering or salt buildup (flush with rainwater). Wilting? Root-bound or pests—inspect for aphids or root circling. Adjust care based on symptoms: prune dead branches, amend soil, or repot if roots are circling.
Can I move a mature tree to a raised bed later?
Moving established trees is risky, but possible for smaller specimens (under 6 ft tall). Dig carefully to preserve roots, prune 1/3 of foliage to reduce stress, and water thoroughly post-transplant. Success hinges on timing—do it in early spring or fall, and expect some leaf drop as the tree recovers.
Wrapping up and next steps
Raised bed tree planting unlocks a world of possibilities for gardeners—whether you're a beginner or a seasoned green thumb. By layering soil strategically, you create the perfect environment for your trees to thrive, boosting growth, health, and even fruit production. The key? Patience, preparation, and a little creativity!
Now that you’re armed with the right techniques, it’s time to roll up your sleeves and plant with confidence. Start small with one tree or shrub, observe how it grows, and let your success inspire bigger projects. Happy planting—your future harvest (or stunning foliage!) is waiting! 🌱✨